
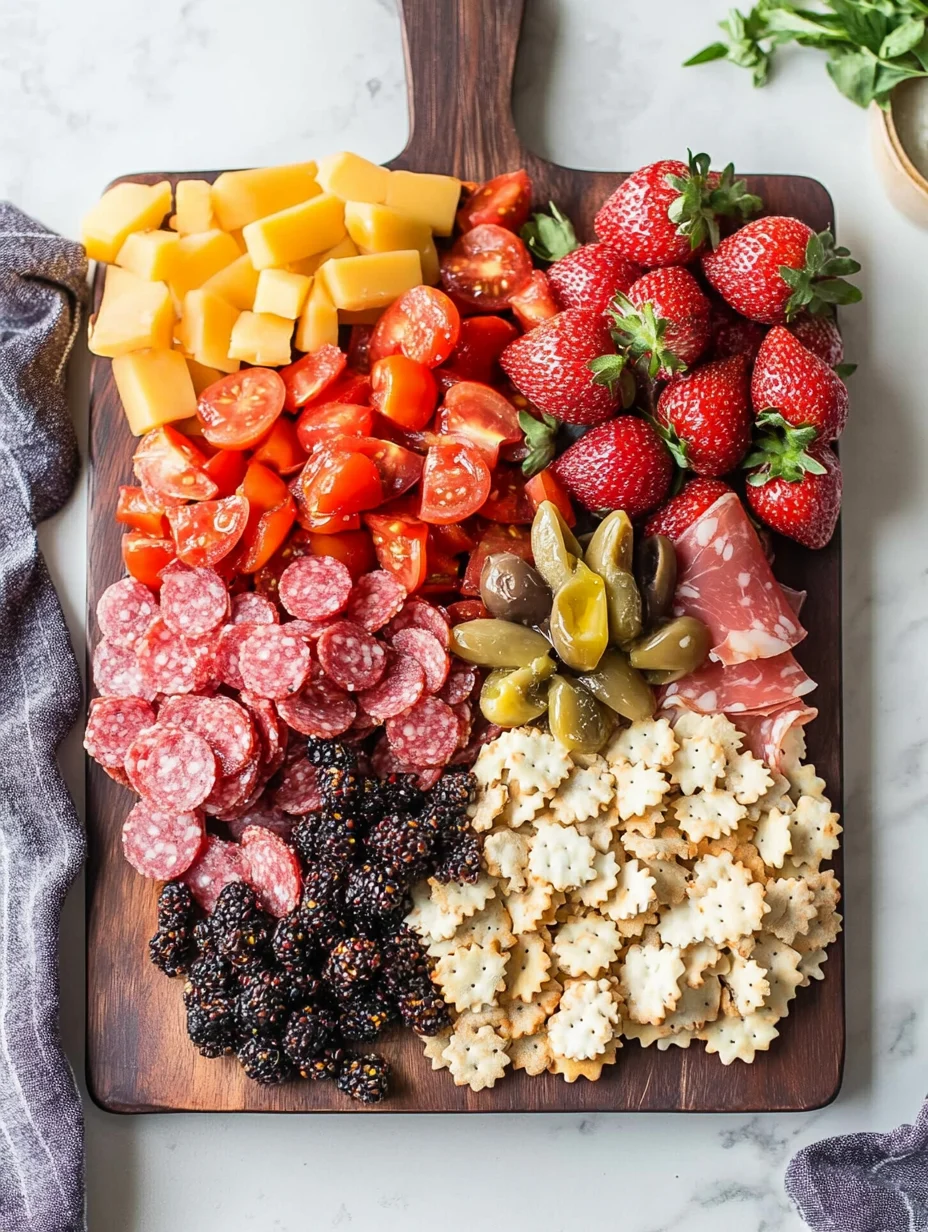
4th of July Charcuterie Board is a festive and creative way to celebrate Independence Day. As you gather with friends and family to enjoy the summer sun, a charcuterie board can be an “easy-to-make” centerpiece that keeps the atmosphere lively and social. This guide will cover everything you need to know about creating the ultimate 4th of July Charcuterie Board, from preparation to ingredients and serving suggestions. Let’s dive into this delicious and vibrant feast that guarantees to impress!
Why You’ll Love This Recipe
The 4th of July Charcuterie Board is not just a meal; it’s an experience! Here are several reasons why you will adore this delightful spread:
1. Visual Appeal – The combination of red, white, and blue ingredients makes for an eye-catching arrangement that radiates patriotism.
2. Customizable Options – You can mix and match ingredients based on personal taste, dietary preferences, and what’s in season.
3. Social and Fun – Charcuterie boards encourage mingling and conversation, perfect for gatherings.
4. Minimal Cooking Required – Most elements require little to no cooking, allowing you to spend more time enjoying the celebration.
5. Versatile Pairings – The board pairs well with various beverages, from cocktails to sparkling water.
6. Perfect for All Ages – Everyone loves a charcuterie board! It appeals to kids and adults alike.
These factors combined make the 4th of July Charcuterie Board a showstopper for your celebrations!
Preparation and Cooking Time
Creating your 4th of July Charcuterie Board will take about 30-45 minutes, depending on how elaborate you want to be.
– Preparation Time: 30-35 minutes
– Arranging Time: 10-15 minutes
– Total Time: 30-45 minutes
This quick assembly leaves you plenty of time to enjoy the holiday with loved ones, making it an ideal option for a busy summer day.
Ingredients
– Assorted cheeses (cheddar, brie, blue cheese)
– Sliced meats (salami, prosciutto, turkey)
– Fresh fruits (strawberries, blueberries, grapes)
– Vegetables (carrots, cucumbers, bell peppers)
– Crackers and breadsticks
– Dips (hummus, guacamole, or ranch dressing)
– Nuts (almonds, cashews)
– Optional: star-shaped cookie cutters for cheese or fruits
Step-by-Step Instructions
Creating the perfect 4th of July Charcuterie Board involves several simple steps:
1. Choose Your Board: Start with a large wooden or slate board. A white platter can also work if you prefer a cleaner look.
2. Select a Variety of Cheeses: Arrange different types of cheese, cutting some into interesting shapes using star-shaped cookie cutters.
3. Add Meat Choices: Roll or fan out slices of meat next to the cheese to create visual interest.
4. Incorporate Fresh Fruits: Scatter berries and grapes around the board. Use groupings for a balanced look.
5. Include Vegetables: Place an assortment of cut vegetables in your selection, coloring the board with greens and orange hues.
6. Add Crackers and Breadsticks: Strategically position various crackers and breadsticks around the edges of the board for easy access.
7. Introduce Nuts: Place small bowls or piles of nuts in the corners or gaps, filling in the space.
8. Dips & Spreads: Portion out dips in small bowls and add them to the board for easy dipping options.
9. Finishing Touches: Garnish with fresh herbs or edible flowers for an extra pop. If desired, use star-shaped cookie cutters for any remaining cheese or fruits to enhance the festive look.
10. Serve & Enjoy: Once the board is ready, invite your guests to dig in while enjoying the festivities.
These steps will ensure your board looks impressive and tastes incredible, creating a memorable July 4th experience.
How to Serve
Serving your 4th of July Charcuterie Board can be as fun and festive as making it! Here are some tips to elevate the serving experience:
1. Presentation: Consider choosing a vibrant tablecloth that reflects the holiday theme, placing your charcuterie board at the center.
2. Utensils: Provide small forks, toothpicks, and cheese knives for guests to serve themselves easily.
3. Drink Pairings: Offer a selection of beverages that complement the board, such as sparkling lemonade, iced tea, or a festive cocktail.
4. Encourage Interaction: Create a casual atmosphere where guests can help themselves, promoting conversation and sharing.
5. Leftover Storage: If there are any leftovers (which may be rare!), provide containers to store uneaten items for later enjoyment.
By following these serving suggestions, you will transform a simple charcuterie board into a delightful experience, allowing your guests to enjoy their food freely while celebrating together.
With the help of this guide, your 4th of July Charcuterie Board is bound to be an incredible and memorable addition to your summer festivities. Enjoy celebrating Independence Day with this amazing meal that showcases both creativity and deliciousness!
Additional Tips
– Use Seasonal Ingredients: Incorporate fruits and vegetables that are in season for optimal freshness and flavor.
– Color Coordination: Arrange ingredients in a gradient fashion to enhance the visual appeal and create a patriotic layout.
– Ice Packs: If your gathering is outdoors, consider placing ice packs under the board to keep ingredients fresh, especially perishable items.
Recipe Variation
Get creative with your 4th of July Charcuterie Board! Here are a few variations to consider:
1. Themed Ingredients: Include ingredients that represent the American flag using blueberries, strawberries, and white cheese.
2. Vegan Option: Substitute meats and cheese with plant-based alternatives, such as avocado, vegan cheese, and marinated veggies.
3. Sweet Treats: Add elements of a dessert charcuterie board—like chocolate-covered fruits and mini cupcakes—at one corner of the board for a sweet touch.
Freezing and Storage
– Storage: Most ingredients on the board can be kept in the refrigerator. Store meats and cheeses separately to maintain quality, ideally for up to 3 days.
– Freezing: While charcuterie boards are best enjoyed fresh, you can freeze certain elements like dips for up to 3 months. Allow to thaw completely before serving.
Special Equipment
To assemble your ultimate 4th of July Charcuterie Board, you might find the following tools helpful:
– Charcuterie Board or Platter
– Cheese Knives for serving various cheeses
– Small bowls for dips
– Food Labels for identifying different components
– Cookie Cutters in festive shapes for garnish
Frequently Asked Questions
What cheeses are best for a charcuterie board?
A variety of textures and flavors works best. Cheddar, brie, and goat cheese are popular choices.
Can I use store-bought dips?
Absolutely! Store-bought dips are a great time-saver. Just make sure to choose quality options.
How do I know how much to prepare?
Generally, plan for about 3-4 ounces of cheese and 2-3 ounces of meat per person, plus additional snacks.
Is it okay to make the board in advance?
Yes, you can prep most of the ingredients a few hours ahead and assemble the board right before serving.
How do I keep fruits from browning?
You can lightly coat apple slices or avocados with lemon juice to prevent browning.
Conclusion
Creating a 4th of July Charcuterie Board is not only a feast for the eyes but also a delightful dining experience. By using simple ingredients and clever arrangements, you can create an impressive centerpiece for your Independence Day celebration. From the vibrant colors to the variety of flavors, this charcuterie board will be a hit among your guests, making your holiday gathering both memorable and delicious!

4th of July Charcuterie Board: An Incredible Ultimate Guide
- Total Time: 15 minutes
Ingredients
– Assorted cheeses (cheddar, brie, blue cheese)
– Sliced meats (salami, prosciutto, turkey)
– Fresh fruits (strawberries, blueberries, grapes)
– Vegetables (carrots, cucumbers, bell peppers)
– Crackers and breadsticks
– Dips (hummus, guacamole, or ranch dressing)
– Nuts (almonds, cashews)
– Optional: star-shaped cookie cutters for cheese or fruits
Instructions
Creating the perfect 4th of July Charcuterie Board involves several simple steps:
1. Choose Your Board: Start with a large wooden or slate board. A white platter can also work if you prefer a cleaner look.
2. Select a Variety of Cheeses: Arrange different types of cheese, cutting some into interesting shapes using star-shaped cookie cutters.
3. Add Meat Choices: Roll or fan out slices of meat next to the cheese to create visual interest.
4. Incorporate Fresh Fruits: Scatter berries and grapes around the board. Use groupings for a balanced look.
5. Include Vegetables: Place an assortment of cut vegetables in your selection, coloring the board with greens and orange hues.
6. Add Crackers and Breadsticks: Strategically position various crackers and breadsticks around the edges of the board for easy access.
7. Introduce Nuts: Place small bowls or piles of nuts in the corners or gaps, filling in the space.
8. Dips & Spreads: Portion out dips in small bowls and add them to the board for easy dipping options.
9. Finishing Touches: Garnish with fresh herbs or edible flowers for an extra pop. If desired, use star-shaped cookie cutters for any remaining cheese or fruits to enhance the festive look.
10. Serve & Enjoy: Once the board is ready, invite your guests to dig in while enjoying the festivities.
These steps will ensure your board looks impressive and tastes incredible, creating a memorable July 4th experience.
- Prep Time: 15 minutes
- Cook Time: 0 minutes
Nutrition
- Serving Size: 8-10
- Calories: 350 kcal
- Fat: 25g
- Protein: 12g