
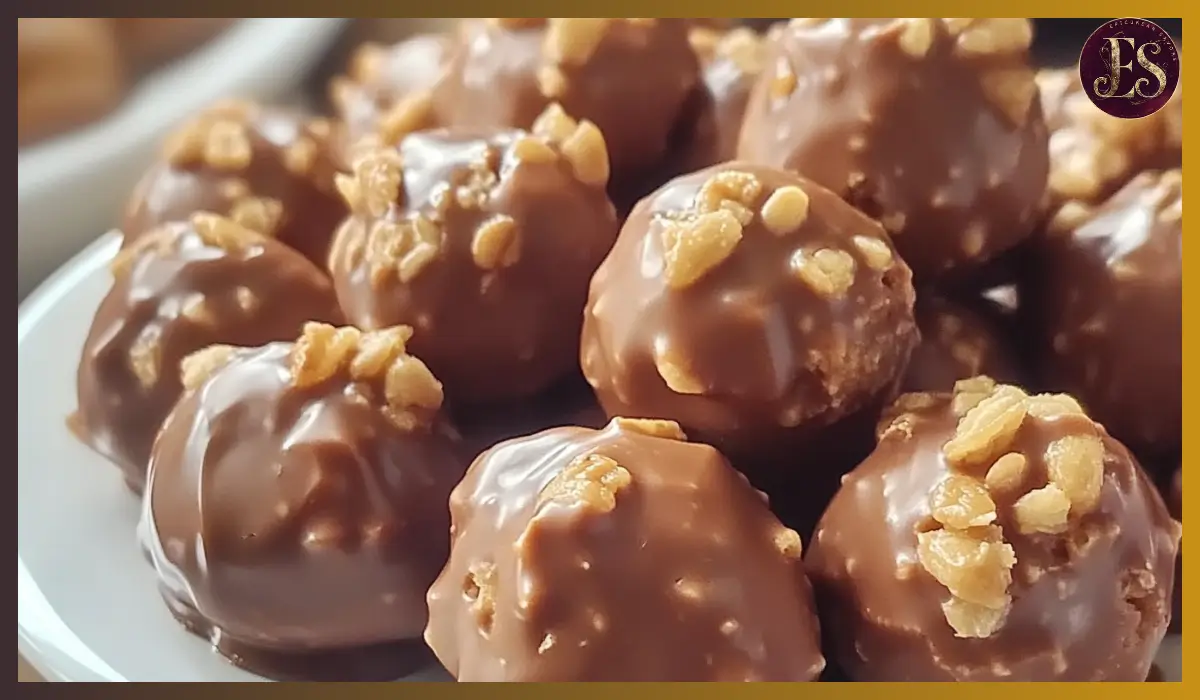
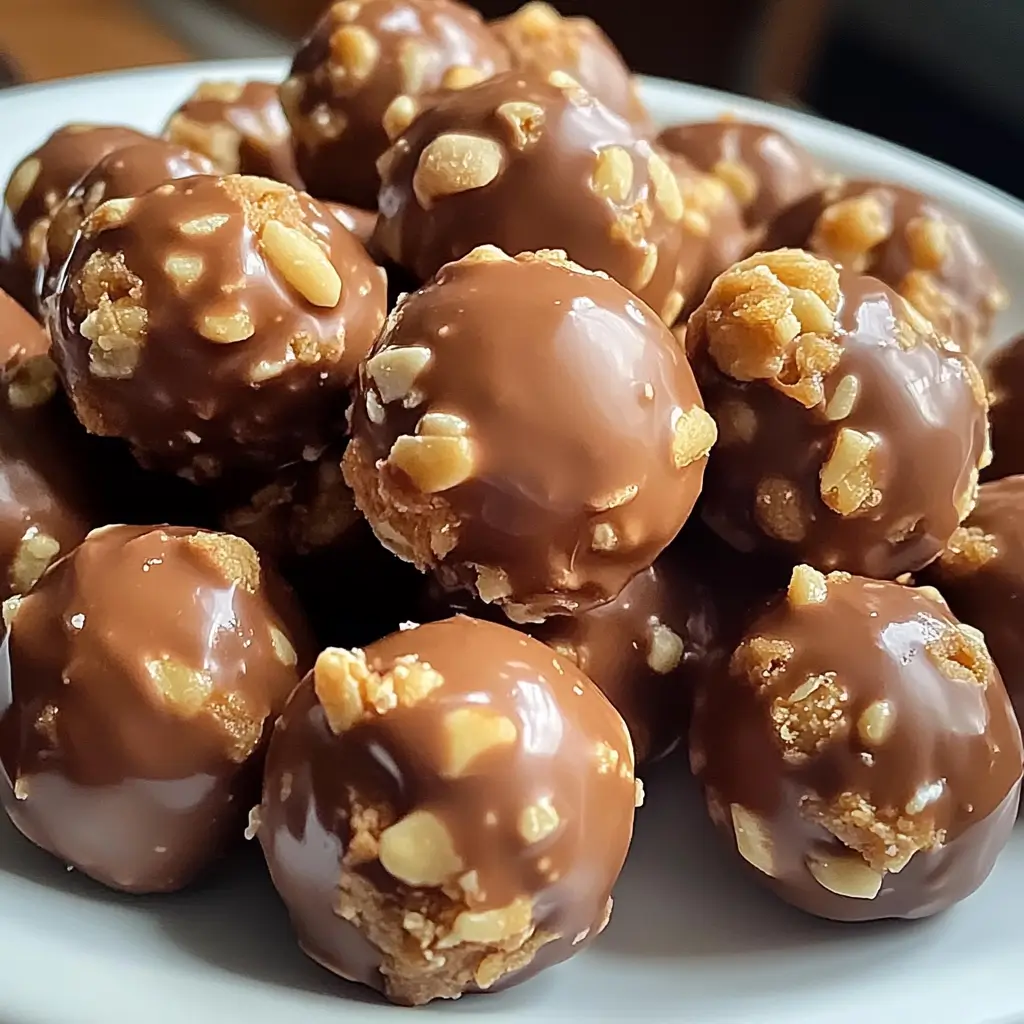
There’s something magical about the combination of peanut butter, chocolate, and crispy, caramelized candy. And when you mix them all into one bite-sized treat, you get Butterfinger Balls—a no-bake dessert that’s crunchy, creamy, and coated in a rich layer of chocolate. These treats are perfect for any occasion, whether you’re whipping up a batch for a party, gifting them during the holidays, or simply treating yourself to a little indulgence.
I still remember the first time I made these. It was during a holiday baking marathon, and I needed something simple but impressive. After just one bite, I knew this recipe was a keeper. The peanut butter and graham cracker base give them a melt-in-your-mouth texture, while the crushed Butterfinger pieces add an irresistible crunch. The chocolate coating brings it all together, making each bite pure dessert bliss.
What’s even better is how easy these are to make. There’s no baking involved, and you only need a handful of ingredients. Plus, they store beautifully in the fridge or freezer, making them the perfect make-ahead treat. Whether you’re a pro in the kitchen or just starting, you’ll love how effortlessly these Butterfinger Balls come together. Let’s dive into why you need to try them and how to make them perfectly every single time.
Why You’ll Love This Recipe
These Butterfinger Balls are more than just another sweet treat—they’re the kind of dessert that disappears in minutes at parties, and people always ask for the recipe. Here’s why they’re a must-try:
- No-Bake Simplicity – You don’t need an oven or any fancy equipment to make these. Just mix, roll, chill, and dip in chocolate. It’s that easy.
- Perfectly Balanced Flavors – The creamy peanut butter pairs beautifully with the crunchy, caramelized bits of Butterfinger, and the chocolate coating brings it all together.
- Crowd-Pleasing and Kid-Friendly – These are a hit at gatherings, and kids absolutely love them. They’re also great for school lunchbox treats or birthday parties.
- Make-Ahead Friendly – You can prepare them ahead of time, store them in the fridge or freezer, and always have a delicious homemade treat ready to go.
- Customizable – Want to switch things up? You can easily swap the candy, change the coating, or add festive decorations for different holidays.
Each bite has the perfect balance of smooth peanut butter, crispy candy bits, and a luscious chocolate shell. They’re rich but not overpowering, sweet but not overly sugary. It’s everything you want in a bite-sized treat.
Health Benefits of Butterfinger Balls
While Butterfinger Balls are definitely an indulgence, they do offer some surprising benefits when enjoyed in moderation.
- Protein from Peanut Butter – Peanut butter provides a good dose of protein and healthy fats, which help keep you satisfied longer.
- Energy-Boosting Ingredients – With a mix of protein, carbohydrates, and fats, these treats can be a great pre- or post-workout snack when eaten in moderation.
- Homemade Goodness – Since you’re making these yourself, you can control the ingredients and avoid preservatives and additives found in store-bought candy.
- Portion-Control Friendly – Because they’re bite-sized, they make it easier to enjoy a small treat without overindulging.
That being said, Butterfinger Balls are best enjoyed as an occasional treat rather than an everyday snack. But when you do indulge, they’re absolutely worth it.
Preparation Time, Servings, and Nutritional Information
- Prep Time: 15 minutes
- Chilling Time: 30 minutes
- Total Time: 45 minutes
- Servings: Makes about 24 balls
Nutritional Information (Per Butterfinger Ball)
- Calories: 160
- Protein: 3g
- Carbohydrates: 16g
- Fat: 10g
- Sugar: 12g
Ingredients List
To make these Butterfinger Balls, you’ll need just a few simple ingredients:
- 1 cup peanut butter – Use a regular, creamy peanut butter like Jif or Skippy for the best texture. Avoid natural peanut butter, as it can be too oily.
- 4 tablespoons butter (softened) – This helps the mixture blend smoothly and gives the balls a rich, creamy consistency.
- ¾ cup graham cracker crumbs – Adds texture and structure to the filling.
- ½ cup crushed Butterfinger bars – The key ingredient! Crush them into small pieces for the best crunch.
- 1 cup powdered sugar – Sweetens and thickens the mixture.
- 1 teaspoon vanilla extract – Enhances the flavor with a warm, slightly sweet depth.
- 8 ounces chocolate bark or chocolate chips – Used for the outer coating. Dark, milk, or white chocolate all work.
- Optional garnishes: More crushed Butterfinger, sprinkles, or sea salt for decoration.
Step-By-Step Cooking Instructions
1. Prepare the Dough
- In a large mixing bowl, beat the peanut butter and softened butter together until smooth.
- Add in the vanilla extract and stir to combine.
- Gradually mix in the powdered sugar, stirring until fully incorporated. The mixture will start to thicken.
- Fold in the graham cracker crumbs and crushed Butterfinger bars, ensuring everything is evenly distributed.
2. Shape the Balls
- Line a baking sheet with parchment paper.
- Using a spoon or small cookie scoop, take about 1 to 1.5 tablespoons of the mixture and roll into balls.
- Place each ball onto the lined baking sheet.
- Once all the balls are formed, transfer the tray to the freezer for at least 30 minutes to firm up.
3. Melt the Chocolate
- In a microwave-safe bowl, melt the chocolate bark or chocolate chips in 30-second intervals at 50% power, stirring between each interval.
- Continue microwaving and stirring until the chocolate is smooth.
4. Coat the Balls in Chocolate
- Remove the chilled balls from the freezer.
- Using a fork or dipping tool, dip each ball into the melted chocolate, ensuring they are fully coated.
- Let any excess chocolate drip off before placing the coated ball back onto the parchment-lined tray.
- If desired, sprinkle crushed Butterfinger, festive sprinkles, or sea salt on top before the chocolate hardens.
5. Let the Chocolate Set
- Allow the chocolate coating to set completely at room temperature or in the fridge for quicker results.
How to Serve
- Straight from the fridge – These taste best when they’re slightly chilled.
- With coffee or milk – Perfect for a sweet afternoon treat.
- On a dessert platter – Arrange them on a serving tray for parties or gatherings.
- As a gift – Package them in decorative boxes for a thoughtful homemade gift.
Pairing Suggestions
- Hot Beverages: Serve with coffee, hot chocolate, or chai tea.
- Fruit: Pair with fresh berries for a sweet contrast.
- Ice Cream: Crumble them over vanilla ice cream for a delicious topping.
Storage, Freezing & Reheating Instructions
- Refrigeration: Store in an airtight container in the fridge for up to 1 week.
- Freezing: Place in a freezer-safe container and freeze for up to 5-6 months.
- Reheating: No reheating needed—just thaw at room temperature for a few minutes before serving.
Common Mistakes to Avoid
- Not chilling the dough before dipping – This helps the chocolate adhere properly.
- Using natural peanut butter – It’s too oily and can affect the texture.
- Overheating the chocolate – Melt it gently to avoid burning.
Pro Tips
- Use a fork for dipping – It makes the process easier.
- Freeze before coating – This prevents them from falling apart in the chocolate.
Creative Ways to Customize Butterfinger Balls
One of the best things about Butterfinger Balls is how easy they are to customize. If you love experimenting in the kitchen, here are some fun variations to try. Swap out the Butterfinger candy for other crushed treats like Reese’s Pieces, Snickers, or Heath bars to create a different flavor profile. Instead of traditional chocolate coating, try using white chocolate or a mix of dark and milk chocolate for a marbled effect. Add a crunchy surprise by mixing in chopped nuts such as almonds or pecans. If you want a festive touch, roll the balls in colored sprinkles, coconut flakes, or drizzle with caramel before the chocolate sets. For a healthier twist, use almond butter or sunflower seed butter instead of peanut butter. There are so many ways to make this recipe unique, whether you’re catering to dietary preferences or just love changing things up.
How to Make Butterfinger Balls for Different Occasions
These bite-sized treats are perfect for any occasion, and a few small tweaks can make them even more special. For holidays like Christmas or Valentine’s Day, decorate them with red and green sprinkles or drizzle with white chocolate. If you’re making them for a birthday party, consider adding edible glitter or colorful candy melts for a festive pop. Need a gift idea? Arrange them in a decorative tin or small gift box with parchment paper for a homemade treat that feels extra special. For Halloween, make them extra spooky by using orange candy melts or shaping them into mini pumpkins before dipping them in chocolate. If you want a summer-friendly version, serve them frozen for a cool, refreshing bite. No matter the occasion, these Butterfinger Balls can be easily adapted to fit the theme.
The Best Way to Package and Gift Butterfinger Balls
Homemade treats make some of the best gifts, and Butterfinger Balls are no exception. Their small, bite-sized shape makes them easy to package beautifully. For a simple yet elegant look, place them in mini cupcake liners inside a bakery-style box or tin. If you’re making them for party favors, wrap each one individually in cellophane with a ribbon. You can also layer them in a mason jar for a rustic, homemade touch. If you want to add a personal element, create a small tag with a handwritten note or the recipe so the recipient can make them at home. For long-distance gifting, ensure they stay fresh by packing them in an insulated container with an ice pack to prevent melting. Whether for holidays, birthdays, or a simple thank-you gift, these sweet treats are guaranteed to impress.
How to Make Butterfinger Balls Kid-Friendly
Butterfinger Balls are already a kid-favorite, but making them even more fun and engaging is easy. Get kids involved in the process by letting them help roll the dough into balls—it’s a great hands-on activity. Allow them to choose their own toppings, such as mini chocolate chips, crushed Oreos, or rainbow sprinkles, to make each ball unique. For an extra fun twist, shape the mixture into different forms like hearts or stars using small cookie cutters before freezing. If your child has a peanut allergy, substitute the peanut butter with sunflower seed butter for a nut-free version. Serve them as part of a fun dessert board with other small treats like pretzels, marshmallows, and fruit for a balanced snack. Whether making them together or serving them at a party, these no-bake treats are guaranteed to be a hit with kids.
Frequently Asked Questions (FAQs)
- Can I use crunchy peanut butter? Yes, but it will change the texture slightly.
- Can I make these nut-free? Substitute sunflower seed butter for a nut-free version.
Conclusion & Call to Action
These Butterfinger Balls are the ultimate no-bake treat—easy to make, packed with flavor, and perfect for any occasion. Try them today and share your experience!
Print
Butterfinger Balls
- Total Time: 45 minutes (includes chilling)
- Yield: About 24 balls 1x
- Diet: Vegetarian
Description
These no-bake Butterfinger Balls are an easy, sweet treat made with peanut butter, crushed Butterfinger candy bars, graham cracker crumbs, and chocolate. Perfect for parties, holidays, or an indulgent snack.
Ingredients
- 1 cup peanut butter (not natural)
- 4 tbsp butter (softened)
- ¾ cup graham cracker crumbs
- ½ cup crushed Butterfinger bars
- 1 cup powdered sugar
- 1 tsp vanilla extract
- 8 oz chocolate bark or chocolate chips (for coating)
- Optional: Additional crushed Butterfinger, sprinkles, or sea salt for garnish
Instructions
- In a large bowl, mix peanut butter and softened butter until smooth.
- Add vanilla extract and mix well.
- Stir in powdered sugar gradually until fully combined.
- Fold in graham cracker crumbs and crushed Butterfinger pieces.
- Shape into small balls (1 to 1.5 tbsp each) and place on a parchment-lined baking sheet.
- Freeze for at least 30 minutes until firm.
- Melt chocolate in a microwave-safe bowl in 30-second intervals, stirring between each.
- Dip each chilled ball into the melted chocolate, letting excess drip off.
- Place back on the baking sheet and sprinkle with crushed Butterfinger or sprinkles.
- Let the chocolate set at room temperature or in the fridge before serving.
Notes
- Avoid using natural peanut butter, as it can be too oily.
- Chilling the dough before dipping prevents the balls from falling apart.
- Store in the refrigerator for up to 1 week or freeze for up to 6 months.
- Prep Time: 15 minutes
- Cook Time: 0 minutes (no-bake)
- Category: Dessert, Snack
- Method: No-bake
- Cuisine: American