

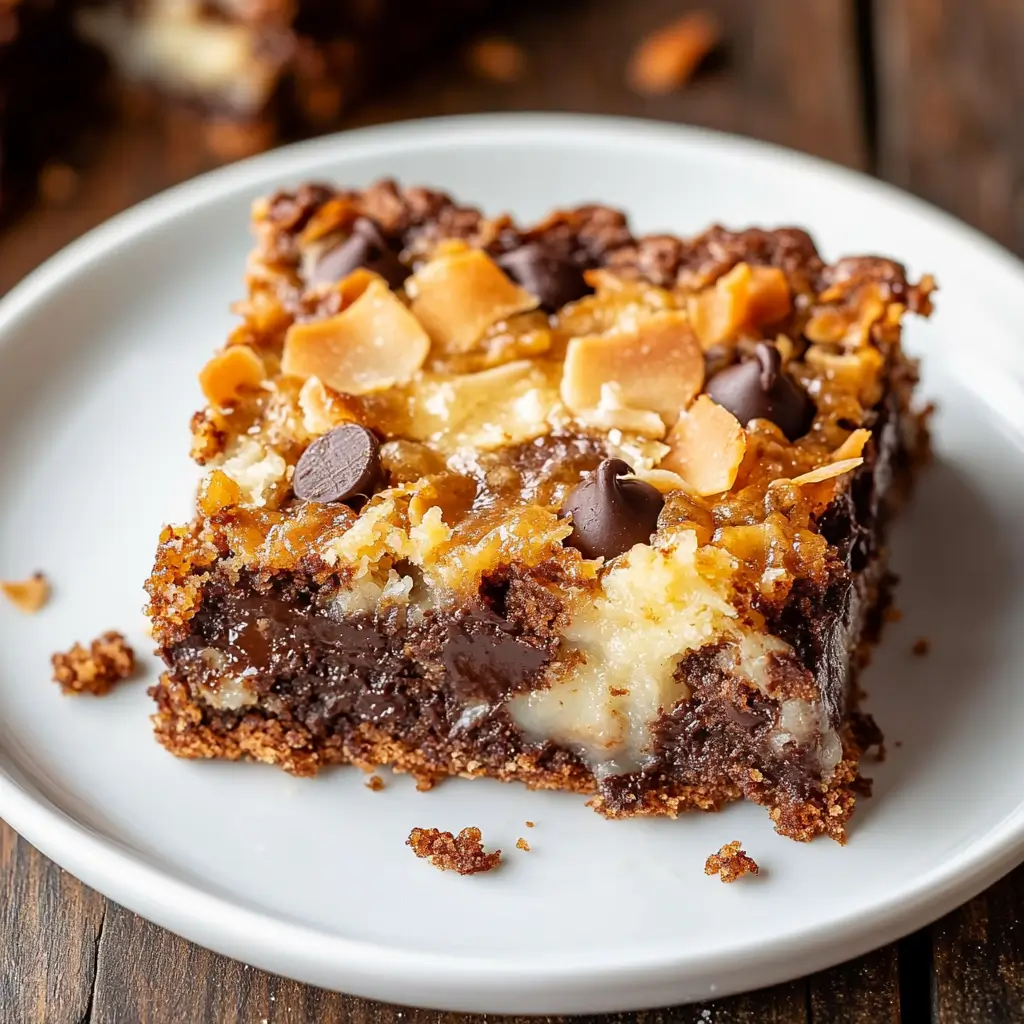
There is something truly magical about Coconut Magic Bars. These delightful treats, also known as Magic Cookie Bars or Seven Layer Bars, are the perfect combination of chewy, crunchy, and gooey textures. With layers of buttery graham cracker crust, chocolate chips, coconut, and sweetened condensed milk, these bars are a dessert lover’s dream.
The beauty of this recipe lies in its simplicity. You do not need to be an expert baker to make these delicious bars. In fact, you do not even need a mixer. Everything comes together with basic pantry ingredients, making it an easy go-to dessert for last-minute gatherings, bake sales, or an indulgent treat for yourself.
I first discovered Coconut Magic Bars at a family gathering when I was a child. My grandmother made them every holiday season, and they quickly became my absolute favorite. The moment I took a bite, I was hooked. The combination of crispy graham crackers, melty chocolate, crunchy pecans, and sweet coconut, all bound together by rich, creamy condensed milk, felt like a little piece of heaven. Now, years later, I make these bars whenever I want to bring a bit of nostalgia and comfort to my kitchen.
What makes these bars truly special is their versatility. You can customize them with different types of chocolate, add nuts, or even incorporate peanut butter for a twist. They also store beautifully, making them a fantastic make-ahead dessert. Whether you are making these for a party or just to satisfy a sweet craving, Coconut Magic Bars never disappoint.
Why You’ll Love This Recipe
There are countless reasons to fall in love with Coconut Magic Bars. Here are just a few that make this recipe an absolute must-try:
1. Simple and Easy to Make
This recipe does not require a mixer, fancy equipment, or even a lot of prep work. Just layer the ingredients in a baking dish, pop it in the oven, and let the magic happen.
2. Perfect for Any Occasion
Whether you need a dessert for a holiday party, a bake sale, or just a weeknight treat, these bars are always a hit. They are a crowd-pleaser for kids and adults alike.
3. A Dreamy Combination of Textures
From the crunch of the graham cracker crust to the chewy coconut and the melty chocolate, every bite of these bars offers a delightful contrast in textures.
4. Customizable to Your Tastes
You can switch up the ingredients to suit your preferences. Try white chocolate instead of semi-sweet, swap pecans for almonds, or add peanut butter chips for an extra layer of flavor.
5. Perfect Balance of Sweetness
The rich and creamy condensed milk brings all the flavors together without making the bars overwhelmingly sweet. Every bite has just the right amount of indulgence.
6. They Store Well
These bars taste just as good the next day, and they freeze beautifully, making them a great make-ahead dessert.
Health Benefits
Although Coconut Magic Bars are a sweet treat, they do have some ingredients that offer nutritional benefits.
1. Coconut’s Nutritional Boost
Coconut contains healthy fats that can help provide sustained energy. It also has fiber, which supports digestion and helps keep you feeling full longer.
2. Dark Chocolate’s Antioxidants
If you opt for dark chocolate chips instead of milk chocolate, you will be getting a dose of antioxidants, which can help reduce inflammation and support heart health.
3. Nuts for Heart Health
Pecans, or any other nuts you choose to use, provide healthy fats, protein, and essential nutrients like magnesium and vitamin E. Nuts are known to support heart health and brain function.
4. Graham Crackers for Energy
Graham crackers provide carbohydrates, which give you energy. While they are not the healthiest grain option, they do add a nice crunch and can be a better choice compared to highly processed alternatives.
5. Moderation is Key
Like any dessert, Coconut Magic Bars should be enjoyed in moderation. While they contain some beneficial ingredients, they are still a sweet indulgence. Enjoying them as part of a balanced diet is the best way to savor their deliciousness guilt-free.
Preparation Time, Servings, and Nutritional Information
Total Time:
- Prep Time: 10 minutes
- Bake Time: 30 minutes
- Cooling Time: 1 hour
Servings:
This recipe makes 16 bars.
Nutritional Information (Per Serving):
- Calories: 250
- Carbohydrates: 30g
- Protein: 3g
- Fats: 14g
- Sugar: 18g
- Fiber: 2g
Ingredients List
The Base:
- ½ cup unsalted butter, melted
- 2 cups graham cracker crumbs
The Layers:
- 1 cup semi-sweet chocolate chips
- 1 cup shredded sweetened coconut
- ¾ cup pecans, coarsely chopped
- 1 ⅔ cups sweetened condensed milk
Step-By-Step Cooking Instructions
Preheat Your Oven
Preheat your oven to 350°F (175°C). Grease an 8×8-inch baking dish or line it with parchment paper to prevent sticking.
Prepare the Graham Cracker Crust
In a bowl, mix the graham cracker crumbs with the melted butter until the crumbs are fully coated. Press this mixture evenly into the bottom of the prepared baking dish to create a firm crust.
Add the Chocolate Layer
Sprinkle the semi-sweet chocolate chips evenly over the graham cracker crust. This ensures every bite has a melty, chocolatey goodness.
Sprinkle the Coconut
Evenly distribute the shredded coconut over the chocolate layer. The coconut will toast as it bakes, adding a delicious crunch and depth of flavor.
Add the Nuts
Scatter the chopped pecans on top of the coconut. If you prefer, you can use walnuts, almonds, or leave the nuts out entirely.
Pour the Sweetened Condensed Milk
Slowly pour the sweetened condensed milk evenly over the entire mixture. This will bind all the layers together and create the signature chewy texture of the bars.
Bake the Bars
Place the dish in the preheated oven and bake for 30 minutes, or until the edges turn golden brown and the coconut is lightly toasted.
Cool Completely
Once baked, let the bars cool in the dish for at least 1 hour before cutting them. This helps them set properly and makes slicing easier.
Slice and Enjoy
Once cooled, cut the bars into 16 squares and enjoy!
How to Serve
- Serve at room temperature for the best texture.
- Pair with a scoop of vanilla ice cream for an extra indulgent dessert.
- Drizzle with melted chocolate or caramel sauce for a fancy touch.
Pairing Suggestions
- Enjoy with a cup of coffee or hot chocolate.
- Serve alongside a fruit salad for a refreshing contrast.
Storage, Freezing & Reheating Instructions
- Store in an airtight container at room temperature for up to 5 days.
- Freeze by wrapping each bar in plastic wrap and storing in a freezer-safe bag for up to 3 months.
Common Mistakes to Avoid
Even though Coconut Magic Bars are incredibly simple to make, there are a few common mistakes that can lead to less-than-perfect results. Avoid these pitfalls to ensure your bars come out just right every time.
1. Not Pressing the Crust Firmly Enough
The graham cracker crust is the foundation of these bars, so it needs to be compact and sturdy. If you do not press the crumbs down firmly enough, the crust can crumble when cutting or serving. Use the back of a spoon, a spatula, or even the bottom of a measuring cup to press the crust firmly into the pan.
2. Using Too Much or Too Little Butter
The balance between graham cracker crumbs and butter is essential. Too much butter will make the crust greasy and soggy, while too little will make it dry and crumbly. Stick to the recipe measurements for the best results.
3. Overbaking the Bars
These bars should be golden brown when done, but overbaking can make them dry and hard. Keep an eye on them, especially in the last 5 minutes of baking. The bars will firm up more as they cool, so do not bake them until they are rock-solid in the oven.
4. Cutting the Bars Too Soon
One of the biggest mistakes is cutting into the bars while they are still warm. The condensed milk needs time to set, or else you will end up with a gooey mess. Let the bars cool for at least 1 hour before slicing. If you want even cleaner cuts, refrigerate them for 30 minutes before slicing.
5. Pouring the Condensed Milk Unevenly
The sweetened condensed milk is what holds all the layers together, so it needs to be evenly distributed. Pour it slowly in a zig-zag motion across the entire surface to ensure that every bite is rich and chewy.
6. Not Lining the Baking Dish
While you can grease the baking dish, lining it with parchment paper makes it much easier to remove the bars after baking. This prevents sticking and allows you to lift the entire batch out of the pan for easy cutting.
7. Using Unsweetened Coconut Instead of Sweetened
This recipe calls for sweetened shredded coconut, which adds moisture and sweetness. If you use unsweetened coconut, the bars may turn out drier and less flavorful.
8. Skipping the Cooling Time
Patience is key! If you try to eat these bars right away, they will be too soft and may fall apart. Allowing them to cool ensures that they hold their shape and develop the best texture.
Pro Tips for the Best Coconut Magic Bars
To take your Coconut Magic Bars from good to absolutely amazing, follow these expert tips.
1. Use Toasted Coconut for Extra Flavor
For a deeper, nutty coconut flavor, toast the shredded coconut before adding it to the bars. Simply spread it on a baking sheet and bake at 325°F (163°C) for 5-7 minutes, stirring occasionally until golden brown.
2. Chill Before Slicing for Clean Cuts
If you want perfectly clean slices, let the bars chill in the refrigerator for at least 30 minutes before cutting. This firms up the layers, making it easier to get neat squares.
3. Try Different Chocolate Varieties
Semi-sweet chocolate is classic, but you can experiment with white chocolate chips, dark chocolate, or even butterscotch chips for a unique twist.
4. Enhance with a Pinch of Sea Salt
A light sprinkle of flaky sea salt on top of the bars right after baking can enhance the flavors and balance out the sweetness.
5. Add a Peanut Butter or Caramel Drizzle
For an extra indulgent touch, drizzle melted peanut butter or caramel over the bars before serving. It adds another layer of richness and flavor.
6. Double the Recipe for a Larger Batch
If you are making these for a crowd, double the recipe and bake in a 9×13-inch pan. Just be sure to adjust the baking time slightly, as a larger pan may take a few extra minutes.
7. Make It Nut-Free
If you have a nut allergy, simply omit the pecans or replace them with sunflower seeds or extra chocolate chips.
8. Store for Maximum Freshness
These bars can be stored in an airtight container at room temperature for up to 5 days. For longer storage, refrigerate them for up to 1 week or freeze them for up to 3 months.
Frequently Asked Questions (FAQs)
1. Can I Use a Different Type of Crust?
Yes! If you do not have graham crackers, you can substitute vanilla wafer crumbs, digestive biscuits, or even crushed pretzels for a salty-sweet twist.
2. Can I Make These Bars Gluten-Free?
Absolutely! Just use gluten-free graham crackers or almond flour-based crust alternatives.
3. Can I Use a Different Type of Chocolate?
Yes! Try white chocolate, milk chocolate, dark chocolate, or butterscotch chips for a variation.
4. How Do I Prevent the Bars from Sticking?
Use parchment paper or aluminum foil to line the baking dish. This allows you to lift the bars out easily once they are cooled.
5. Can I Make These Ahead of Time?
Yes! These bars store well, making them perfect for make-ahead desserts. Prepare them a day or two in advance, and store them in an airtight container.
6. Can I Freeze Coconut Magic Bars?
Yes! Wrap individual bars in plastic wrap, then store them in a ziplock bag or airtight container in the freezer for up to 3 months. Thaw at room temperature before serving.
Conclusion & Call to Action
If you are looking for an easy, indulgent dessert that is guaranteed to impress, Coconut Magic Bars are the perfect choice. With their chewy texture, rich layers, and irresistible flavor, they are a crowd-pleaser for any occasion. Whether you are making these for a bake sale, holiday gathering, or just a weekend treat, you will love how simple and delicious they are.
The best part? These bars are completely customizable. Swap out the nuts, try a different type of chocolate, or add extra toppings to make them your own. Plus, they store beautifully, so you can always have a sweet treat ready whenever you need it.
Now it is your turn! Try making Coconut Magic Bars and see for yourself why they are so loved. If you make them, I would love to hear about it! Leave a comment below and let me know how they turned out.
If you enjoyed this recipe, do not forget to save it, share it, and pin it for later. You can also tag me on social media—I would love to see your creations! Happy baking!
Print
Coconut Magic Bars
- Total Time: 40 minutes
- Yield: 16 bars 1x
- Diet: Vegetarian
Description
These Coconut Magic Bars are a chewy, gooey, and crunchy dessert made with layers of graham crackers, chocolate, shredded coconut, and sweetened condensed milk. A simple, no-mixer-required treat that’s perfect for holidays, bake sales, or whenever you need a sweet fix!
Ingredients
- ½ cup unsalted butter, melted
- 2 cups graham cracker crumbs
- 1 cup semi-sweet chocolate chips
- 1 cup shredded sweetened coconut
- ¾ cup pecans, coarsely chopped
- 1 ⅔ cups sweetened condensed milk
Instructions
- Preheat oven to 350°F (175°C) and grease an 8×8-inch baking dish.
- Mix graham cracker crumbs with melted butter and press into the bottom of the dish.
- Layer chocolate chips, shredded coconut, and chopped pecans evenly.
- Drizzle sweetened condensed milk evenly over all layers.
- Bake for 30 minutes until golden brown and set.
- Cool completely before slicing into bars.
Notes
- Let bars cool fully before slicing to prevent crumbling.
- Swap pecans for almonds, walnuts, or omit nuts entirely.
- Store in an airtight container for up to 5 days or freeze for up to 3 months.
- Prep Time: 10 minutes
- Cook Time: 30 minutes
- Category: Dessert
- Method: Baking
- Cuisine: American