
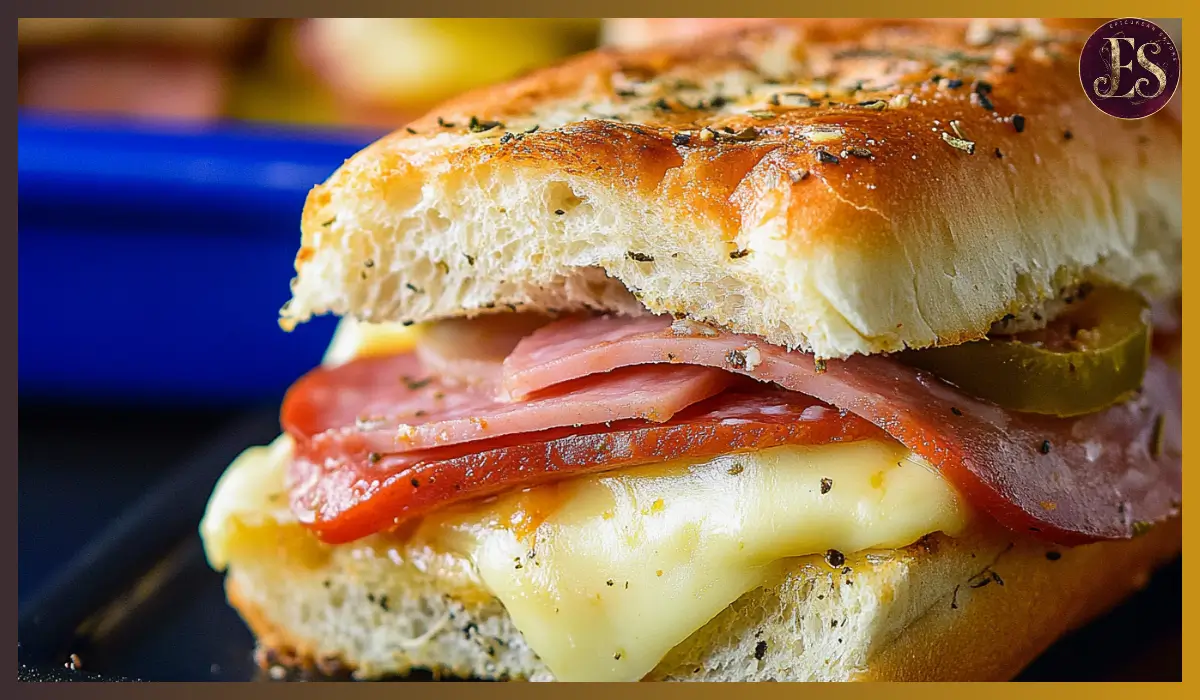
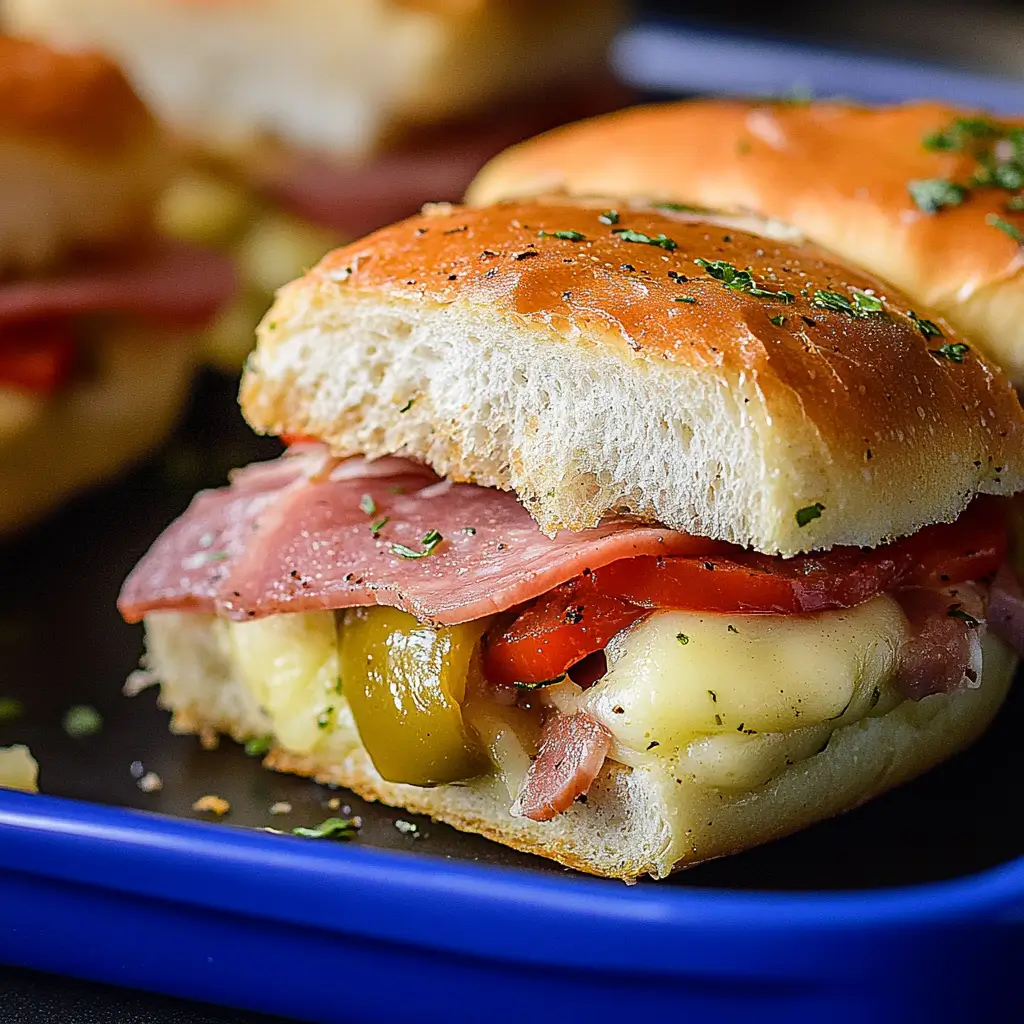
There is something undeniably comforting about a warm, cheesy, and flavorful sandwich, and these Hot Italian Sub Sliders are the ultimate game-day, party, or weeknight dinner treat. With layers of savory Italian deli meats, melted provolone cheese, and tangy pickled peppers, all wrapped up in soft, buttery Hawaiian rolls, these sliders are packed with bold flavors. They are brushed with a rich garlic butter mixture before baking, ensuring a golden, crispy top that enhances the whole experience.
These sliders are the perfect dish to serve at gatherings because they require minimal effort but deliver maximum satisfaction. Whether you are hosting a Super Bowl party, a family dinner, or looking for a quick and satisfying meal, this recipe is a guaranteed hit. Unlike traditional Italian subs, which can sometimes be a bit messy, these sliders are neatly packed and easy to eat, making them a great choice for kids and adults alike.
The first time I made these for a family get-together, they disappeared in minutes. The combination of melted cheese, spicy and savory meats, and the crispy, buttery top was simply irresistible. My guests kept asking for the recipe, and ever since, it has been a staple at our family gatherings. The best part is that you can customize them according to your preference. Want a milder version? Swap out the hot peppers for sweet roasted red peppers. Prefer more heat? Add extra pepperoni and banana peppers. The possibilities are endless, and every version is delicious in its own way.
Why You’ll Love This Hot Italian Sub Sliders Recipe
There are so many reasons why this recipe is a must-try. First, it is incredibly easy to make. The entire process, from assembling to baking, takes under 40 minutes. You can even prepare the sliders ahead of time, making them perfect for busy days or meal prepping.
Another great thing about these sliders is how flavorful they are. The combination of salty and spicy meats, creamy melted cheese, and the tang of pickled peppers creates a well-balanced bite. The garlic butter brushed on top adds an extra layer of richness that ties everything together.
These sliders are also incredibly versatile. You can serve them as a main dish with a side salad or a bowl of soup, or you can make them the star of your game-day spread alongside chips, dips, and other appetizers. They are small enough to be finger food but hearty enough to be a satisfying meal.
Lastly, they are completely customizable. If you want a vegetarian version, you can replace the meats with roasted vegetables like eggplant, zucchini, and bell peppers. If you prefer a milder taste, swap out the pickled peppers for caramelized onions or roasted red peppers. No matter how you make them, they will be delicious.
Health Benefits
While these sliders are definitely a treat, they also offer some nutritional benefits. The deli meats used in the recipe, such as ham, salami, and pepperoni, provide a good amount of protein, which helps with muscle repair and keeps you full longer.
The provolone cheese adds calcium, which is essential for bone health. If you opt for a high-quality cheese, you can get additional benefits such as probiotics that aid digestion.
The peperoncini and hot cherry peppers bring more than just flavor; they contain vitamins C and A, which support immune function and skin health. These peppers also have capsaicin, which may boost metabolism and aid in weight management.
While Hawaiian rolls add a touch of sweetness and softness to the sliders, you can use whole-wheat or multigrain rolls for added fiber and a lower glycemic index. This swap can make the meal more balanced and suitable for those looking to eat a bit healthier.
By making small adjustments, such as using leaner meats, lower-fat cheese, and adding extra vegetables, you can make these sliders more nutritious while keeping them just as delicious.
Preparation Time, Servings, and Nutritional Information
- Preparation Time: 10 minutes
- Cooking Time: 30 minutes
- Total Time: 40 minutes
- Servings: 12 sliders
Estimated Nutritional Information Per Serving:
- Calories: 280
- Protein: 14g
- Fat: 16g
- Carbohydrates: 20g
- Fiber: 1g
- Sodium: 620mg
Ingredients List
- 12-pack Hawaiian rolls (King’s Hawaiian recommended)
- 6 oz deli ham, thinly sliced
- 5 oz salami, thinly sliced
- 5 oz pepperoni, thinly sliced
- 9 slices provolone cheese
- ⅓ cup peperoncini, sliced
- ⅓ cup pickled hot cherry peppers, sliced
- ¼ cup salted butter, melted
- 1 tsp Italian seasoning
- 2 cloves garlic, crushed
- 1 cup marinara sauce (for dipping, optional)
Step-By-Step Cooking Instructions
1. Preheat the Oven and Prepare the Baking Dish
- Preheat your oven to 350°F (177°C).
- Line a baking sheet with parchment paper or lightly grease a 9×13 baking dish.
2. Slice the Rolls and Assemble the Bottom Layer
- Using a serrated knife, carefully slice the Hawaiian rolls in half horizontally without separating them individually.
- Place the bottom half of the rolls into the prepared baking dish.
3. Layer the Meats and Cheese
- Start by layering ham evenly over the bottom half of the rolls.
- Add a layer of salami, followed by pepperoni.
- Place provolone cheese slices on top of the meats, ensuring full coverage.
4. Add the Pickled Peppers for Extra Flavor
- Scatter sliced peperoncini and pickled hot cherry peppers over the cheese.
- If you prefer a milder taste, you can use roasted red peppers instead.
5. Cover with the Top Half of the Rolls
- Carefully place the top half of the rolls over the assembled ingredients, pressing down gently.
6. Make the Garlic Butter Mixture
- In a small bowl, combine melted butter, Italian seasoning, and crushed garlic.
- Mix well until the ingredients are fully incorporated.
7. Brush the Butter Mixture Over the Sliders
- Using a pastry brush, generously coat the top of the rolls with the garlic butter mixture.
- Make sure the butter seeps into the crevices for extra flavor.
8. Bake Until Golden and Melty
- Cover the dish with foil and bake for 20 minutes.
- Remove the foil and bake for another 10 minutes, or until the tops are golden brown.
9. Slice and Serve Warm
- Remove the sliders from the oven and let them sit for a few minutes.
- Using a sharp knife, cut along the pre-scored lines of the rolls to separate them.
- Serve immediately with warm marinara sauce on the side for dipping.
How to Serve
- Serve as a main dish with a side of garlic parmesan fries or a simple Caesar salad.
- Offer a dipping station with marinara sauce, garlic aioli, or honey mustard.
- Pair with a light and refreshing cucumber tomato salad to balance the richness.
Pairing Suggestions
These sliders pair well with:
- Balsamic-glazed roasted vegetables for a tangy contrast.
- Homemade potato chips or parmesan truffle fries for a crispy side.
- Chilled lemonade or iced tea for a refreshing drink.
Storage, Freezing & Reheating Instructions
- Store leftovers in an airtight container in the refrigerator for up to 3 days.
- Freeze unbaked sliders wrapped tightly in plastic wrap and foil for up to 3 months.
- Reheat baked sliders in the oven at 325°F for 10 minutes to restore crispiness.
Common Mistakes to Avoid
When making Hot Italian Sub Sliders, there are a few common mistakes that can affect the final outcome. Avoiding these pitfalls will ensure your sliders are perfectly crispy, cheesy, and full of flavor every time.
One of the biggest mistakes is not slicing the rolls correctly. If you cut them unevenly or separate them too much, they may fall apart while assembling or baking. Use a sharp serrated knife and keep the rolls intact when slicing horizontally to ensure they stay connected.
Another issue is overloading the sliders with too many ingredients. While it may be tempting to add extra layers of meat, cheese, or peppers, too much filling can make the sliders difficult to eat and cause them to fall apart when baked. Stick to the recommended amounts for the best balance of flavors and textures.
Many people also skip brushing the butter mixture evenly on top of the sliders. The garlic butter adds flavor and helps the rolls turn golden brown. Be generous with it, ensuring every roll is coated so you don’t end up with dry or unevenly toasted tops.
Some people bake their sliders at too high a temperature, thinking it will make them crispier. Baking at a higher temperature than recommended can cause the cheese to burn before the rolls get golden brown. Stick to 350°F (177°C) for even cooking.
Finally, not letting the sliders rest before slicing can cause the cheese and fillings to slide out. Give them a few minutes to set after taking them out of the oven so they stay together when cut.
Pro Tips
To make the best Hot Italian Sub Sliders, follow these expert tips for a perfectly crispy, cheesy, and flavorful result every time.
Use fresh, high-quality deli meats and cheese for the best flavor. Thinly sliced meats like ham, salami, and pepperoni work best because they layer evenly without making the sliders too thick. Provolone is the classic choice, but you can mix in mozzarella or cheddar for a different taste.
For extra crispy sliders, place the assembled sliders on a wire rack set inside the baking dish. This allows air to circulate around the bottom, preventing sogginess and ensuring a crispy finish all around.
If you like a little extra crunch, toast the bottom half of the rolls before assembling. Place them cut-side up in the oven for 3-4 minutes at 350°F before adding the fillings. This creates a firmer base that won’t get soggy from the ingredients.
When making the garlic butter, use freshly minced garlic instead of garlic powder for the best flavor. Fresh garlic gives a stronger, richer taste that enhances the overall dish.
Finally, don’t forget to serve them with a dipping sauce like warm marinara, garlic aioli, or honey mustard to elevate the flavors even more. The right dipping sauce can make all the difference.
Frequently Asked Questions (FAQs)
Can I use different types of bread instead of Hawaiian rolls?
Yes! While Hawaiian rolls add a slight sweetness that balances the salty and spicy flavors, you can use slider buns, ciabatta rolls, or even mini hoagie rolls for a different texture.
How can I make these sliders less spicy?
To reduce the spice level, swap the hot cherry peppers for roasted red peppers or mild banana peppers. You can also use plain deli ham without pepperoni to tone down the heat.
Can I make these ahead of time?
Yes! Assemble the sliders, cover them tightly with plastic wrap, and store them in the fridge for up to 8 hours before baking. Just brush on the garlic butter mixture before putting them in the oven.
How do I reheat leftover sliders?
Reheat leftovers in the oven at 325°F for about 10 minutes to restore crispiness. You can also use an air fryer at 350°F for 3-4 minutes for a quick reheat.
Can I freeze these sliders?
Yes! You can freeze unbaked sliders by wrapping them tightly in plastic wrap and aluminum foil. When ready to bake, thaw in the refrigerator overnight and bake as directed.
Conclusion & Call to Action
Hot Italian Sub Sliders are one of the easiest and most flavorful dishes you can make for a party, game day, or casual family meal. With layers of salty and spicy deli meats, melted cheese, and a crispy, buttery garlic topping, these sliders deliver restaurant-quality taste with minimal effort. Whether you serve them as an appetizer, a main dish, or a snack, they’re always a hit.
One of the best things about this recipe is its versatility. You can easily customize the sliders by adjusting the spice level, swapping out ingredients, or adding extra toppings like caramelized onions or roasted vegetables. Whether you prefer a classic Italian-style slider or a milder, kid-friendly version, you can tweak the recipe to fit your taste.
These sliders are also great for meal prepping. You can assemble them ahead of time, store them in the fridge, and pop them in the oven when you’re ready to serve. Leftovers, if there are any, can be stored and reheated without losing their deliciousness. The recipe is simple enough for beginners but impressive enough to wow a crowd.
Now that you have everything you need to make these mouthwatering sliders, it’s time to get started! Gather your ingredients, preheat the oven, and enjoy the best Hot Italian Sub Sliders you’ve ever had. If you try this recipe, let me know how it turned out in the comments! I’d love to hear your favorite variations and serving ideas. And if you enjoyed this recipe, don’t forget to share it with your friends and family. Happy cooking!
Print
Hot Italian Sub Sliders
- Total Time: 40 minutes
- Yield: 12 sliders 1x
Description
These Hot Italian Sub Sliders are the ultimate party food, packed with layers of Italian meats, provolone cheese, and tangy peppers, all baked to perfection with a garlic butter topping. Quick, easy, and incredibly delicious, they are perfect for game days, family gatherings, or a simple weeknight meal.
Ingredients
- 12-pack Hawaiian rolls
- 6 oz deli ham, thinly sliced
- 5 oz salami, thinly sliced
- 5 oz pepperoni, thinly sliced
- 9 slices provolone cheese
- ⅓ cup peperoncini, sliced
- ⅓ cup pickled hot cherry peppers, sliced
- ¼ cup salted butter, melted
- 1 tsp Italian seasoning
- 2 cloves garlic, crushed
- 1 cup marinara sauce (optional, for dipping)
Instructions
- Preheat oven to 350°F (177°C). Line a baking sheet with parchment paper or lightly grease a baking dish.
- Slice Hawaiian rolls in half horizontally without separating them individually. Place the bottom half in the baking dish.
- Layer ham, salami, and pepperoni evenly on the bottom half of the rolls.
- Add a layer of provolone cheese, followed by sliced peperoncini and hot cherry peppers.
- Place the top half of the rolls over the ingredients.
- In a small bowl, mix melted butter, Italian seasoning, and crushed garlic. Brush the mixture generously over the top of the rolls.
- Cover with foil and bake for 20 minutes. Remove the foil and bake for another 10 minutes, or until the tops are golden brown.
- Let the sliders sit for a few minutes, then slice and serve with marinara sauce for dipping.
Notes
- For a milder version, use roasted red peppers instead of hot cherry peppers.
- Make ahead: Assemble the sliders, cover, and refrigerate until ready to bake.
- Store leftovers in an airtight container in the fridge for up to 3 days.
- Prep Time: 10 minutes
- Cook Time: 30 minutes
- Category: Appetizer, Snack, Main Course
- Method: Baking
- Cuisine: Italian-American