
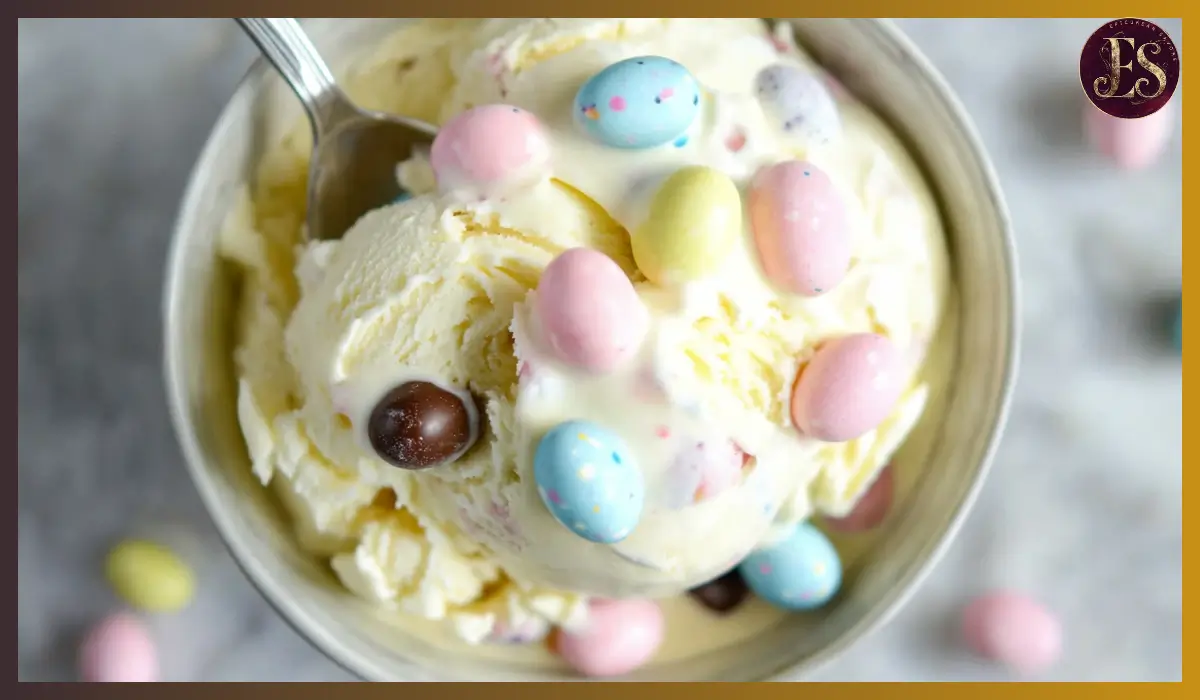
There is something magical about Mini Eggs. The crunchy, candy-coated chocolate melts into a smooth, rich flavor that instantly transports you back to childhood Easter hunts. Now, imagine that iconic taste blended into a luscious, homemade ice cream. This Mini Egg Ice Cream is the perfect way to enjoy your favorite Easter treat in a new and exciting way.
If you have never made ice cream at home before, don’t worry. This recipe is super simple and requires only five basic ingredients. With a little patience and an ice cream maker, you’ll be rewarded with a velvety, creamy dessert studded with crunchy bits of Mini Eggs in every bite.
What makes this recipe so special is its perfect balance of textures. The smooth, rich vanilla ice cream base is complemented by the satisfying crunch of chopped Mini Eggs, creating an irresistible combination. Whether you’re making this for an Easter gathering, a fun family treat, or just because you love Mini Eggs, this recipe will quickly become a favorite.
One of the best parts about this ice cream is that it’s completely customizable. You can adjust the level of sweetness, add different chocolate mix-ins, or even turn it into an ice cream sundae with your favorite toppings. Plus, it stores beautifully in the freezer, so you can enjoy a scoop whenever your sweet tooth kicks in.
So, grab your ingredients, dust off your ice cream maker, and let’s create a creamy, chocolate-studded dessert that will bring smiles to everyone’s faces.
Why You’ll Love This Recipe
This Mini Egg Ice Cream is more than just a fun Easter treat. It’s a dessert that combines simplicity, flavor, and nostalgia in every scoop. Here are a few reasons why you’re going to fall in love with this recipe:
1. Super Easy to Make
With just five ingredients, this recipe is as simple as it gets. There’s no need for complicated custard bases or endless stirring. Just mix, churn, and freeze.
2. Perfect for Easter and Beyond
While Mini Eggs are most popular during Easter, you can find them year-round. That means you can enjoy this ice cream any time you crave that delightful combination of vanilla and chocolate.
3. Creamy and Dreamy Texture
The base of this ice cream is rich and smooth, thanks to the combination of heavy whipping cream and milk. The high-fat content creates an indulgent, velvety mouthfeel that rivals any store-bought ice cream.
4. The Best Crunchy Chocolate Mix-In
Mini Eggs add an amazing crunch to every bite. The candy coating provides a subtle crispness, while the milk chocolate inside melts beautifully on your tongue.
5. Crowd-Pleasing Dessert
Whether you’re serving this at a family gathering, an Easter party, or just as a treat for yourself, everyone will love it. The combination of creamy vanilla ice cream and chocolate crunch appeals to all ages.
6. Customizable to Your Taste
Want to make it even more indulgent? Add chocolate sauce, caramel drizzle, or even a sprinkle of sea salt. You can also swap Mini Eggs for other chocolate candies like M&M’s or crushed chocolate bars.
Health Benefits
While ice cream is undoubtedly an indulgence, it’s always interesting to know the benefits of some of its key ingredients. Here’s how this Mini Egg Ice Cream can still offer some surprising perks:
1. Dairy Provides Essential Nutrients
The base of this ice cream contains milk and heavy cream, which are rich in calcium, vitamin D, and protein. These nutrients are essential for strong bones and muscle health.
2. Chocolate Contains Antioxidants
Mini Eggs are made with milk chocolate, which contains cocoa solids. Cocoa is packed with antioxidants, which help combat oxidative stress in the body.
3. Boosts Mood and Reduces Stress
Chocolate contains compounds like theobromine and serotonin, which are known to boost mood and reduce stress levels. A scoop of this ice cream can be an instant pick-me-up after a long day.
4. Homemade is Better for You
Unlike store-bought ice creams, this homemade version is free from artificial preservatives and additives. You control the ingredients, ensuring a fresher, more natural treat.
Preparation Time, Servings, and Nutritional Information
- Total Time: 4 hours (including freezing time)
- Active Prep Time: 15 minutes
- Churning Time: 20-25 minutes
- Servings: 8
- Calories per serving: ~300 kcal
- Protein: 4g
- Carbohydrates: 30g
- Fat: 18g
Ingredients List
To make this Mini Egg Ice Cream, you will need:
- 4 cups heavy whipping cream (for a rich and creamy texture)
- ½ cup whole milk (adds smoothness without making it too heavy)
- ¾ cup granulated sugar (to sweeten the ice cream base)
- 2 teaspoons pure vanilla extract (for a deep, warm vanilla flavor)
- 1 cup chopped Mini Eggs (for chocolatey crunch)
- 1 cup whole Mini Eggs (to mix in later for added texture)
Step-By-Step Cooking Instructions
Step 1: Prepare the Ice Cream Base
In a large mixing bowl, whisk together the heavy whipping cream, milk, granulated sugar, and vanilla extract. Stir until the sugar is completely dissolved.
Step 2: Chill the Mixture
For best results, refrigerate the mixture for at least 1 hour. This ensures that the ice cream churns evenly and has a smoother texture.
Step 3: Chop the Mini Eggs
Using a sharp knife, roughly chop 1 cup of Mini Eggs. This will create small crunchy pieces that will be mixed into the ice cream.
Step 4: Churn the Ice Cream
Pour the chilled mixture into an ice cream maker and process it according to the manufacturer’s instructions. This typically takes 20-25 minutes.
Step 5: Add the Chopped Mini Eggs
When the ice cream is nearly finished churning, add the chopped Mini Eggs. Let them mix in for the last few minutes so they distribute evenly.
Step 6: Mix in Whole Mini Eggs
Transfer the churned ice cream to an airtight container and fold in the whole Mini Eggs. This adds an extra layer of crunch.
Step 7: Freeze the Ice Cream
Place the container in the freezer and let the ice cream set for at least 2 hours before serving.

How to Serve
- Classic Scoop: Serve in a bowl or cone.
- Ice Cream Sandwich: Scoop between two cookies for a delicious dessert.
- Ice Cream Sundae: Top with caramel, chocolate syrup, or whipped cream.
- Milkshake: Blend with milk for a rich, chocolatey milkshake.
Pairing Suggestions
- Warm brownies or cookies
- Fresh strawberries or raspberries
- A drizzle of espresso for an affogato-style dessert
Storage, Freezing & Reheating Instructions
- Storage: Store in an airtight container in the freezer for up to two weeks.
- Softening: Let sit at room temperature for 5 minutes before scooping.
Common Mistakes to Avoid
Making homemade ice cream is a fun and rewarding process, but a few common mistakes can impact the final texture and flavor. Here are some pitfalls to watch out for so your Mini Egg Ice Cream turns out perfectly every time.
One of the biggest mistakes is not chilling the mixture before churning. If your ice cream base isn’t cold enough, it won’t freeze properly in the ice cream maker, leading to a grainy or icy texture. Always chill the mixture for at least one hour or, ideally, overnight before churning.
Another mistake is overloading the ice cream maker. Ice cream needs room to expand as it churns, so never fill your machine beyond two-thirds of its capacity. Overfilling can prevent proper aeration, resulting in dense, heavy ice cream instead of a light, creamy texture.
Some people make the mistake of adding mix-ins too early. If you put Mini Eggs into the ice cream base before it has thickened, they will sink to the bottom. Instead, wait until the last five minutes of churning before adding the chopped Mini Eggs. Whole Mini Eggs should be folded in after churning to keep their crunch.
Using low-fat dairy products is another common issue. This recipe relies on heavy whipping cream and whole milk for its rich, creamy texture. If you use low-fat milk or skip the heavy cream, the ice cream will be icy rather than smooth.
Lastly, not allowing the ice cream to firm up in the freezer can lead to soft, runny scoops. While it may be tempting to eat it right away, giving it at least two hours in the freezer allows it to set properly, giving you that perfect scoopable consistency.
By avoiding these common mistakes, you’ll ensure your homemade Mini Egg Ice Cream is smooth, creamy, and full of delicious chocolate crunch in every bite.
Pro Tips
To take your Mini Egg Ice Cream to the next level, here are some expert tips that will help you achieve the best texture, flavor, and presentation.
For the creamiest results, use high-quality vanilla extract. Cheap or artificial vanilla can leave a bitter aftertaste. A good-quality pure vanilla extract enhances the flavor and makes the ice cream taste more luxurious.
If you love an extra-crunchy texture, lightly toast the Mini Eggs before adding them. Place them on a baking sheet and bake at 300°F for about five minutes. This intensifies their chocolate flavor and adds a delightful crispiness to the candy shell.
Another great tip is to crush some Mini Eggs into fine dust and mix it into the base before churning. This gives the entire ice cream a subtle chocolate flavor, ensuring that every bite has a bit of Mini Egg magic, even without whole pieces.
When churning the ice cream, don’t rush the process. The longer it churns (up to the recommended time), the more air is incorporated, creating a lighter texture. If you stop churning too soon, the ice cream will be too dense and hard to scoop.
To avoid freezer burn, store the ice cream in an airtight container and press a piece of parchment paper directly on top before sealing the lid. This prevents ice crystals from forming on the surface and keeps the ice cream fresher for longer.
If you prefer a no-churn version, beat the cream until it forms soft peaks, then fold in the sweetened condensed milk and vanilla before freezing. This method still creates a creamy texture without needing an ice cream maker.
By following these pro tips, you’ll elevate your homemade Mini Egg Ice Cream and impress everyone with a dessert that looks and tastes like it came from a gourmet ice cream shop.
Frequently Asked Questions (FAQs)
Can I make this ice cream without an ice cream maker?
Yes! You can make a no-churn version by whipping 2 cups of heavy cream until soft peaks form, then folding in a can of sweetened condensed milk, vanilla extract, and crushed Mini Eggs. Pour the mixture into a container and freeze for at least four hours before serving.
How long does homemade ice cream last in the freezer?
Homemade ice cream is best enjoyed within two weeks, but it can last up to one month if stored properly in an airtight container with parchment paper pressed against the surface to prevent freezer burn.
Can I use different chocolate candies instead of Mini Eggs?
Absolutely! You can substitute Mini Eggs with M&M’s, crushed chocolate bars, or even cookie pieces for a fun variation. The key is to choose mix-ins that complement the vanilla ice cream base.
Why is my ice cream too hard to scoop?
If your ice cream is too hard, it may be due to a high water content in the dairy or a lack of air incorporation during churning. Let it sit at room temperature for five minutes before scooping, and try using a hot spoon to make scooping easier.
Can I use a lower-fat milk option?
For the best texture, stick with heavy whipping cream and whole milk. Using lower-fat milk will result in a more icy, less creamy consistency. If you want a slightly lighter version, you can use half-and-half, but avoid skim milk.
How do I prevent ice crystals from forming?
To prevent ice crystals, always cover the ice cream with a layer of parchment paper before sealing the container. Also, make sure your freezer is set to a consistent, cold temperature and avoid frequent opening and closing of the freezer door.
Conclusion & Call to Action
Mini Egg Ice Cream is the ultimate homemade treat that combines the nostalgic joy of Easter chocolate with the creamy indulgence of ice cream. The smooth vanilla base, paired with crunchy, candy-coated chocolate pieces, makes this a dessert that will impress both kids and adults alike. Whether you enjoy it in a cone, alongside a warm brownie, or straight from the container with a spoon, this ice cream is pure happiness in every bite.
What makes this recipe even better is how simple and foolproof it is. With just five ingredients and an ice cream maker, you can whip up a batch of creamy, dreamy goodness in no time. And if you don’t have an ice cream maker, the no-churn method ensures you can still enjoy homemade Mini Egg Ice Cream with minimal effort.
Now it’s your turn! Try making this Mini Egg Ice Cream and let us know how it turns out. Share your creations on social media, tag your friends, and don’t forget to leave a comment with your favorite variations or tips. If you love this recipe, be sure to check out other delicious homemade ice cream ideas on our blog. Happy churning!
Print
Mini Egg Ice Cream
- Total Time: 4 hours (including freezing)
- Yield: 8 servings 1x
- Diet: Vegetarian
Description
This Mini Egg Ice Cream is a creamy, homemade Easter dessert made with just five simple ingredients. The rich vanilla base is packed with crunchy, chocolate-coated Mini Eggs, creating the perfect balance of smooth and crispy textures.
Ingredients
- 4 cups heavy whipping cream
- ½ cup whole milk
- ¾ cup granulated sugar
- 2 teaspoons pure vanilla extract
- 1 cup chopped Mini Eggs
- 1 cup whole Mini Eggs
Instructions
- In a large bowl, whisk together the heavy whipping cream, milk, sugar, and vanilla extract until the sugar dissolves.
- Chill the mixture in the refrigerator for at least 1 hour.
- Chop 1 cup of Mini Eggs into small pieces.
- Pour the chilled mixture into an ice cream maker and churn according to the manufacturer’s instructions (about 20-25 minutes).
- Add the chopped Mini Eggs in the last 5 minutes of churning.
- Transfer the ice cream to an airtight container and fold in the whole Mini Eggs.
- Freeze for at least 2 hours before serving.
Notes
- For a no-churn version, freeze the mixture and stir every 30 minutes for 3-4 hours.
- Let the ice cream sit at room temperature for 5 minutes before scooping.
- Prep Time: 15 minutes
- Cook Time: 0 minutes
- Category: Dessert
- Method: Churning
- Cuisine: American