
Cream Cheese Mints are one of those classic treats that seem to show up at all the best celebrations. Whether it’s a wedding, baby shower, birthday party, or festive holiday gathering, these creamy, melt-in-your-mouth mints are always a hit. The best part? They only require five simple ingredients and a little bit of patience while they chill. No baking, no fuss—just pure sugary goodness.
I still remember the first time I made these mints. It was for my best friend’s bridal shower, and I was a bundle of nerves trying to pull off a picture-perfect dessert table. But as soon as I tasted that first batch, I knew these mints would be a hit. Their creamy, buttery texture paired with a refreshing hint of mint was so addictive, and the best part was how simple they were to make. They’ve since become my go-to recipe whenever I need an elegant, customizable treat that everyone will love.
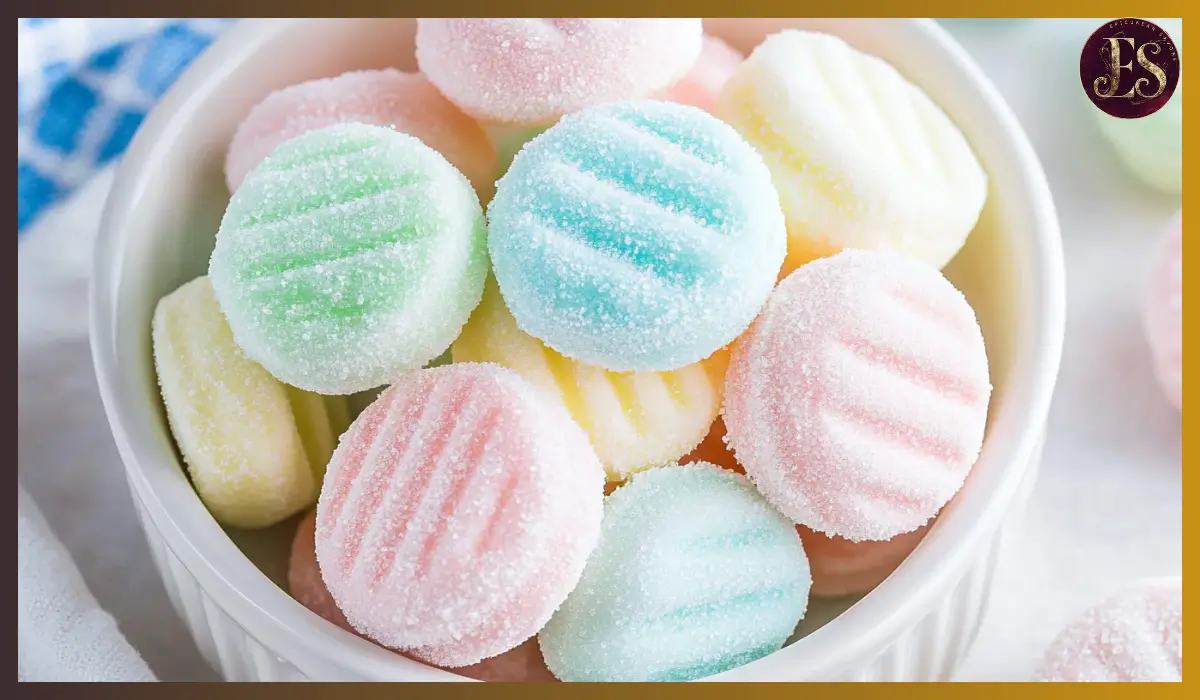
And the customization options? Endless. You can make them in any color to match your party theme or even experiment with different extracts to create fun flavor variations. They’re perfect for adding a personal touch to your dessert table, and guests always rave about how pretty (and delicious) they are. Plus, the fact that they can be made ahead of time makes them a total lifesaver when you’re busy prepping for a big event. So, if you’re looking for an easy, beautiful, and absolutely scrumptious sweet treat, you’re in the right place. Let’s dive into how to make these amazing Cream Cheese Mints!
Why You’ll Love This Recipe
There are so many reasons to fall in love with these Cream Cheese Mints. They’re one of those recipes that check all the boxes when it comes to flavor, simplicity, and overall wow factor. Here’s why you’re going to adore making (and eating) them:
Easy and Quick to Make: This recipe only requires five simple ingredients and no baking whatsoever. You’ll just mix, chill, and shape. It’s that simple!
Perfectly Customizable: Whether you want soft pastel colors for Easter, vibrant reds and greens for Christmas, or elegant white mints for a wedding, these mints can be customized to match any occasion. You can even swap out the mint extract for other flavors like vanilla, lemon, or almond to suit your taste.
Make-Ahead Convenience: With all the other things on your to-do list when hosting a special event, you’ll love that these mints can be made days ahead of time and stored until needed. Less stress, more fun!
Now that you know why you’ll love them, let’s talk about why these Cream Cheese Mints aren’t just delicious but also have a few surprising benefits.
Health Benefits
While Cream Cheese Mints are definitely a sweet treat, there are some positive aspects to consider when you enjoy them in moderation. Let’s break down why these mints are not all sugar and no substance:
Source of Energy: The powdered sugar in these mints provides a quick source of energy. If you’re feeling a bit sluggish, popping one of these mints can give you a gentle pick-me-up.
Calcium-Rich: Thanks to the cream cheese, you’re getting a bit of calcium with each bite. Calcium is essential for maintaining healthy bones and teeth, which makes indulging in these mints just a little bit more justifiable.
Mood Booster: Sugar may not be the healthiest ingredient, but in moderation, it can actually improve your mood by boosting serotonin levels. Plus, mint extract is known for its refreshing and invigorating properties, which can leave you feeling more awake and alert.
Reduced Artificial Ingredients: When you make these mints at home, you have full control over the ingredients. You can use high-quality, pure extracts and natural food coloring if you prefer to avoid artificial additives.
Digestive Benefits of Mint: Mint extract has some mild digestive benefits, including helping to relieve indigestion and soothing minor stomach discomfort.
Preparation Time, Servings, and Nutritional Information
Understanding how long a recipe will take and what you can expect from the final product is always helpful. Here’s a breakdown of what you need to know:
- Total Preparation Time: Approximately 2 hours and 30 minutes (includes chilling time).
- Active Preparation Time: About 20 minutes.
- Servings: This recipe makes approximately 80 small mints, depending on how large you shape them.
- Calories per Serving: About 45 calories per mint.
Nutritional Information (Per Mint):
- Calories: 45
- Carbohydrates: 8 grams
- Protein: 0.3 grams
- Fat: 1.5 grams
- Saturated Fat: 1 gram
- Cholesterol: 4 milligrams
- Sodium: 5 milligrams
- Sugars: 7 grams
It’s important to note that nutritional values can vary slightly depending on the exact ingredients used and how large or small you make each mint.
Ingredients List
The ingredients for these Cream Cheese Mints are incredibly straightforward. You might even have most of them sitting in your kitchen right now. Here’s what you’ll need:
- ¼ cup unsalted butter (softened): Adds richness and helps the mints hold their shape.
- 1 package cream cheese (8 ounces, softened): The star ingredient that provides the creamy, melt-in-your-mouth texture.
- 2 pounds powdered sugar (about 7 ½ cups, divided): The bulk of the sweetness and the main component of the mints.
- 1 ½ teaspoons pure mint extract: Adds that classic refreshing minty flavor. You can adjust the amount for a milder or stronger mint taste.
Step-By-Step Cooking Instructions
Making Cream Cheese Mints is a breeze. Follow these steps, and you’ll have perfectly shaped, delicious mints ready to impress your guests.
Prepare the Mixture
- In a large mixing bowl, combine the softened butter and cream cheese.
- Use an electric mixer to beat them together until the mixture is smooth and creamy. This should take about 3-4 minutes on medium speed.
- Add the mint extract and mix again until it’s fully incorporated. Adjust the mint extract to your desired intensity.
Add the Powdered Sugar
- Gradually add 7 cups of powdered sugar to the butter and cream cheese mixture.
- Start mixing on low speed to avoid a sugar cloud in your kitchen. As the sugar blends in, increase the speed to medium-high and beat until the mixture becomes fluffy and smooth, which should take about 2 minutes.
- The dough should be soft but firm enough to hold its shape. If it feels too sticky, gradually add more powdered sugar until the desired consistency is reached.
Divide and Color (If Desired)
- If you want to make different colored mints, divide the dough into separate bowls.
- Add a small drop of gel food coloring to each portion. Mix well until the color is evenly distributed.
- Cover the bowls with plastic wrap and refrigerate the mixture for at least 2 hours or overnight. Chilling helps the dough firm up, making it easier to shape.
Shape the Mints
- Line baking sheets with parchment paper and lightly dust with powdered sugar to prevent sticking.
- Scoop about ¾ teaspoon of the dough and roll it into a small ball using your hands.
- Place each ball onto the prepared baking sheet, leaving some space between each one.
- Dip a fork in powdered sugar and gently press down on the top of each mint to flatten slightly and create a decorative pattern.
Let Them Set
- Allow the mints to air dry and set at room temperature for about 4 hours. This step is crucial to ensure the mints become firm enough to handle.
Store or Serve
- Once the mints have set, transfer them to an airtight container. You can store them in the refrigerator for up to two weeks or freeze them for up to three months.

How to Serve
These Cream Cheese Mints are versatile and can be served in so many ways to enhance your dessert table or event presentation:
- On a Dessert Platter: Arrange the mints on a decorative tray, separated by colors if you made multiple shades.
- Gift Boxes or Jars: Pack them up in pretty boxes or jars tied with ribbons as thoughtful homemade gifts.
- Alongside Other Desserts: Pair them with cookies, cakes, or brownies to offer guests a refreshing palate cleanser.
Pairing Suggestions
Although these mints are delightful on their own, pairing them with other treats can make your dessert spread even more impressive:
- Beverages: Serve with hot coffee, tea, or cocoa. The mints add a refreshing, creamy contrast to warm drinks.
- Chocolate Desserts: Pair them with chocolate truffles, brownies, or fudge for a decadent dessert combination.
- Fruit Platters: Serve alongside fresh berries or fruit salads for a refreshing balance of flavors.
- Cookies: Complement them with shortbread or sugar cookies to create a variety of textures.
Storage, Freezing & Reheating Instructions
Proper storage is key to maintaining the freshness and texture of your Cream Cheese Mints. Here’s how to do it:
Storage:
- Store the mints in an airtight container, layered with parchment paper between them to prevent sticking.
- Keep them refrigerated for up to two weeks. They’re best enjoyed chilled but can be served at room temperature.
Freezing:
- To freeze, place the mints on a baking sheet in a single layer and freeze until solid.
- Transfer the frozen mints to a freezer-safe bag or container. They’ll keep well for up to three months.
Reheating (If Needed):
- Allow frozen mints to thaw in the refrigerator for a few hours before serving.
- Never microwave them, as this will ruin their texture.
Common Mistakes to Avoid
Even with a simple recipe like this one, there are a few pitfalls to watch out for:
- Using Too Much Food Coloring: Gel food coloring is potent, so start with a tiny amount and gradually increase until you reach the desired shade.
- Not Chilling the Mixture Long Enough: If you skip the chilling step, your dough will be too soft to handle properly.
- Overworking the Dough: Kneading or mixing the dough too much can cause the mints to become overly dense.
- Improper Storage: Failing to store the mints properly can cause them to dry out or become sticky.
- Always use airtight containers.
- Adding Too Much Extract: Mint extract can be strong. Taste the mixture before adding more to avoid an overpowering flavor.
Being aware of these common mistakes will help ensure your mints turn out perfectly every time.
Pro Tips
To make sure your Cream Cheese Mints turn out perfectly every time, here are some helpful pro tips:
Use Room Temperature Ingredients: Make sure your butter and cream cheese are properly softened before mixing. This ensures a smooth, lump-free dough.
Drain Excess Moisture: If your cream cheese has excess moisture, you may end up with sticky dough. Let it sit out on a paper towel for a few minutes if needed.
Gradually Add Powdered Sugar: Adding all the powdered sugar at once can make mixing difficult. Incorporate it slowly to achieve a smooth, fluffy consistency.
Test Your Extract: Not all mint extracts are created equal. Pure mint extract is ideal, but peppermint extract works well if you prefer a more intense flavor.
Keep Colors Separate: If making multiple colors, work with one batch at a time to avoid cross-contamination.
Frequently Asked Questions (FAQs)
Can I use low-fat cream cheese?
Yes, but it will affect the texture. Low-fat cream cheese tends to be softer and less creamy, which may result in a stickier dough. Full-fat cream cheese is recommended for best results.
Can I make these mints ahead of time?
Absolutely! Cream Cheese Mints can be made days in advance and stored in the refrigerator for up to two weeks or frozen for up to three months.
Can I use other extracts instead of mint?
Yes! You can swap the mint extract for vanilla, almond, lemon, or even strawberry extract for a fun twist. Just remember to adjust the quantity according to the strength of the extract.
How do I fix sticky dough?
If the dough is too sticky, add more powdered sugar, one tablespoon at a time, until it reaches a workable consistency. Refrigerating the dough also helps it firm up.
Why are my mints not setting properly?
This usually happens if the dough wasn’t chilled long enough or if there’s too much moisture in the cream cheese. Make sure to chill the dough for at least two hours before shaping.
Conclusion & Call to Action
Making these Cream Cheese Mints is as easy as it is rewarding. They’re creamy, rich, and refreshingly minty with a smooth, delicate texture that melts in your mouth. Whether you’re making them for a wedding, baby shower, holiday gathering, or just because, they’ll quickly become a crowd-pleaser that everyone looks forward to.
The best part? This recipe is so versatile. Change the colors, swap out the extract, or even shape them differently to match your event’s theme. The possibilities are endless. Plus, they’re perfect for gifting or keeping in the fridge for a sweet treat whenever you need one.
I can’t wait for you to try this recipe and experience the joy of making these delightful mints. They’re simple, fun, and practically foolproof when you follow the tips I’ve shared.
Once you’ve made your own batch, I’d love to hear how they turned out! Did you try different flavors or colors? Any creative serving ideas? Share your experience in the comments, and feel free to tag me on social media if you post your beautiful creations. I’m so excited to see how they turn out!
Happy mint-making! Ready to get started? Grab your ingredients and let’s do this!
Print
Cream Cheese Mints
- Total Time: 2 hours 20 minutes (including chilling time)
- Yield: Approximately 80 mints 1x
- Diet: Gluten Free
Description
These creamy, melt-in-your-mouth Cream Cheese Mints are incredibly easy to make with just five ingredients. Perfect for weddings, holidays, baby showers, and any special occasion. Customize them with different colors and flavors for a personalized treat!
Ingredients
- ¼ cup unsalted butter, softened
- 1 package cream cheese (8 ounces), softened
- 2 pounds powdered sugar (about 7 ½ cups, divided)
- 1 ½ teaspoons pure mint extract (or peppermint extract for a stronger flavor)
- Gel food coloring (optional, for desired colors)
Instructions
- Prepare the Mixture: In a large bowl, beat softened butter and cream cheese until smooth and creamy (about 3-4 minutes). Add mint extract and mix well.
- Add Powdered Sugar: Gradually add 7 cups of powdered sugar while mixing on low speed. Once incorporated, increase speed and beat until fluffy (about 2 minutes).
- Add Color (If Desired): Divide mixture into separate bowls for different colors. Add gel food coloring and mix thoroughly. Cover and refrigerate for at least 2 hours.
- Shape the Mints: Line baking sheets with parchment paper dusted with powdered sugar. Roll about ¾ teaspoon of dough into balls, place on sheet, and press down with a fork.
- Set and Store: Allow mints to air dry for about 4 hours. Store in an airtight container in the fridge for up to 2 weeks or freeze for up to 3 months.
Notes
- Gel food coloring works best to prevent excess moisture.
- Test mint flavor before chilling and adjust if needed.
- For a firmer dough, add more powdered sugar, one tablespoon at a time.
- Prep Time: 20 minutes
- Cook Time: 0 minutes (No Bake)
- Category: Desserts, Sweets
- Method: No-Bake
- Cuisine: American