
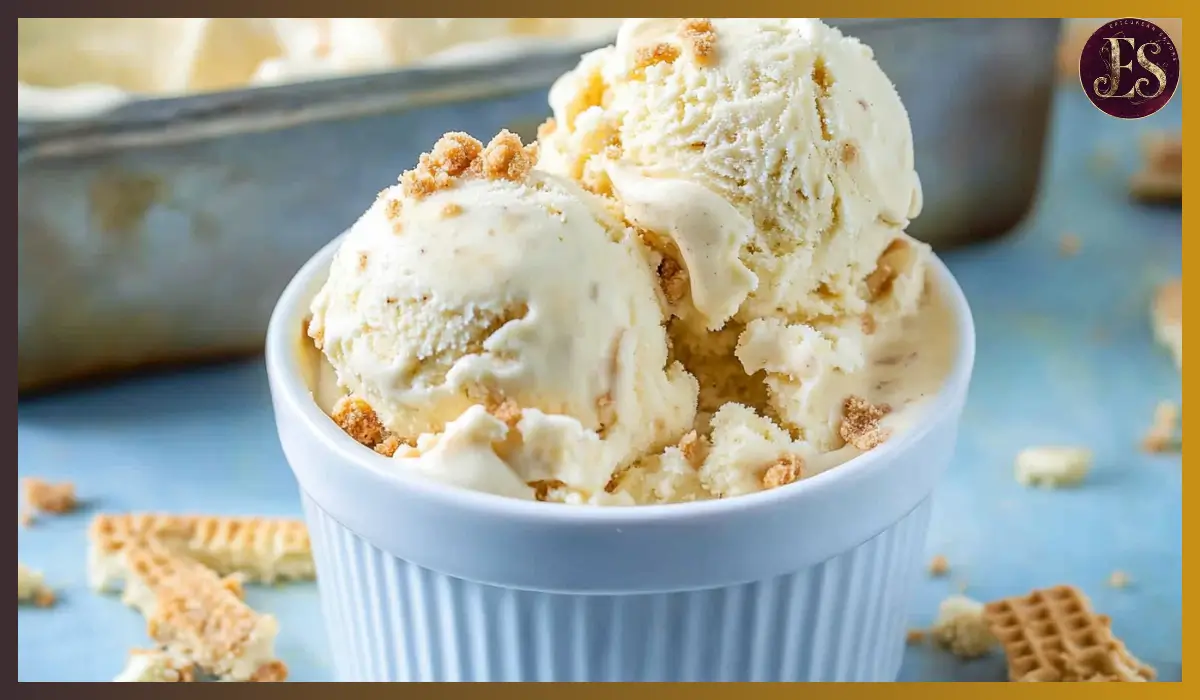
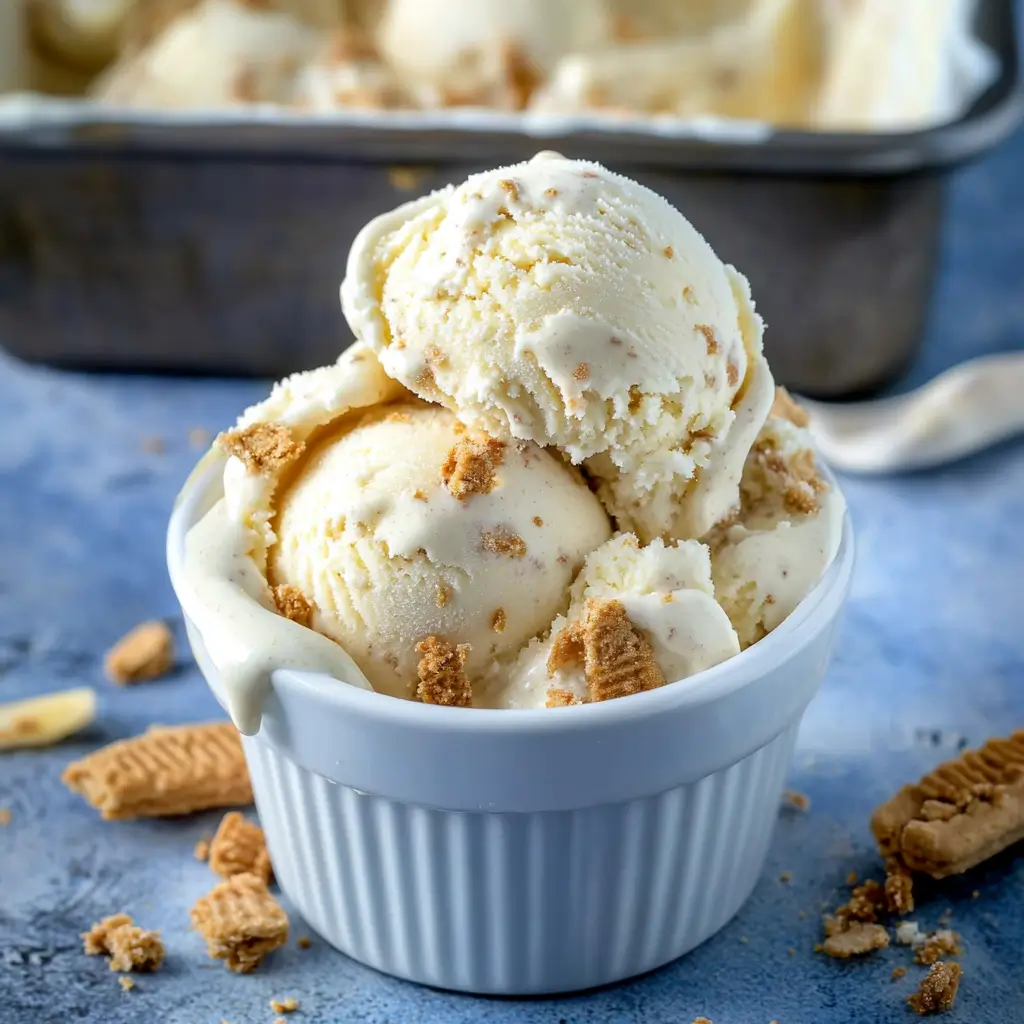
There’s something undeniably nostalgic about banana pudding—the creamy texture, the sweet banana flavor, and those crunchy vanilla wafers that somehow get even better when softened slightly by the pudding. Now imagine all of that goodness transformed into a frozen treat. That’s exactly what this No Churn Banana Ice Cream delivers.
This recipe, inspired by Tornadough Alli, is an easy, no-fuss dessert that brings banana pudding vibes straight to your freezer. It’s made with just a handful of simple ingredients and doesn’t require any special equipment—no ice cream maker needed. The best part? It tastes like summer in a bowl, with a cool, creamy base and delightful bits of banana and crushed vanilla wafers in every bite.
The first time I made this ice cream, it was an impromptu attempt to use up some bananas that were a little too ripe for snacking. I didn’t expect much—but after one spoonful, I was hooked. My kids declared it their new favorite dessert, and now it’s a staple in our warm-weather rotation. Whether you’re making it for a backyard BBQ, a family movie night, or just because you deserve something sweet, this recipe checks every box.
Not only is it incredibly simple to throw together, but it also freezes beautifully and tastes even better the next day. So let’s dive in and talk about why this recipe needs to be your next kitchen adventure.
Why You’ll Love This Recipe
There are countless reasons to love this No Churn Banana Ice Cream, but let’s break it down into the top highlights that make it such a crowd-pleaser.
It’s unbelievably easy
You don’t need an ice cream machine, and there’s zero cooking involved. All it takes is whipping some cream, mixing a few ingredients, folding everything together, and popping it in the freezer. That’s it.
Minimal ingredients, maximum flavor
With just six main ingredients, you get a dessert that’s creamy, sweet, and packed with banana pudding flavor. The banana pudding mix adds that nostalgic Southern twist, while the real banana slices bring freshness to every bite.
Family-friendly and customizable
This ice cream is a guaranteed hit with kids and adults alike. You can easily adapt it based on your preferences—add chocolate chips, swirl in peanut butter, or skip the wafers for a smoother texture. It’s your dessert, your rules.
Great for make-ahead desserts
Because it needs to freeze for several hours, you can make it the night before a party or gathering. It also holds up well in the freezer for up to two weeks, making it a convenient option for last-minute sweet cravings.
The perfect banana pudding twist
If you love banana pudding, this frozen version will win your heart. The flavor is spot on, and the added crunch from the vanilla wafers adds a satisfying contrast to the creamy base.
Health Benefits
While ice cream isn’t typically categorized as a health food, this particular version does have a few redeeming qualities worth noting.
Potassium-rich bananas
Bananas are the star of the show, and they’re loaded with potassium, vitamin C, and dietary fiber. Even in small amounts, they offer a nutritional boost to the dessert.
Homemade over store-bought
Making ice cream at home allows you to control the ingredients. You can use organic heavy cream, choose a pudding mix with fewer additives, or even add in more fresh fruit if you’d like.
No artificial preservatives
Unlike many store-bought ice creams that rely on stabilizers and preservatives to maintain shelf life and texture, this homemade version is free from those extras.
Lower sugar options
You can substitute the sweetened condensed milk with a lower-sugar or keto-friendly alternative if needed, making it more adaptable to different dietary needs.
Preparation Time, Servings, and Nutritional Information
Total Time:
15 minutes prep + 4–6 hours freezing time
Servings:
8 servings
Nutritional Information (per serving):
Calories: 320
Protein: 3g
Fat: 20g
Carbohydrates: 32g
Sugar: 25g
Fiber: 1g
Ingredients List
To make this deliciously creamy banana ice cream, you’ll need the following ingredients:
- 2 cups heavy cream – This is the base of the ice cream, providing the richness and structure once whipped.
- 1 (14-ounce) can sweetened condensed milk – Adds sweetness and helps create that soft, scoopable texture.
- 1 (3.4-ounce) box banana pudding mix (dry) – Be sure to use the dry mix; this adds intense banana flavor and helps with thickening.
- 1 teaspoon vanilla extract – Enhances the overall flavor and brings balance to the sweetness.
- 1 large banana, sliced and halved – Brings a fresh banana taste and soft texture to each bite.
- 1 cup broken or crushed vanilla wafers – For that classic banana pudding crunch and flavor contrast.
Optional: Add extra banana slices or wafers on top before freezing for an attractive finish.
Step-By-Step Cooking Instructions
Making no churn banana ice cream couldn’t be easier. Follow these steps, and you’ll have a freezer full of banana pudding heaven in no time.
1. Whip the heavy cream
In a large mixing bowl, whip the heavy cream using a hand mixer or stand mixer until stiff peaks form. This step is crucial as it gives your ice cream that fluffy, airy texture. Set the whipped cream aside once it’s ready.
2. Mix the base ingredients
In a separate large bowl, whisk together the sweetened condensed milk, banana pudding mix, and vanilla extract until fully combined. The mixture will be thick and smooth with a distinct banana aroma.
3. Fold the mixtures together
Gently fold the pudding mixture into the whipped cream using a spatula. Don’t overmix—it’s okay if there are still visible swirls of white cream. The goal is to combine everything without deflating the whipped cream.
4. Add the banana and wafers
Carefully fold in the sliced banana and broken vanilla wafers. Try to distribute them evenly throughout the mixture, but again, avoid overmixing.
5. Transfer to a pan and top
Pour the mixture into a standard 9×5-inch loaf pan. Smooth the top with your spatula and sprinkle extra crushed wafers on top for a crunchy finish.
6. Freeze
Cover the pan tightly with plastic wrap or foil and freeze for at least 4 to 6 hours, or until fully set. For best texture, let it freeze overnight.
7. Serve and enjoy
Once frozen, scoop into bowls or cones and enjoy the cool, creamy magic.
How to Serve
Here are some fun and delicious ways to serve your homemade banana ice cream:
- Scoop into bowls and top with extra crushed wafers and fresh banana slices.
- Serve in waffle cones for a classic ice cream shop feel.
- Use it as a filling for ice cream sandwiches with soft sugar cookies.
- Top a warm brownie or blondie with a generous scoop for a decadent dessert.
- Add a drizzle of caramel sauce or a dollop of whipped cream for extra indulgence.
Pairing Suggestions
This no-churn banana ice cream pairs beautifully with a variety of accompaniments. Here are a few ideas:
Side treats:
- Chocolate chip cookies
- Mini banana muffins
- Shortbread biscuits
Beverages:
- Chilled milk or banana milkshake
- Iced coffee or cold brew
- Mint-infused lemonade for a refreshing contrast
Fruit pairings:
- Fresh berries like strawberries or raspberries
- Grilled pineapple or mango for a tropical twist
Storage, Freezing & Reheating Instructions
Storing in the freezer
Store the ice cream in an airtight container in the freezer. It’s best enjoyed within 10–14 days for optimal flavor and texture.
Freezing tips
To prevent freezer burn, press a layer of plastic wrap directly onto the surface of the ice cream before sealing with the lid. You can also portion the ice cream into individual containers for quick grab-and-go servings.
Reheating (softening) for serving
Remove the ice cream from the freezer and let it sit at room temperature for 5–10 minutes before scooping. This allows it to soften slightly, making it easier to serve.
Common Mistakes to Avoid
Even with a simple recipe like this, a few common mistakes can impact the final result. Here’s what to watch out for:
- Overmixing the whipped cream – This can deflate it and lead to dense ice cream. Fold gently.
- Using prepared pudding – Be sure to use the dry mix directly. Making it into pudding first will ruin the texture.
- Skipping the banana – The fresh banana adds flavor and texture, so don’t leave it out unless substituting with another fruit.
- Not letting it freeze long enough – It needs at least 4 hours, but overnight is best for a firm, scoopable texture.
- Forgetting to cover it well – Air exposure can cause freezer burn and affect the flavor.
Pro Tips
- Chill your mixing bowl and beaters before whipping the cream for quicker, fluffier results.
- Use a silicone spatula for folding to prevent overmixing and to scrape every bit of goodness into your pan.
- Layer extra bananas and wafers between scoops in the pan for a surprise crunch in every bite.
- Try adding a swirl of peanut butter or chocolate syrup before freezing for a fun flavor twist.
- Label your container with the date so you know how long it’s been in the freezer.
Frequently Asked Questions (FAQs)
Can I use homemade pudding instead of the boxed mix?
This recipe relies on the dry pudding mix to help thicken and flavor the ice cream. Homemade pudding may alter the texture, so it’s not recommended here.
What if I don’t have heavy cream?
You’ll need heavy cream or whipping cream to achieve the right texture. Milk or half-and-half won’t whip properly.
Is it okay to leave out the vanilla wafers?
Yes, you can skip them if you prefer a smoother texture or replace them with graham crackers or shortbread.
Can I use frozen bananas?
Fresh bananas are best for texture, but if you use frozen, thaw them completely and drain any excess liquid.
Does it taste like artificial banana?
Not at all. The pudding mix provides a balanced banana flavor, and the fresh banana adds natural sweetness.
How long does this ice cream last in the freezer?
It’s best eaten within 2 weeks, although it can technically last longer. Over time, it may develop ice crystals.
Can I make this dairy-free?
Yes, use coconut cream in place of heavy cream and a dairy-free condensed milk alternative. Choose a vegan banana pudding mix if available.
How do I make it less sweet?
Use unsweetened whipped cream and reduce the amount of condensed milk slightly. Keep in mind this may affect the texture.
What other mix-ins can I try?
Crushed graham crackers, mini chocolate chips, chopped nuts, or swirls of nut butter work well.
Can I double the recipe?
Absolutely. Use a larger pan or divide between two containers. Just make sure you have enough freezer space.
Conclusion & Call to Action
This No Churn Banana Ice Cream is everything you love about banana pudding, served in frozen dessert form. It’s creamy, flavorful, and ridiculously easy to make—no fancy tools or complicated steps required. Whether you’re new to homemade ice cream or already a pro, this recipe will earn a permanent spot in your summer dessert lineup.
Ready to give it a try? Gather your ingredients, whip up a batch, and let the freezer do the rest. When you scoop out that first bite and taste the creamy banana goodness with bits of crunchy wafer, you’ll know you made the right call.
If you make this recipe, I’d love to hear how it turned out! Leave a comment below, or tag me in your creations on social media so I can see your delicious results.
Print
No Churn Banana Ice Cream
- Total Time: 6 hours (including freeze time)
- Yield: 8 servings 1x
- Diet: Vegetarian
Description
This creamy no churn banana ice cream captures the classic flavor of banana pudding with real banana slices and crunchy vanilla wafers—no machine needed.
Ingredients
-
2 cups heavy cream
-
1 (14 oz) can sweetened condensed milk
-
1 (3.4 oz) box banana pudding mix (dry)
-
1 teaspoon vanilla extract
-
1 large banana, sliced and halved
-
1 cup broken/crushed vanilla wafers
Instructions
-
Whip the heavy cream in a large bowl until stiff peaks form.
-
In a separate bowl, whisk together the condensed milk, banana pudding mix, and vanilla.
-
Gently fold the pudding mixture into the whipped cream.
-
Fold in sliced banana and vanilla wafers.
-
Transfer mixture to a loaf pan and top with extra wafers.
-
Cover and freeze for 4–6 hours or until firm.
Notes
- Use dry banana pudding mix, not prepared pudding.
- Let ice cream sit at room temperature for 5–10 minutes before serving.
- Add peanut butter swirls or chocolate chips for fun flavor variations.
- Prep Time: 15 minutes
- Cook Time: 0 minutes
- Category: Dessert
- Method: No Churn / Freezer
- Cuisine: American