
There’s something incredibly nostalgic and comforting about Oreos. Maybe it’s the way they crunch when you bite into them or the perfectly sweet, creamy filling. But when you take those classic cookies and transform them into a luscious, layered dessert, you get something truly next-level. That’s exactly what this Heavenly Oreo Dessert delivers—a show-stopping, no-bake treat that feels like a hug in dessert form.
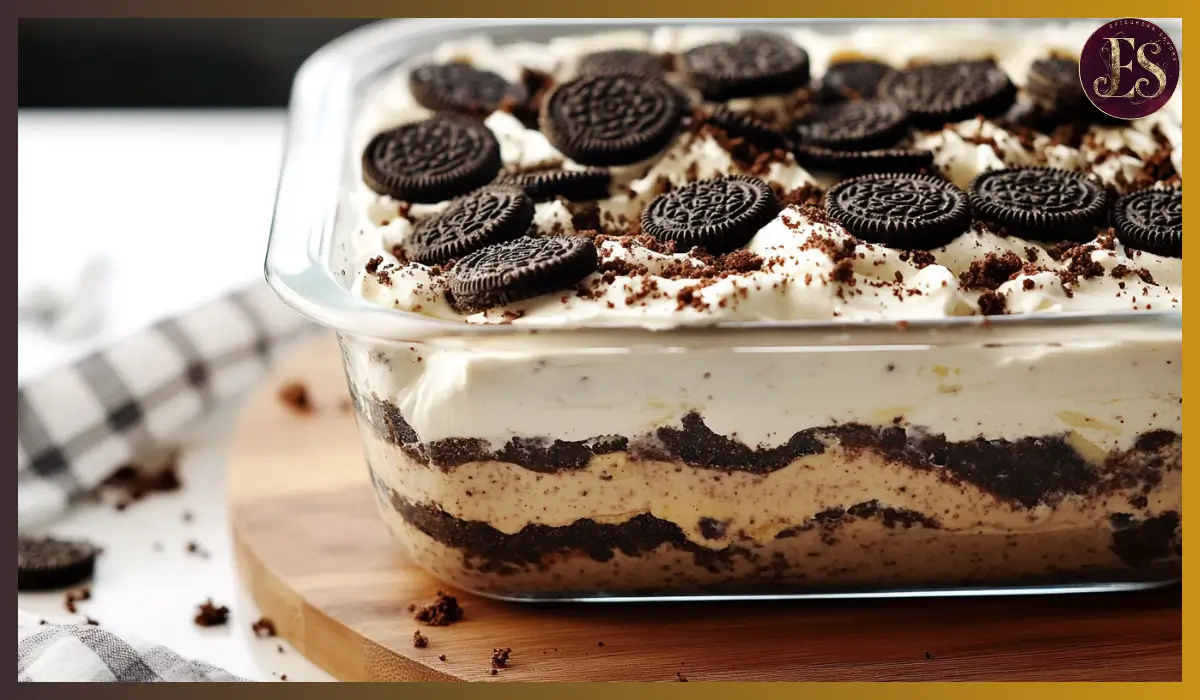
This Oreo Dessert recipe brings together a buttery Oreo crust, a tangy-sweet cream cheese layer, rich chocolate pudding, and fluffy whipped topping. The whole thing is chilled until it sets, giving you perfectly distinct layers with every spoonful. It’s a crowd-pleaser that’s elegant enough for dinner parties but easy enough to throw together on a weekday.
I first made this Oreo Dessert for a friend’s potluck, and to this day, people still ask me for the recipe. What I love most is how deceptively simple it is to make. It looks like it took hours of work, but you won’t even need to turn on your oven. And let’s be honest—when you combine Oreos and chocolate pudding, how could you possibly go wrong?
So whether you’re planning a birthday party, bringing dessert to a family gathering, or just want something indulgent to enjoy after dinner, this dessert is going to be your new go-to.
Why You’ll Love This Recipe
This no-bake Oreo dessert is the kind of sweet treat that wins over everyone at the table. Here are just a few reasons why you’ll love it:
- Simple Ingredients: Everything in this dessert can be found at your local grocery store. From instant pudding mix to Cool Whip and Oreos, you don’t need anything fancy to make magic happen.
- No Baking Required: If turning on the oven isn’t your thing, you’re in luck. This dessert sets in the fridge, which makes it perfect for hot summer days or when your oven is already full.
- Texture Galore: Between the crunchy Oreo crust, creamy cheesecake filling, and silky pudding layer, every bite is loaded with texture and flavor.
- Make-Ahead Friendly: You can prep this dessert a day in advance, letting it chill overnight. That makes it a fantastic choice for parties, holidays, and gatherings.
- Family Favorite: It’s rich without being overwhelming, and even kids can’t resist the Oreo goodness.
- Customizable: Want to swap the chocolate pudding for vanilla or mix in some peanut butter? Go for it. This base recipe is just the beginning of endless variations.
In short, this dessert isn’t just delicious—it’s approachable, adaptable, and always a hit.
Health Benefits
While this dessert is definitely an indulgence, it’s worth mentioning that enjoying a sweet treat now and then can absolutely be part of a balanced lifestyle. Here’s how this dessert fits into a feel-good approach to eating:
- Portion Control Friendly: Because it’s rich and satisfying, a small serving goes a long way in satisfying a sweet tooth.
- Stress-Free Preparation: Reducing stress around food is a big part of wellness. This recipe comes together without complicated steps, allowing you to enjoy the process.
- Mood-Boosting Ingredients: Chocolate has long been linked to improved mood thanks to compounds that trigger feel-good brain chemicals like serotonin.
Of course, this dessert isn’t meant to be a health food, but when enjoyed in moderation, it can bring a lot of joy—which is an important part of overall well-being.
Preparation Time, Servings, and Nutritional Information
Total Time:
- Prep Time: 20 minutes
- Chill Time: 2 hours
Servings: 12 to 15 generous portions
Nutritional Information (Per Serving):
- Calories: 410
- Protein: 3g
- Carbohydrates: 40g
- Fat: 26g
- Fiber: 1g
- Sugar: 28g
Ingredients List
To bring this Oreo Dessert to life, here’s everything you’ll need:
- 1 package (15.35 ounces) Double-Stuffed Oreo Cookies – These form the crust and the topping. Their rich chocolate flavor and creamy filling add sweetness and structure.
- ½ cup melted butter – Used to bind the crushed Oreos into a solid crust. Make sure it’s fully melted for even distribution.
- 2 boxes (3.9 ounces each) instant chocolate pudding mix – This provides a smooth and velvety middle layer. Use instant, not cook-and-serve, for best results.
- 3¼ cups cold milk – Whisked with the pudding mix to create that perfect creamy texture.
- 2 containers (8 ounces each) Cool Whip, thawed – One tub goes into the cream cheese layer, and the other tops everything off with a light, airy finish.
- 1 block (8 ounces) cream cheese, softened – Brings tanginess and creaminess to the second layer. Make sure it’s at room temperature for easier mixing.
- 1 cup powdered sugar – Sweetens the cream cheese layer and helps it become perfectly smooth and fluffy.
Step-By-Step Cooking Instructions
Let’s walk through the steps together so you feel confident and ready to tackle this Oreo Dessert.
Prepare the Oreo Crust
- Place all the Oreo cookies into a large zip-top bag.
- Use a rolling pin or the bottom of a heavy pan to crush them into fine crumbs. You want small pieces, but a few larger bits are okay for texture.
- Reserve about 1/3 of the crumbs for the topping and set them aside.
- Pour the remaining crumbs into a 9×13-inch baking dish.
- Drizzle the melted butter over the crumbs and stir until everything is evenly coated.
- Press the mixture firmly into the bottom of the dish using the back of a spoon or the bottom of a glass. This will be your crust.
Make the Chocolate Pudding
- In a medium mixing bowl, combine the pudding mixes with the cold milk.
- Whisk for 2 to 3 minutes until it begins to thicken.
- Cover and place in the refrigerator to set while you prepare the next layer.
Create the Cream Cheese Layer
- In another medium bowl, use a hand mixer to beat the softened cream cheese until smooth and creamy.
- Slowly add in the powdered sugar, mixing continuously to avoid clumps.
- Once fully incorporated, fold in one container of thawed Cool Whip. Use a spatula to gently fold the mixture together until light and fluffy.
- Spread this cream cheese mixture evenly over the Oreo crust in your baking dish.
Add the Pudding Layer
- Retrieve the chocolate pudding from the fridge. It should now be thick and spreadable.
- Carefully spread it over the cream cheese layer, making sure not to mix the layers together.
Top It Off
- Spread the second container of Cool Whip over the pudding layer, smoothing it out with a spatula.
- Sprinkle the reserved Oreo crumbs on top as a finishing touch.
Chill and Serve
- Cover the dish tightly with plastic wrap or a lid.
- Refrigerate for at least 2 hours so the dessert can fully set.
- When ready to serve, slice into squares and enjoy every dreamy bite.

How to Serve
Here are a few fun and delicious ways to serve your Heavenly Oreo Dessert:
- Serve chilled with an extra dollop of whipped topping for added flair.
- Top each serving with a drizzle of chocolate syrup or a sprinkle of mini chocolate chips.
- For a more elegant presentation, serve in clear parfait cups to show off the beautiful layers.
Pairing Suggestions
While this dessert is rich on its own, a few thoughtful pairings can make it even better:
- Drinks: Serve with a glass of cold milk, hot chocolate, or a creamy milkshake for a kid-friendly combo. For adults, try decaf coffee or a spiced chai latte.
- Light Sides: A bowl of fresh berries can balance the richness, adding a pop of brightness.
- Crunchy Counterparts: Add a few salted pretzels on the side for a sweet-and-salty contrast.
Storage, Freezing & Reheating Instructions
Storage:
- Store leftovers in an airtight container in the refrigerator for up to 4 days.
- Keep it tightly covered to prevent the layers from drying out or absorbing fridge odors.
Freezing:
- You can freeze this dessert, although the texture of Cool Whip may change slightly.
- To freeze, wrap the dish tightly in plastic wrap and then aluminum foil.
- Freeze for up to 1 month. Thaw in the fridge overnight before serving.
Reheating:
- Since this is a cold dessert, reheating is not needed. Serve straight from the fridge for best results.
Common Mistakes to Avoid
- Not Softening the Cream Cheese: If your cream cheese is too cold, it won’t blend smoothly, resulting in lumps.
- Using Cook-and-Serve Pudding: Stick to instant pudding mix. Cook-and-serve won’t set properly for this chilled dessert.
- Skipping Chill Time: Be sure to chill for at least 2 hours, or the layers may not hold their shape.
- Overmixing the Cool Whip: Gently fold it in to maintain that airy, fluffy texture.
- Using Warm Butter: Make sure the melted butter has cooled slightly before mixing it with the Oreo crumbs to avoid greasy clumps.
Pro Tips
- Crush the Oreos in a food processor for finer crumbs if you prefer a smoother crust.
- Want to boost the chocolate flavor? Add a layer of mini chocolate chips or shaved chocolate between the pudding and Cool Whip layers.
- For cleaner slices, use a sharp knife dipped in hot water. Wipe it clean between each cut.
- Let the dessert sit at room temperature for 5 minutes before slicing if it’s too firm straight from the fridge.
- Double the recipe and make it in two pans for large gatherings—it disappears fast!
Frequently Asked Questions (FAQs)
Can I use regular Oreos instead of Double-Stuffed?
Yes, you can use regular Oreos. The crust will still work well, but you might get a slightly less creamy texture.
Can I use homemade whipped cream instead of Cool Whip?
Absolutely. Just make sure it’s stabilized (by adding a bit of powdered sugar or cream cheese) so it holds its shape when chilled.
What if I only have one pudding mix box?
You can halve the pudding layer or use it as a thinner middle layer. It will still be delicious, just less rich.
Can I make this dessert ahead of time?
Yes! It’s even better when made a day ahead. The flavors have time to meld, and the layers hold together beautifully.
Is this recipe gluten-free?
No, traditional Oreos contain gluten. However, you can use gluten-free sandwich cookies to make this a gluten-free treat.
Can I add extra toppings?
Of course. Crushed toffee, chocolate chips, or even caramel drizzle make great additions.
Can I substitute the cream cheese?
Mascarpone can be used as a substitute, but it has a slightly different flavor and texture.
Will this dessert hold up in warm weather?
It holds up well when chilled, but in heat, it can soften quickly. Keep it refrigerated until just before serving.
Can I use chocolate-flavored Cool Whip?
Yes! That adds an extra chocolatey twist to the top layer.
How long will it last in the fridge?
Stored properly, it will last up to four days, but it’s usually gone much sooner!
Conclusion & Call to Action
If you’re looking for a quick, no-fuss dessert that delivers on every level—flavor, texture, and presentation—this Heavenly Oreo Dessert is it. It’s rich, creamy, crunchy, and so easy to make, even if baking isn’t your thing. Perfect for birthdays, holidays, or just a cozy night in, this is the kind of dessert people remember and ask for again and again.
I’d love to hear how it turns out for you! If you try this recipe, drop a comment below or share your creation on social media and tag me. Your photos, tweaks, and feedback always make my day. Happy dessert-making!
Print
Heavenly Oreo Dessert
- Total Time: 2 hours 20 minutes (includes chilling)
- Yield: 12–15 servings 1x
- Diet: Vegetarian
Description
A no-bake layered dessert made with crushed Oreo cookies, a creamy cheesecake filling, rich chocolate pudding, and fluffy whipped topping. Perfect for parties, holidays, and quick sweet cravings!
Ingredients
-
1 package (15.35 oz) Double-Stuffed Oreo cookies
-
½ cup melted butter
-
2 boxes (3.9 oz each) instant chocolate pudding mix
-
3¼ cups cold milk
-
2 containers (8 oz each) Cool Whip, thawed
-
1 block (8 oz) cream cheese, softened
-
1 cup powdered sugar
Instructions
-
Crush Oreos and set aside 1/3 for topping.
-
Mix remaining crumbs with melted butter and press into a 9×13-inch pan.
-
Whisk pudding mix with cold milk and refrigerate.
-
Beat cream cheese until smooth, mix in powdered sugar, then fold in one tub of Cool Whip. Spread over crust.
-
Spread set pudding over cream cheese layer.
-
Add second Cool Whip tub on top.
-
Sprinkle reserved Oreos over the top.
-
Chill for at least 2 hours before serving.
Notes
- Use instant pudding only.
- Softened cream cheese ensures a smooth filling.
- Dessert is best when chilled overnight.
- Prep Time: 20 minutes
- Cook Time: 0 minutes
- Category: Dessert
- Method: No-Bake
- Cuisine: American