
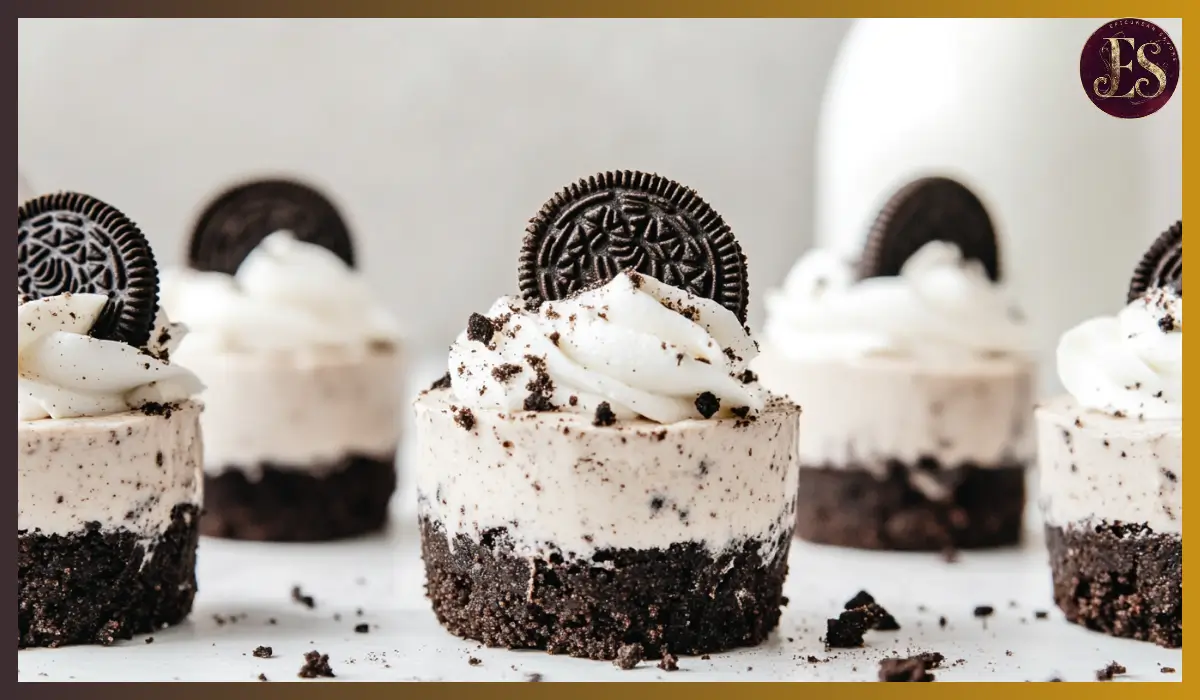
There’s something undeniably satisfying about a dessert that looks fancy, tastes decadent, and comes together without even turning on the oven. Enter these Mini No-Bake Oreo Cheesecakes: the perfect little indulgences that check every box. Whether you’re looking for a treat to serve at a dinner party, impress your coworkers at a potluck, or just spoil yourself with something sweet at home, these creamy, cookies-and-cream bites are guaranteed to hit the spot.
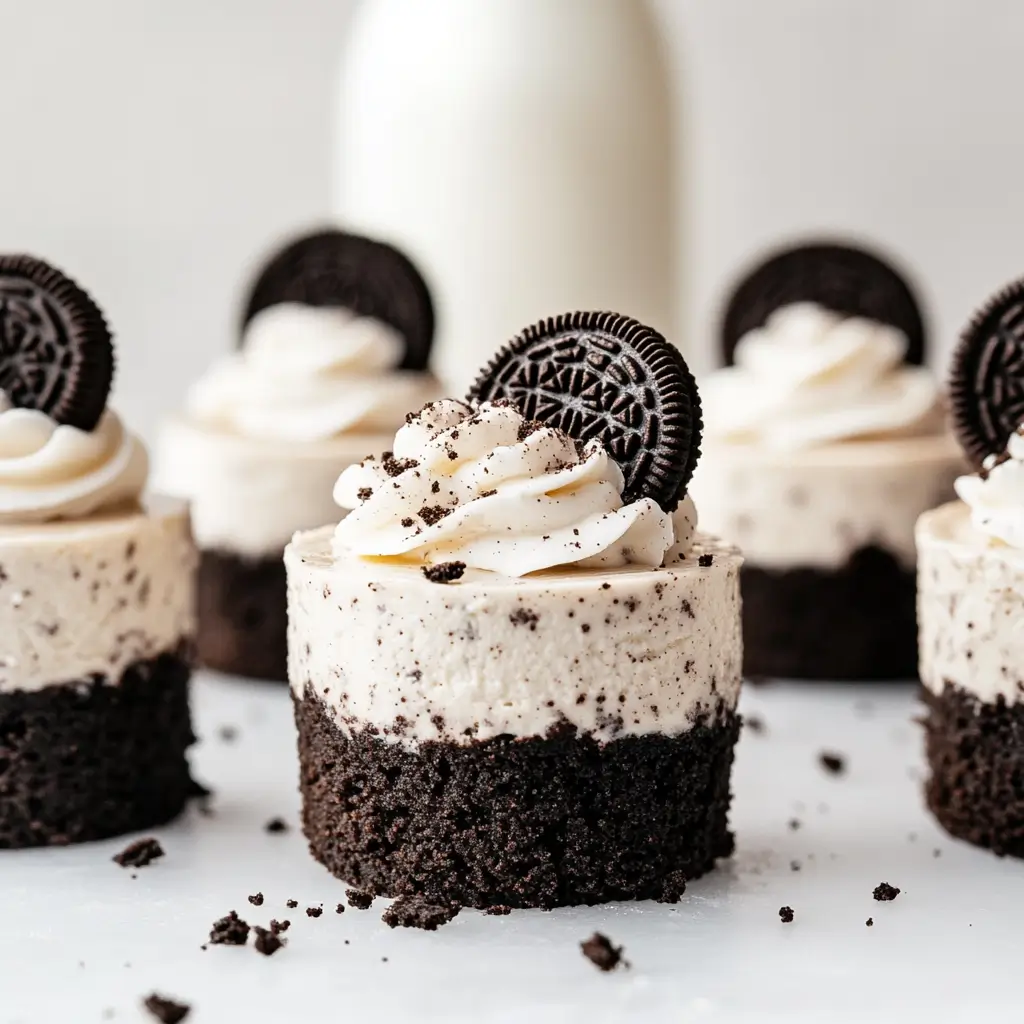
The best part? They’re vegan, which means they’re dairy-free and suitable for many dietary preferences without sacrificing a bit of the classic Oreo flavor we all love. The crust is made from crushed Oreo cookies and dairy-free butter, creating a crunchy base that supports the rich, whipped filling. The cheesecake layer is luxuriously smooth, with crushed Oreos folded in for texture and flavor, and the topping brings it all together with a pretty swirl of dairy-free whipped cream and even more cookie crumble.
I first made theseMini No-Bake Oreo Cheesecakes for a friend’s birthday party. Everyone assumed I had spent hours baking and decorating, but I secretly whipped them up in under 30 minutes and let the freezer do all the heavy lifting. Since then, they’ve become my go-to dessert when I want to wow without the stress. They’re easy, they’re cute, and they disappear faster than you can say “cookies and cream.”
Why You’ll Love This Recipe
These Mini No-Bake Oreo Cheesecakes are an absolute dream for both beginner bakers and seasoned pros. Here’s why you’ll find yourself making them again and again:
No baking required: This recipe is entirely no-bake, making it a perfect option for warm weather when you don’t want to heat up the kitchen.
Simple ingredients: You’ll only need a handful of basic, easy-to-find items. Most of them are pantry staples if you’re already into dairy-free or vegan cooking.
Make-ahead magic: These can be prepared in advance and stored in the freezer, which means no last-minute scrambling before your guests arrive.
Portable and shareable: Their individual size makes them ideal for gatherings, parties, or even lunchbox desserts.
Creamy and crunchy combo: The texture contrast between the smooth cheesecake filling and the crisp cookie base is incredibly satisfying.
Kid-approved and adult-adored: Everyone, regardless of age, gets excited about Oreos—and this dessert takes them to a whole new level.
Customizable: You can swap out the Oreos for any sandwich cookie you like or add a flavor twist like peppermint or peanut butter.
These little cheesecakes deliver a big punch of flavor, and because they’re served individually, they look elegant while also being super convenient.
Health Benefits
While this Mini No-Bake Oreo Cheesecakes recipe is definitely a treat, it has a few perks that make it a better-for-you dessert choice, especially compared to traditional cheesecake.
Dairy-free and vegan: This recipe is entirely free of dairy, making it ideal for those with lactose intolerance or those following a plant-based diet. Vegan cream cheese and whipping cream alternatives tend to be lower in saturated fats compared to conventional options.
Portion-controlled: Each mini cheesecake is a perfect individual serving. You get all the indulgence without the temptation of overdoing it with a large slice.
Cholesterol-free: Since this dessert doesn’t contain any animal products, it’s naturally free of dietary cholesterol.
Fewer refined sugars: While Oreos do contain sugar, the overall recipe doesn’t rely heavily on added sweeteners, thanks to the sweetness already present in the cookies.
Of course, this is still a dessert, and moderation is key. But it’s always a win when you can enjoy something so satisfying while still aligning with your dietary needs and preferences.
Preparation Time, Servings, and Nutritional Information
Total Time:
Prep time: 25 minutes
Chilling time: 4 hours (freezer)
Total: 4 hours 25 minutes
Servings:
This recipe makes 6 mini cheesecakes.
Nutritional Info (Per Serving):
Calories: 290
Protein: 2g
Carbs: 22g
Fat: 20g
Saturated Fat: 6g
Sugar: 10g
Fiber: 1g
Ingredients List
For the Base:
- 150g Oreo cookies – Crushed to form the firm and flavorful crust.
- 50g dairy-free butter or margarine – Melted and mixed with the cookies to bind them together.
For the Cheesecake Filling:
- 260g dairy-free whipping cream (such as Elmlea Plant-Based Double) – Whipped to give volume and silkiness.
- 160g dairy-free cream cheese – Adds richness and the signature cheesecake tang.
- 8 Oreo cookies – Crushed and folded in for extra texture and that cookies-and-cream flavor.
For the Topping:
- 20g dairy-free whipping cream – Whipped and piped on top for that finishing flourish.
- 4 Oreo cookies – Used for decoration and added crunch.
Make sure all ingredients are cold before you begin for the best texture and consistency.
Step-By-Step Cooking Instructions
1. Prepare the Base
- Start by melting the dairy-free butter in a small saucepan over low heat. Keep an eye on it to avoid burning.
- While the butter melts, crush the Oreo cookies into fine crumbs using a food processor. If you don’t have one, place the cookies in a zip-top bag and crush them with a rolling pin.
- Combine the cookie crumbs and melted butter in a mixing bowl. Stir until the mixture resembles wet sand.
- Spoon the crumb mixture evenly into a muffin tin lined with cupcake papers or silicone molds. Use the back of a spoon to press the mixture down firmly to create a compact base.
- Place the tin in the freezer for about 10 minutes while you prepare the filling.
2. Make the Cheesecake Filling
- In a large mixing bowl, add the dairy-free whipping cream and cream cheese.
- Using a hand mixer or stand mixer, whip the mixture on medium-high speed for about 5 minutes until thick, fluffy, and smooth. You want stiff peaks, but be careful not to over-whip.
- Crush 8 Oreo cookies into small pieces and gently fold them into the whipped mixture using a spatula. Don’t overmix—just enough to distribute the cookies evenly.
- Transfer the filling to a piping bag fitted with a large round tip. If you don’t have a piping bag, a spoon will work fine.
- Pipe or spoon the cheesecake mixture evenly into each chilled crust. Smooth the tops with the back of a spoon or a small offset spatula.
- Freeze the cheesecakes for at least 4 hours or until firm. Overnight is even better if you have the time.
3. Add the Topping
- Just before serving, whip the remaining 20g of dairy-free whipping cream until thick and fluffy.
- Transfer the whipped cream to a piping bag fitted with a star tip.
- Pipe a decorative swirl onto each cheesecake.
- Garnish with a halved Oreo or some extra crushed cookies for that final touch.
Now your mini cheesecakes are ready to serve—and steal the show.
How to Serve
These Mini No-Bake Oreo Cheesecakes are best served cold, straight from the fridge or just a few minutes out of the freezer. Here are some fun and creative ways to present them:
- Place them on a pretty dessert tray with fresh mint leaves for a pop of color.
- Serve with a drizzle of dairy-free chocolate sauce for extra indulgence.
- Add a dollop of fruit preserves (like raspberry or cherry) if you want a tart contrast to the sweet cookies-and-cream base.
Because they’re mini, they also work great as part of a dessert buffet or alongside coffee at a casual gathering.
Pairing Suggestions
These mini cheesecakes pair beautifully with a variety of beverages and sides. Here are a few suggestions:
- Hot drinks: Serve with a cup of strong black coffee, chai tea, or dairy-free hot chocolate.
- Cold drinks: Try them with a glass of almond milk or an oat milk iced latte.
- Fresh fruit: Pair with strawberries, raspberries, or sliced bananas to brighten up the plate.
- Dessert platters: Add them to a vegan dessert spread with brownies, lemon bars, or fruit tarts.
The balance of creamy and crunchy in the cheesecake is nicely complemented by the richness of a warm beverage or the freshness of fruit.
Storage, Freezing & Reheating Instructions
Refrigerator Storage:
Store the mini cheesecakes in an airtight container in the fridge for up to 2 days. After that, the texture may start to soften too much.
Freezer Storage:
To freeze, place the cheesecakes on a baking tray and freeze until solid. Then transfer them to a sealed container or zip-top bag. They will keep well for up to 1 month.
To Serve from Frozen:
Let them thaw in the fridge for 1–2 hours or at room temperature for about 15–20 minutes before serving.
Reheating:
No reheating required—these are best enjoyed chilled.
Common Mistakes to Avoid
Not chilling long enough:
If you try to serve them before they’re fully set, the texture will be too soft. Be patient and let them freeze completely.
Over-whipping the filling:
Too much whipping can cause the cream to separate. Stop as soon as you see stiff peaks.
Using warm ingredients:
Start with cold cream and cream cheese for the best texture. Room temperature ingredients won’t whip properly.
Skipping the liner:
If you don’t use cupcake liners or silicone molds, the crust might stick to the pan and crumble.
Adding toppings too early:
Wait until just before serving to add the whipped cream topping so it stays fluffy.
Pro Tips
- Chill your tools: Place your mixing bowl and beaters in the freezer for 10 minutes before whipping the cream to help it whip faster.
- Go extra with the crust: Add a pinch of salt to the cookie base to enhance the overall flavor balance.
- Make it pretty: Use a piping bag for both the filling and topping for a professional-looking finish.
- Add a flavor twist: Mix in crushed freeze-dried strawberries or a bit of vanilla bean paste to the filling for a subtle variation.
- Use silicone molds: They make it easier to pop out the cheesecakes without damaging the base or sides.
Frequently Asked Questions (FAQs)
Can I use regular Oreos?
Yes, classic Oreos are accidentally vegan and work perfectly in this recipe.
What’s the best dairy-free cream cheese to use?
Any smooth and neutral-tasting vegan cream cheese will work. Brands like Violife or Tofutti are great options.
Can I make these ahead of time?
Definitely. They’re perfect for making the day before a party. Just keep them chilled until ready to serve.
Do I have to freeze them?
Freezing helps the cheesecakes firm up. If you’re in a hurry, you can try chilling them in the fridge for at least 6 hours, but they may be softer.
Can I use coconut cream instead of dairy-free whipping cream?
Yes, just make sure it’s full-fat and chilled before whipping for the best texture.
How do I crush the cookies without a food processor?
Put them in a zip-top bag and crush with a rolling pin or heavy mug.
Can I make this gluten-free?
Yes, use gluten-free sandwich cookies instead of regular Oreos.
What if I don’t have a piping bag?
You can spoon the filling and topping in place. A zip-top bag with the corner snipped also works in a pinch.
Can I double the recipe?
Absolutely. This recipe scales well if you’re feeding a crowd.
What’s the best way to decorate these?
Crushed cookies, halved Oreos, dairy-free chocolate shavings, or even a drizzle of caramel sauce.
Conclusion & Call to Action
These Mini No-Bake Oreo Cheesecakes are a total win: easy to make, beautiful to serve, and incredibly delicious. Whether you’re making them for a special event or just because you’re craving something sweet, they’re guaranteed to satisfy.
Now it’s your turn. Grab those Oreos, whip out your mixer, and get ready to create a dessert everyone will be talking about. If you try this recipe, I’d love to hear how it went. Leave a comment below or share a photo on social media and tag me—seeing your creations is always the best part.
Happy no-baking!
Print
Mini No-Bake Oreo Cheesecakes
- Total Time: 4 hours 25 minutes (including chilling)
- Yield: 6 mini cheesecakes
- Diet: Vegan
Description
These Mini No-Bake Oreo Cheesecakes are a creamy, vegan-friendly dessert made with a crunchy Oreo base and whipped dairy-free cheesecake filling. No baking needed and perfect for parties or personal indulgence!
Ingredients
-
Base: 150g Oreo cookies, 50g dairy-free butter or margarine
-
Filling: 260g dairy-free whipping cream, 160g dairy-free cream cheese, 8 crushed Oreo cookies
-
Topping: 20g dairy-free whipping cream, 4 Oreo cookies for garnish
Instructions
-
Melt butter and mix with crushed Oreos to form the base. Press into cupcake tins and freeze.
-
Whip dairy-free cream and cream cheese until thick. Fold in crushed Oreos.
-
Pipe or spoon filling onto crusts. Freeze for 4 hours.
-
Top with whipped cream and cookie pieces before serving.
Notes
- Use cold ingredients for best texture.
- Freeze until fully firm to set properly.
- Can be stored in the fridge for 2 days or frozen up to 1 month.
- Prep Time: 25 minutes
- Cook Time: 0 minutes
- Category: Dessert
- Method: No-Bake
- Cuisine: American