
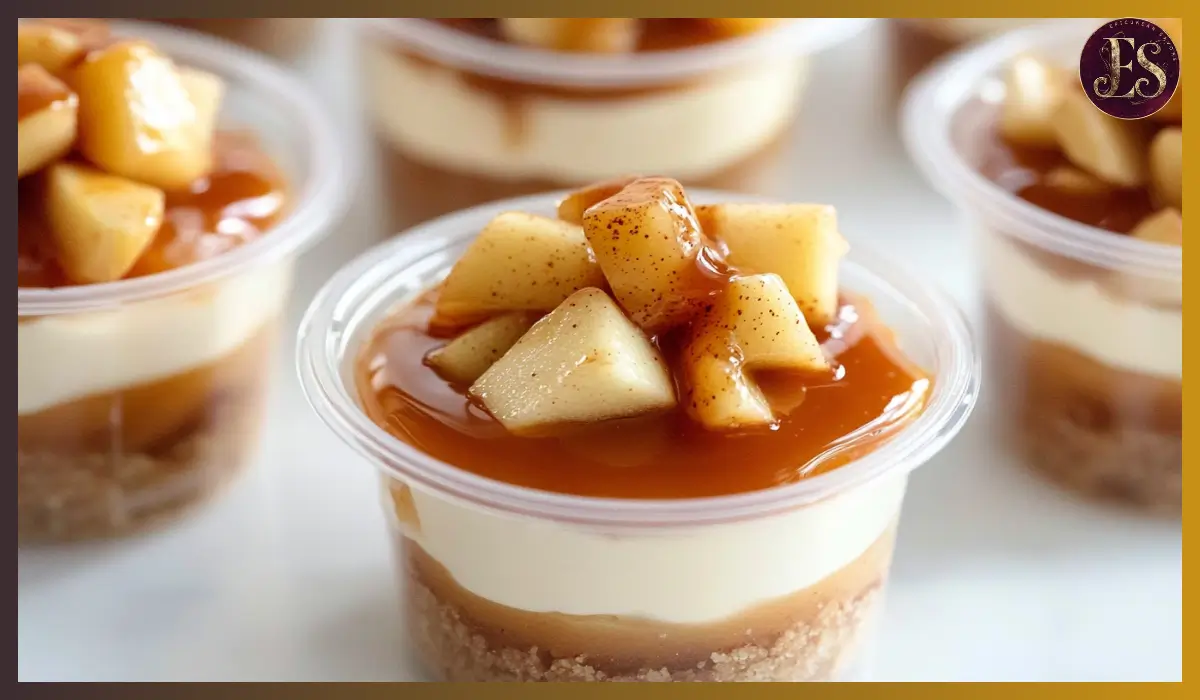
There’s something undeniably magical about the combination of caramel and apples. As soon as the weather starts to cool and the leaves begin to turn, I find myself craving cozy, nostalgic flavors—and nothing hits quite like these Caramel Apple Dessert Cups. They bring together the crisp freshness of fall apples, the rich, buttery sweetness of caramel, and the light, airy texture of whipped mousse, all layered neatly into individual, no-fuss cups.
This recipe is a dream come true for anyone who wants to impress without turning on the oven. No baking means less time stressing and more time enjoying the moment—whether you’re preparing for a fall party, a family get-together, or just looking for something sweet to wind down the week.
What makes these Caramel Apple Dessert Cups so special is the way each layer brings something unique. The vanilla wafer crust offers a buttery, slightly crunchy base. The salted caramel mousse is light but full of flavor—made with simple pantry ingredients like instant pudding mix and whipped topping. Then, we top it all off with warm, cinnamon-sugar apples that taste like they came straight out of an apple pie.
I first made this dessert for a fall potluck at work, and let’s just say… it vanished within minutes. Since then, it’s become a staple in my kitchen every September through November. The individual cups make serving a breeze, especially when you’re feeding a crowd, and the portion size is just right—not too heavy, but still deeply satisfying.
So if you’re looking for a low-maintenance, high-reward dessert that celebrates all the best flavors of fall, these Caramel Apple Dessert Cups are about to become your new favorite.
Why You’ll Love This Recipe
There are plenty of reasons why this Caramel Apple Dessert Cups recipe should make its way to your fall lineup, and the best part is—it’s incredibly forgiving and beginner-friendly.
No baking required: This recipe skips the oven completely. That means less prep time, fewer dishes, and no risk of burnt crusts or overbaked fillings.
Perfect for parties: With individual servings, everyone gets their own little dessert. No slicing, no scooping—just grab a spoon and dig in. Whether you’re hosting a harvest celebration or a casual weekend dinner, these dessert cups feel both elegant and effortless.
Great flavor contrast: The tartness of the apples plays beautifully against the richness of the caramel and the airy mousse. Every bite gives you a balanced mix of soft, crunchy, creamy, and just a touch of spice.
Easily customizable: You can swap out the type of cookies in the crust, adjust the sweetness, or even change the apples based on what’s in season. The base recipe is flexible, so feel free to make it your own.
Kid and adult approved: The cute, mini-cup presentation makes these appealing to kids, while the sophisticated flavor profile keeps adults coming back for seconds.
Health Benefits
While this dessert leans into indulgence, it also features a few wholesome ingredients that balance things out. Apples, for one, are a major win. They’re high in fiber, rich in antioxidants, and full of vitamin C. Plus, by sautéing them instead of baking into a pie, you can better control the sugar levels and retain more of their nutrients.
Using instant pudding and whipped topping helps cut down on heavy cream or egg-based fillings, which reduces the overall fat content compared to traditional mousses or custards. Also, portioning the dessert into small cups can help with mindful eating—encouraging satisfaction without overindulgence.
And don’t forget, you can make simple swaps to increase the nutritional profile. For instance, choose whole-grain cookies for the crust or use a lighter version of whipped topping.
Preparation Time, Servings, and Nutritional Information
Total Time:
Preparation: 30 minutes
Chill Time (optional): 1 hour
Servings:
Approximately 28 individual 2 oz cups
Nutrition (Per Serving):
Calories: 170
Protein: 2g
Carbohydrates: 22g
Fat: 8g
Sugar: 14g
Ingredients List
The Crust:
- 2 ½ cups crushed vanilla wafers (about 60 wafers)
- ½ cup unsalted butter, melted
The Salted Caramel Mousse:
- 1 box (3.4 oz) instant vanilla pudding mix
- 1 ¾ cups cold milk
- ¾ cup caramel sauce (store-bought or homemade)
- 1 ½ cups whipped topping (such as Cool Whip), thawed
The Cinnamon Apples:
- 4 medium apples (Granny Smith, Pink Lady, or Golden Delicious), peeled, cored, and diced
- 2 tablespoons unsalted butter
- 3 tablespoons brown sugar
- 1 teaspoon ground cinnamon
- 1 teaspoon lemon juice
Topping:
- Extra caramel sauce for drizzling
- Optional: crushed cookies, chopped pecans, or a pinch of sea salt
Optional Homemade Salted Caramel Sauce:
- 1 cup granulated sugar
- 6 tablespoons butter
- ½ cup heavy cream
- ½ teaspoon salt
Step-By-Step Cooking Instructions
1. Prepare the crust layer
Start by crushing the vanilla wafers. You can use a food processor for a fine crumb or place them in a zip-top bag and crush with a rolling pin.
In a medium bowl, combine the crushed wafers with melted butter and stir until the texture resembles wet sand.
Spoon about 1 tablespoon of the mixture into each 2 oz plastic cup and press down gently to form a base layer. Set aside.
2. Make the caramel mousse
In a large mixing bowl, whisk the instant pudding mix and cold milk until thickened—about 2 minutes.
Add the caramel sauce and mix until fully combined. Then, gently fold in the whipped topping. Be careful not to deflate it.
The mousse should be fluffy and smooth. Chill in the refrigerator while preparing the apples.
3. Cook the cinnamon apples
In a medium skillet over medium heat, melt the butter.
Add the diced apples, brown sugar, cinnamon, and lemon juice. Stir to coat the apples evenly.
Cook for 8–10 minutes, stirring occasionally, until the apples are tender but not mushy.
Remove from heat and let them cool for 10 minutes.
4. Assemble the dessert cups
Using a spoon or piping bag, add a layer of caramel mousse over the crust—about 2 tablespoons.
Top with a spoonful of cinnamon apples.
Drizzle with additional caramel sauce and sprinkle with optional toppings like crushed cookies or sea salt.
Chill for at least 1 hour before serving if you want the mousse to firm up, or serve immediately if preferred.
Optional: Homemade Salted Caramel Sauce
In a heavy-bottom saucepan over medium heat, melt the sugar while stirring constantly. Once fully melted and amber in color, carefully add the butter (it will bubble up).
Stir until fully incorporated, then slowly pour in the cream. Let it boil for 1 minute, then remove from heat and stir in the salt.
Cool before using in the mousse or as a drizzle.
How to Serve
Serve these Caramel Apple Dessert Cups chilled or at room temperature in their individual containers.
- Add a small spoon in each for convenience.
- For a festive look, tie twine or ribbon around the cups.
- You can also layer the dessert in mini mason jars or even a large trifle dish for a family-style presentation.
Pairing Suggestions
These dessert cups are delicious on their own but pair beautifully with:
- A warm spiced herbal tea like chai or cinnamon apple.
- Decaf coffee with a splash of vanilla almond milk.
- Sparkling apple cider for a kid-friendly, seasonal beverage.
- For a savory contrast, serve after a roast chicken or autumn vegetable stew.
Storage, Freezing & Reheating Instructions
Refrigeration:
Store the assembled dessert cups in the fridge, covered, for up to 3 days. Keep them in an airtight container or cover each with plastic wrap to prevent drying.
Freezing:
The mousse layer freezes well, but the apples may become watery upon thawing. If you plan to freeze, assemble the cups without the apple topping and add that fresh after defrosting. Freeze for up to 1 month.
Reheating:
These are meant to be served chilled, so no reheating is necessary. If you’re using leftover cinnamon apples, you can warm them slightly on the stove before layering.
Common Mistakes to Avoid
Overcooking the apples: You want them tender but still holding their shape. Overcooked apples will turn mushy and affect the texture.
Using watery caramel: Make sure your caramel sauce is thick enough to hold its shape when drizzled. Too thin, and it will seep into the mousse.
Not chilling the mousse: Even though it’s technically ready to serve, chilling helps the mousse set and hold its shape in the cups.
Skipping the lemon juice: The citrus balances the sweetness and keeps the apples from browning too quickly.
Filling cups unevenly: Use a measuring spoon or piping bag to keep the layers tidy and uniform across all servings.
Pro Tips
- Use a piping bag to neatly layer the mousse into each cup without mess.
- Make ahead: You can prep each layer up to a day in advance and assemble the dessert cups right before your event.
- Add texture: Crushed pecans, toffee bits, or even granola add a lovely crunch to the top.
- Double the apples: If your crowd loves fruit-forward desserts, double the apple mixture and layer it twice.
- Try flavored wafers: Use cinnamon graham crackers or ginger snaps in place of vanilla wafers for a seasonal twist.
Frequently Asked Questions (FAQs)
Can I use store-bought caramel sauce?
Absolutely. Just choose one that’s thick and flavorful. If it’s too runny, it might make the mousse layer soggy.
Which apples are best?
Granny Smith and Pink Lady offer a tart contrast to the sweet mousse. Golden Delicious and Crispin are great for a milder flavor.
Can I make this dessert in a large pan instead of cups?
Yes! Use an 8×8 or 9×13 baking dish. Simply layer crust, mousse, apples, and toppings. Chill, then slice to serve.
Is this recipe halal-friendly?
Yes, this version contains no alcohol or gelatin. Always check labels for caramel sauce and pudding mix to ensure compliance.
Can I use homemade whipped cream instead of whipped topping?
Yes, but stabilize it with a bit of powdered sugar or cornstarch to maintain its shape.
How far in advance can I make these?
You can fully assemble them up to 24 hours in advance. Just keep them chilled and covered.
Can I reduce the sugar?
Yes. Use unsweetened whipped topping and reduce sugar in the apple mixture to taste.
Can I add nuts or other toppings?
Definitely. Toasted pecans or walnuts make a delicious crunchy topping.
What size cups should I use?
2 oz plastic condiment cups work perfectly for bite-sized servings. You can also use 4 oz cups for a more generous portion.
Can I make this dairy-free?
Yes. Use plant-based milk, dairy-free pudding mix, and coconut whipped topping. Ensure your caramel sauce is also dairy-free.
Conclusion & Call to Action
Caramel Apple Dessert Cups are one of those desserts that checks every box: easy, impressive, crowd-pleasing, and totally adaptable. Whether you’re preparing them for a harvest party, a casual fall dinner, or just as a sweet treat for yourself, they’ll quickly earn a place in your seasonal favorites.
Give them a try and don’t forget to experiment with your own spin—add nuts, swap the crust, or even try pumpkin spice instead of cinnamon. If you make this recipe, I’d love to hear how it turned out! Leave a comment or share a photo on social media and tag me. Happy no-baking!
Print
Caramel Apple Dessert Cups
- Total Time: 40 minutes (plus chilling)
- Yield: 28 cups (2 oz each) 1x
- Diet: Vegetarian
Description
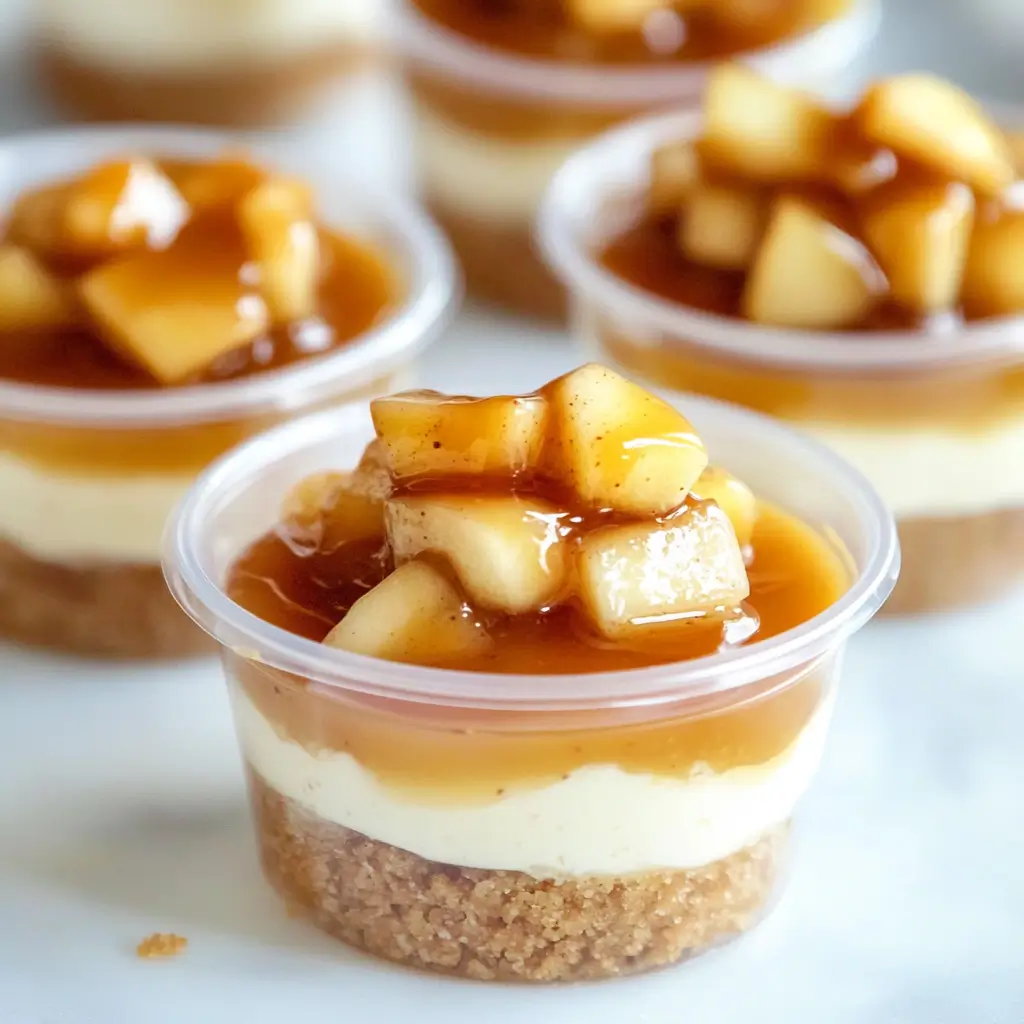
These no-bake caramel apple dessert cups feature layers of crushed vanilla wafer crust, fluffy salted caramel mousse, and cinnamon-sautéed apples. A perfectly portioned autumn treat that’s rich, creamy, and crowd-friendly.
Ingredients
-
2 ½ cups crushed vanilla wafers
-
½ cup unsalted butter, melted
-
1 box (3.4 oz) instant vanilla pudding mix
-
1 ¾ cups cold milk
-
¾ cup caramel sauce (store-bought or homemade)
-
1 ½ cups whipped topping
-
4 medium apples (Granny Smith, Pink Lady, or Golden Delicious), peeled and diced
-
2 tbsp unsalted butter
-
3 tbsp brown sugar
-
1 tsp cinnamon
-
1 tsp lemon juice
-
Optional toppings: caramel drizzle, sea salt, chopped nuts
Instructions
-
Mix crushed vanilla wafers with melted butter. Press 1 tbsp into each 2 oz cup.
-
Whisk pudding with milk until thickened. Stir in caramel sauce, then fold in whipped topping. Chill.
-
Cook diced apples with butter, sugar, cinnamon, and lemon juice until soft but not mushy.
-
Layer mousse over crust, add apples, drizzle with caramel, and chill before serving.
Notes
- Chill at least 1 hour for firmer mousse.
- Use different apples for a flavor twist.
- Store for up to 3 days refrigerated.
- Prep Time: 30 minutes
- Cook Time: 10 minutes
- Category: Dessert
- Method: No-Bake
- Cuisine: American