
There’s something undeniably magical about a dessert that comes together with almost zero effort but delivers sky-high satisfaction. Oreo Dump Cake is one of those rare gems that checks all the boxes—quick, easy, chocolatey, and oh-so-decadent. Whether you’re prepping dessert for a family movie night, throwing together a last-minute treat for unexpected guests, or just craving something sweet and gooey after dinner, this cake has you covered.
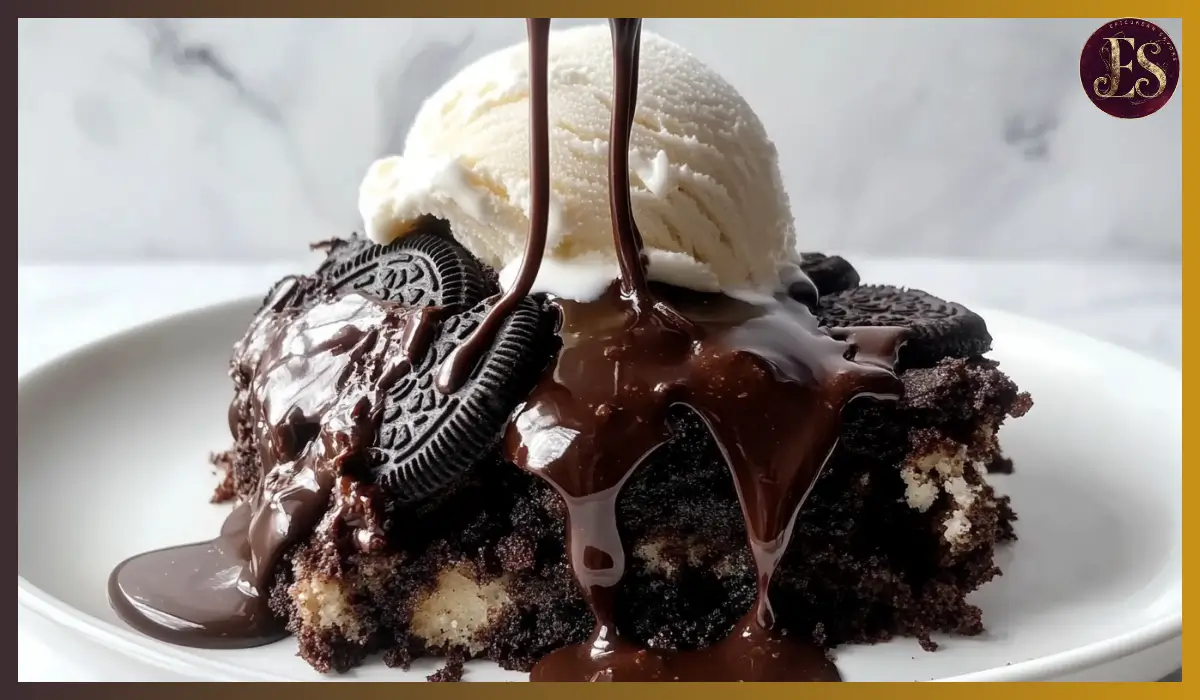
This recipe is a no-mix, no-fuss, layer-and-bake dream. It takes classic pantry staples—Oreos, sweetened condensed milk, whipped topping, chocolate cake mix, and butter—and transforms them into a hot, molten, brownie-like dessert with crispy edges and a soft, gooey center. The Oreos soften just enough to become tender but still maintain that signature crunch in some bites, while the cake mix and butter meld into a rich topping that’s somewhere between a brownie and a lava cake.
What makes this dump cake so special for me is how often it has come to the rescue. It’s the kind of recipe I keep in my back pocket for those hectic days when time is tight, but I still want to make something indulgent. The first time I made it, I was skeptical—could something this simple really be that good? But after one warm bite with melty ice cream sliding down the sides, I was completely sold.
Why You’ll Love This Recipe
If you’re still on the fence, here are several reasons why Oreo Dump Cake deserves a spot in your dessert rotation.
First and foremost, it’s ridiculously easy. There’s no mixing bowl required—everything gets layered directly in the baking dish. That means fewer dishes, less cleanup, and more time to enjoy the cake.
It’s also perfectly indulgent. The layers of crushed Oreos and rich cake mix create a gooey, fudge-like base that feels like you spent hours in the kitchen. The sweetened condensed milk melts into everything, adding a luscious creaminess, while the butter crisps up the top for a satisfying texture contrast.
This recipe is family-friendly and kid-approved. Kids love the idea of dessert made with cookies, and since it’s such a simple recipe, they can even help assemble the layers. It’s a fun way to get everyone involved.
Another great thing? It’s highly adaptable. You can switch out the cake mix flavor, use flavored Oreos, or add toppings like mini marshmallows or chocolate chips. The possibilities are endless, and every variation still tastes amazing.
Lastly, this cake is ideal for any occasion. Serve it on a casual weeknight, bring it to a potluck, or dress it up with ice cream and hot fudge for a birthday celebration. It’s comfort food in dessert form, and once you try it, it’ll be a go-to in your dessert arsenal.
Health Benefits
While this dessert leans into indulgence, there are still a few positive takeaways when enjoyed in moderation.
For starters, it’s portion-friendly. You can serve small squares to satisfy a sweet tooth without going overboard. Pairing it with fresh fruit like strawberries or bananas can also help balance the richness while adding fiber and nutrients.
If you’re looking to make it a little lighter, there are easy swaps. You can use a reduced-fat whipped topping or a light cake mix. Some people even opt for low-sugar or sugar-free alternatives for the condensed milk and Oreos, depending on dietary needs.
While Oreo Dump Cake isn’t aiming to be a health food, it’s a great example of how dessert can be both satisfying and flexible to suit different lifestyles. It’s all about balance and enjoyment.
Preparation Time, Servings, and Nutritional Information
Total Time: 45 minutes
Prep Time: 10 minutes
Cook Time: 35 minutes
Servings: 10–12 slices
Per Serving (estimated):
Calories: 420
Protein: 4g
Carbohydrates: 52g
Fat: 22g
Sugar: 36g
Fiber: 1g
Ingredients List
Here’s what you’ll need to make this Oreo Dump Cake masterpiece:
- 25 Oreo cookies – These form the crunchy base and some gooey, chocolatey bites throughout the cake.
- 1 (14 oz) can sweetened condensed milk – Adds creaminess and binds everything together with a rich, sweet flavor.
- 1 (8 oz) tub whipped topping, thawed – Brings a fluffy, light texture between layers and helps keep the cake moist.
- 1 (15.25 oz) box chocolate cake mix – Any chocolate variety works, but devil’s food or dark chocolate adds extra richness.
- ½ cup salted butter, sliced thinly – When baked, the butter melts into the cake mix, creating a crispy, golden top.
- Additional Oreos, chopped, for topping – These add texture and a little extra flair on top.
Optional Add-Ins:
- Mini marshmallows for gooeyness
- Chocolate chips for extra richness
- Chopped nuts for crunch
- Flavored Oreos for a fun twist
Step-By-Step Cooking Instructions
Follow these simple steps for dessert success:
- Preheat your oven to 350°F (175°C). This ensures everything bakes evenly and gets that perfect molten center.
- Prepare your baking dish. Lightly grease a 9×13-inch dish with cooking spray or a thin layer of butter. This prevents sticking and helps with easy cleanup.
- Layer the Oreo cookies. Place whole Oreos flat on the bottom of the dish. It’s okay if there are small gaps; they’ll fill in as everything bakes.
- Pour the sweetened condensed milk evenly over the cookies. Try to drizzle it all around so every bite gets some of that gooey sweetness.
- Spread the whipped topping. Using a spatula, gently spread the whipped topping over the milk layer. It doesn’t have to be perfect—just aim for an even layer.
- Sprinkle the dry cake mix across the top. Do not mix it in—just scatter it evenly to cover the entire surface.
- Add the sliced butter. Lay the thin slices of butter over the cake mix. Try to distribute them evenly to help melt into all areas.
- Top with chopped Oreos for added crunch and presentation. This step is optional but highly recommended.
- Bake for 35–40 minutes. You’ll know it’s ready when the top looks set and slightly crisped, and the edges are bubbling. The center may still be soft, which is exactly what you want.
- Let it rest for 5–10 minutes after baking to help the layers settle. Serve warm for the best experience.
How to Serve
There are so many delicious ways to serve this Oreo Dump Cake. Here are a few of my favorites:
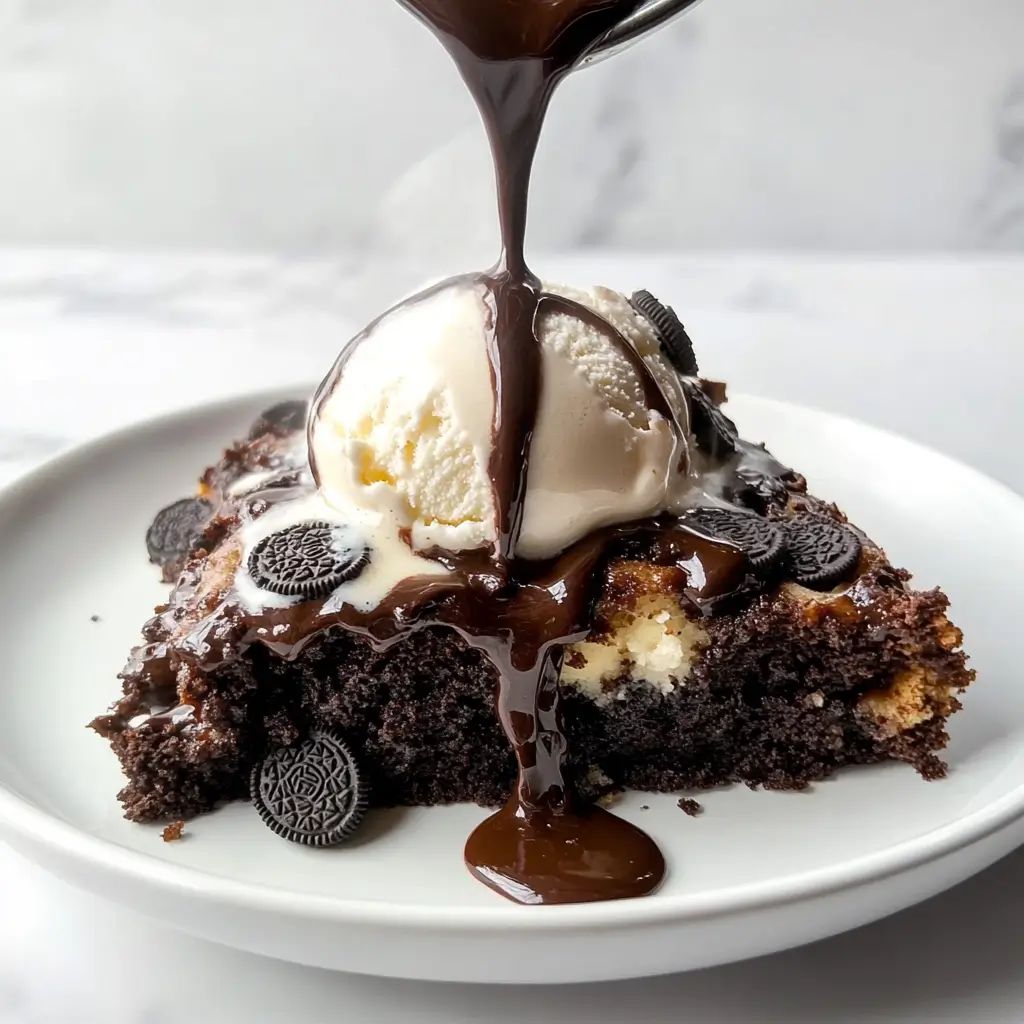
- Serve it warm with a scoop of vanilla or caramel ice cream. The hot and cold combo is irresistible.
- Drizzle with chocolate syrup or caramel sauce for added indulgence.
- Add a dollop of whipped cream and a sprinkle of crushed Oreos on top.
- Pair it with fresh strawberries or raspberries to cut through the richness.
Pairing Suggestions
This dessert pairs wonderfully with several beverages and side options:
- A glass of cold milk is a classic choice, especially for kids.
- Try it with hot coffee or a café latte for a comforting treat.
- Serve alongside a fresh fruit salad for a light, refreshing contrast.
- Pair with iced tea or a minty mocktail for a fun brunch dessert option.
Storage, Freezing & Reheating Instructions
Storing: Store any leftovers in an airtight container in the refrigerator for up to 3 days. The texture will become more cake-like as it chills but still delicious.
Freezing: You can freeze the baked cake by wrapping individual portions in plastic wrap and placing them in a freezer-safe bag. They’ll keep well for up to 2 months.
Reheating: To reheat, pop a slice in the microwave for 20–30 seconds until warmed through. For larger portions, reheat in the oven at 300°F for 10–15 minutes.
Common Mistakes to Avoid
- Using too much butter: It can make the cake greasy. Stick to the amount listed for best results.
- Mixing the cake mix into the whipped topping: This recipe is all about layers, not stirring.
- Not covering the cake mix completely with butter: Dry spots won’t bake properly.
- Refrigerating before baking: This can make the bottom soggy. Always bake immediately after layering.
- Overbaking: You want a gooey center, so don’t wait for it to look fully set throughout.
Pro Tips
- Use flavored Oreos like peanut butter or mint for a fun twist.
- Slice the butter thinly to ensure even coverage over the cake mix.
- Let the whipped topping fully thaw before using so it spreads easily.
- Chop the extra Oreos finely for the topping so they don’t sink into the batter.
- Bake until the edges bubble—this is your cue that everything inside is melted and cooked.
Frequently Asked Questions (FAQs)
Can I use double-stuffed Oreos?
Yes, they work great! They’ll add even more creaminess to the base layer.
What if I only have a white or vanilla cake mix?
You can still use it. The flavor will be slightly different, but still delicious.
Is it okay to use homemade whipped cream instead of whipped topping?
You can, but make sure it’s stable and thick. Store-bought topping holds up better during baking.
Can I make this in a smaller dish?
Absolutely. Just adjust the baking time slightly and watch for bubbling edges.
Can I make it dairy-free?
Use dairy-free whipped topping, sweetened condensed coconut milk, and a vegan cake mix. Swap in plant-based butter.
Will this cake set up more as it cools?
Yes, it firms up a bit as it rests, but it’s best served warm for that gooey texture.
Do I crush the Oreos or leave them whole?
Leave the base layer Oreos whole for structure. Chop extras for the topping.
Can I add chocolate chips or marshmallows?
Definitely. Sprinkle them on top with the chopped Oreos before baking.
How long should it cool before serving?
Let it rest for 5–10 minutes so the layers settle. Then serve warm.
Can I double this recipe for a crowd?
Yes, just use two 9×13 dishes or a large sheet pan and double all ingredients.
Conclusion & Call to Action
There you have it—a rich, warm, incredibly easy Oreo Dump Cake that’s sure to become a staple in your dessert rotation. Whether you’re making it for a casual weeknight or a fun gathering with friends, this recipe delivers major flavor with minimal effort.
Now it’s your turn! Try it out and see why this no-fuss dessert has won so many hearts. And when you do, I’d love to hear how it turns out. Share your experience in the comments or tag your photos online—seeing your creations is one of my favorite parts of sharing these recipes.
Happy baking!
Print
Oreo Dump Cake
- Total Time: 45 minutes
- Yield: 10–12 servings 1x
- Diet: Vegetarian
Description
This Oreo Dump Cake is the ultimate no-fuss dessert. With layers of Oreo cookies, sweetened condensed milk, whipped topping, cake mix, and butter, it bakes into a rich, gooey treat with crispy edges and a soft, molten center. Perfect for chocolate lovers and last-minute gatherings!
Ingredients
-
25 Oreo cookies
-
1 (14 oz) can sweetened condensed milk
-
1 (8 oz) tub whipped topping, thawed
-
1 (15.25 oz) box chocolate cake mix
-
½ cup salted butter, sliced
-
Extra chopped Oreos for topping (optional)
Instructions
-
Preheat oven to 350°F.
-
Grease a 9×13-inch baking dish.
-
Layer whole Oreos on the bottom.
-
Drizzle condensed milk over the Oreos.
-
Spread whipped topping evenly.
-
Sprinkle dry cake mix on top—don’t mix.
-
Distribute butter slices evenly over the cake mix.
-
Add chopped Oreos on top (optional).
-
Bake for 35–40 minutes until bubbly and set.
-
Let cool for 5–10 minutes. Serve warm.
Notes
- Use flavored Oreos or different cake mix for variation.
- Best served warm with ice cream.
- Don’t refrigerate before baking to avoid sogginess.
- Prep Time: 10 minutes
- Cook Time: 35 minutes
- Category: Dessert
- Method: Baking
- Cuisine: American