
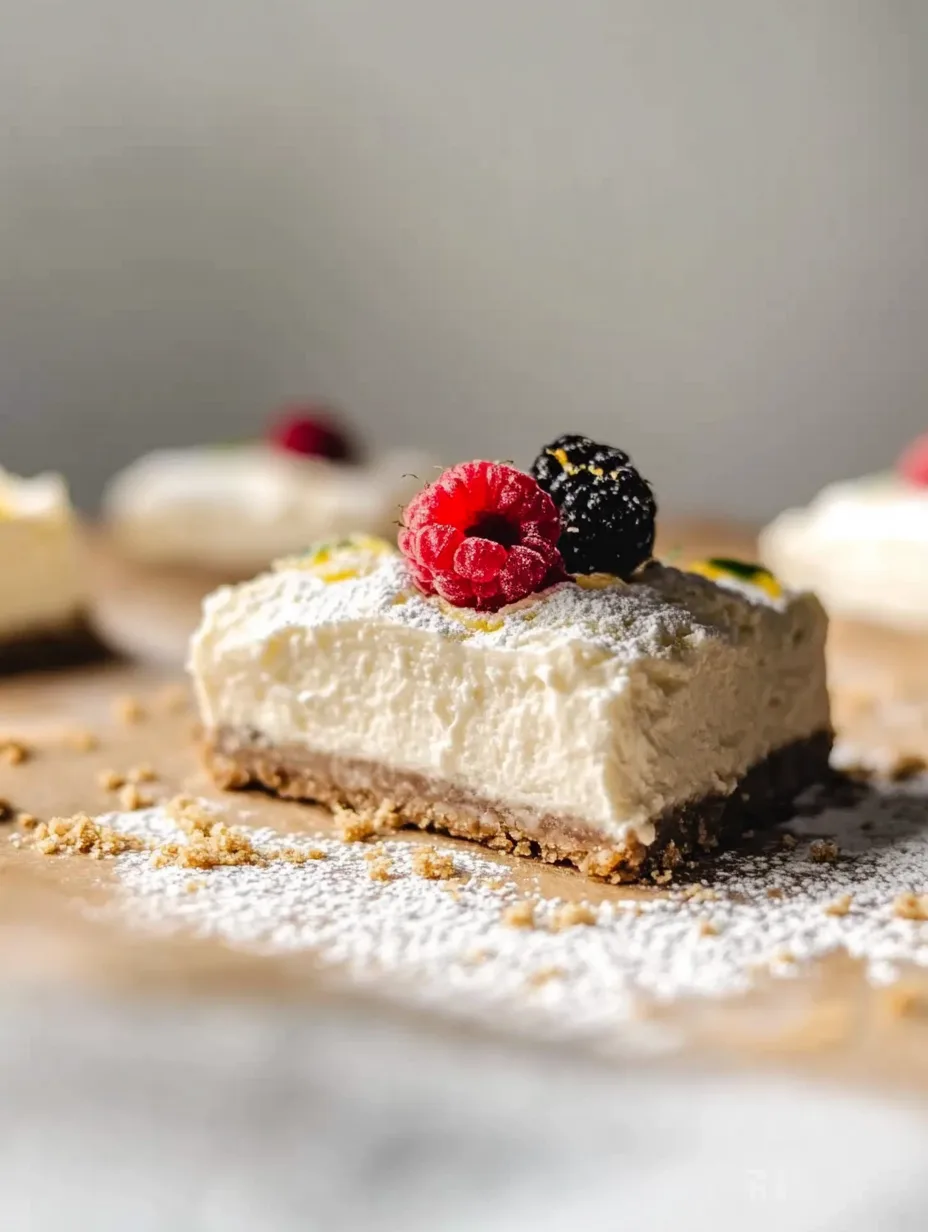
No-Bake Lemon Cheesecake Bars are a delightful dessert that captures the essence of light, refreshing flavors. Perfect for summer gatherings or anytime you crave something sweet and tangy, these bars are incredibly easy to make and require no baking. With a creamy lemon filling on a buttery graham cracker crust, these cheesecake bars will surely leave everyone wanting more. Ideal for parties, picnics, or simply as a treat for yourself, this recipe is not only delicious but also straightforward, making it accessible for bakers of all skill levels.
If you’re someone who loves desserts, you’ll appreciate how No-Bake Lemon Cheesecake Bars combine the best of both worlds—tartness from the lemon and creaminess from the cheese. Imagine cutting into a perfectly chilled bar and indulging in its smooth texture as the flavors dance on your palate. Each bite will transport you to a sunny day, making this dessert a fantastic option any time of year.
In this article, we will explore why these No-Bake Lemon Cheesecake Bars are a must-try, the specific preparation and cooking time, the ingredients you need to create them, and a detailed list of step-by-step instructions. Once you taste the tangy sweetness and buttery crust, you’ll understand why this recipe is so well-loved. Let’s dive deeper into what makes No-Bake Lemon Cheesecake Bars truly special!
Why You’ll Love This Recipe
No-Bake Lemon Cheesecake Bars stand out for several reasons that make them an absolute favorite. Here are just a few compelling factors:
1. No Baking Required: As the name suggests, no oven is needed, making this recipe perfect for hot days.
2. Quick and Easy: The preparation is simple, requiring minimal effort and time.
3. Light and Refreshing: The zesty lemon flavor provides a refreshing contrast to the creamy cheesecake.
4. Crowd-Pleaser: These bars are ideal for gatherings, ensuring your dessert table is a hit.
5. Customizable: You can easily adjust the sweetness or add toppings to suit your taste.
6. Perfect for Meal Prep: They can be made ahead of time and stored in the refrigerator.
These factors highlight why No-Bake Lemon Cheesecake Bars are not just a recipe but an experience. When you take the time to make these bars, you’re not just cooking; you’re creating a delightful treat that friends and family will adore.
Preparation and Cooking Time
Creating No-Bake Lemon Cheesecake Bars is a hassle-free process, and the time required is quite manageable. Here’s a breakdown of preparation time:
– Preparation Time: 20 minutes
– Chilling Time: 4 hours (minimum)
– Total Time: 4 hours 20 minutes
The chilling time is essential to allow the bars to set properly, ensuring each slice is firm and easy to cut.
Ingredients
– For the Crust:
– 1 ½ cups graham cracker crumbs
– ½ cup unsalted butter, melted
– ¼ cup granulated sugar
– For the Cheesecake Filling:
– 16 oz cream cheese, softened
– 1 cup powdered sugar
– ½ cup sour cream
– ¼ cup fresh lemon juice
– Zest of 1 lemon
– 1 teaspoon vanilla extract
– 1 cup heavy whipping cream
Step-by-Step Instructions
Follow these straightforward steps to make your No-Bake Lemon Cheesecake Bars:
1. Prepare the Pan: Line an 8×8-inch square baking dish with parchment paper, leaving some overhang for easy removal.
2. Make the Crust: In a mixing bowl, combine graham cracker crumbs, melted butter, and granulated sugar. Stir until well mixed.
3. Pat the Crust: Press the mixture evenly into the bottom of the prepared baking dish. Use the back of a spoon to flatten.
4. Chill the Crust: Place the crust in the refrigerator while you prepare the filling.
5. Blend the Filling: In a large bowl, beat softened cream cheese until smooth. Add powdered sugar, sour cream, lemon juice, lemon zest, and vanilla extract, mixing until well combined.
6. Whip the Cream: In a separate bowl, whip heavy cream until stiff peaks form. Carefully fold the whipped cream into the cream cheese mixture until no streaks remain.
7. Spread the Filling: Pour the filling over the chilled crust, smoothing the top with a spatula.
8. Chill Again: Cover and refrigerate for at least 4 hours or until set.
9. Slice and Serve: Once set, lift the bars out of the pan using the parchment overhang. Cut into squares and serve.
How to Serve
Serving your No-Bake Lemon Cheesecake Bars can elevate the experience. Here are some suggestions:
1. Plating: Arrange the bars on a dessert platter for an elegant display.
2. Garnish: Top with fresh berries, whipped cream, or a sprinkle of lemon zest for added flair.
3. Beverage Pairing: Serve with iced tea, lemonade, or a light dessert wine to complement the flavors.
4. Chill Again: Keep some additional bars in the fridge for guests to help themselves.
Putting thought into how you present and serve these bars will make a thoughtful impression on anyone you share them with. Whether for a gathering or a casual family dinner, No-Bake Lemon Cheesecake Bars will certainly stand out as a refreshing dessert. Each bite promises a burst of flavor that embodies the essence of a sunny lemon grove, making it an unforgettable treat!
Now that you have all the knowledge and steps needed, it’s time to roll up your sleeves and create these amazing No-Bake Lemon Cheesecake Bars. Enjoy the process and savor the delightful reward of your work!
Additional Tips
– Use Fresh Lemons: For the best flavor, opt for fresh lemons instead of bottled lemon juice. Fresh juice and zest will elevate the taste of your No-Bake Lemon Cheesecake Bars significantly.
– Let Cream Cheese Soften: Ensure that your cream cheese is at room temperature for a smooth, lump-free filling. This will help it blend well with the other ingredients.
– Taste Test: Always taste your cheesecake filling before spreading it onto the crust. You can adjust the sweetness or lemon flavor according to your preference.
– Serve Chilled: For the best experience, serve the bars chilled after taking them out from the fridge. This enhances their creamy texture and refreshing taste.
– Use a Sharp Knife: To achieve clean cuts when slicing your bars, use a sharp knife. It can help to dip the knife in warm water and wipe it dry between cuts.
Recipe Variation
Feel free to try these exciting variations of No-Bake Lemon Cheesecake Bars:
1. Berry-Lemon Bars: Add a layer of mixed berries, such as blueberries or strawberries, above the cheesecake filling for a fruity touch.
2. Coconut Twist: Incorporate shredded coconut into the crust or the filling for a tropical twist.
3. Chocolate Drizzle: Drizzle melted chocolate over the top for a rich contrast to the tangy lemon.
4. Gluten-Free Option: Substitute the graham cracker crumbs with gluten-free cookies or a gluten-free graham cracker alternative.
5. Different Citrus Flavors: Experiment with other citrus fruits like lime or orange for unique flavor profiles.
Freezing and Storage
– Storage: Keep No-Bake Lemon Cheesecake Bars in an airtight container in the refrigerator. They will stay fresh for up to one week.
– Freezing: If you want to freeze them, wrap individual bars in plastic wrap and then place them in a freezer-safe container. They can be stored for up to three months. Thaw in the refrigerator before serving.
Special Equipment
To make No-Bake Lemon Cheesecake Bars, you’ll need the following tools:
– Mixing Bowls: To combine the crust and filling ingredients.
– Electric Mixer: Useful for achieving a smooth and creamy filling.
– Spatula: For spreading the filling evenly over the crust and smoothing the surface.
– 8×8-inch Baking Dish: This size will work perfectly for a batch of bars.
– Parchment Paper: Essential for easy removal of the bars from the dish after chilling.
Frequently Asked Questions
Can I use low-fat cream cheese?
Yes, you can use low-fat cream cheese; however, it may affect the creaminess and overall texture of the filling.
How can I make these bars sweeter?
If you prefer a sweeter cheesecake, increase the amount of powdered sugar in the filling gradually until it reaches your desired sweetness.
What kind of toppings go well with these bars?
Fresh fruit, whipped cream, and a sprinkle of crushed graham crackers are great toppings. You may also try a lemon glaze for a citrusy kick.
Is there a non-dairy alternative for the cream cheese?
Yes, you can replace the cream cheese with a non-dairy cream cheese alternative to create a vegan version of these cheesecake bars.
How far in advance can I make these?
These bars can be made up to 2 days in advance. Store them in the fridge until you’re ready to serve.
Conclusion
No-Bake Lemon Cheesecake Bars are a truly delightful dessert that captures the bright flavor of lemons and the smoothness of cream cheese without the need for an oven. Their simplicity and refreshing taste make them a perfect treat for any occasion, from family gatherings to summer picnics. With the tips, variations, and serving suggestions provided, you can customize these bars to suit your tastes and impress your friends and family. Now that you have all the information needed, it’s time to enjoy making and savoring these delicious No-Bake Lemon Cheesecake Bars!
No-Bake Lemon Cheesecake Bars: An Amazing Ultimate Recipe
- Total Time: 36 minute
Ingredients
– For the Crust:
– 1 ½ cups graham cracker crumbs
– ½ cup unsalted butter, melted
– ¼ cup granulated sugar
– For the Cheesecake Filling:
– 16 oz cream cheese, softened
– 1 cup powdered sugar
– ½ cup sour cream
– ¼ cup fresh lemon juice
– Zest of 1 lemon
– 1 teaspoon vanilla extract
– 1 cup heavy whipping cream
Instructions
Follow these straightforward steps to make your No-Bake Lemon Cheesecake Bars:
1. Prepare the Pan: Line an 8×8-inch square baking dish with parchment paper, leaving some overhang for easy removal.
2. Make the Crust: In a mixing bowl, combine graham cracker crumbs, melted butter, and granulated sugar. Stir until well mixed.
3. Pat the Crust: Press the mixture evenly into the bottom of the prepared baking dish. Use the back of a spoon to flatten.
4. Chill the Crust: Place the crust in the refrigerator while you prepare the filling.
5. Blend the Filling: In a large bowl, beat softened cream cheese until smooth. Add powdered sugar, sour cream, lemon juice, lemon zest, and vanilla extract, mixing until well combined.
6. Whip the Cream: In a separate bowl, whip heavy cream until stiff peaks form. Carefully fold the whipped cream into the cream cheese mixture until no streaks remain.
7. Spread the Filling: Pour the filling over the chilled crust, smoothing the top with a spatula.
8. Chill Again: Cover and refrigerate for at least 4 hours or until set.
9. Slice and Serve: Once set, lift the bars out of the pan using the parchment overhang. Cut into squares and serve.
- Prep Time: 20 minutes
- Cook Time: N/A
Nutrition
- Serving Size: 16 squares
- Calories: 280 kcal
- Fat: 20g
- Protein: 3g