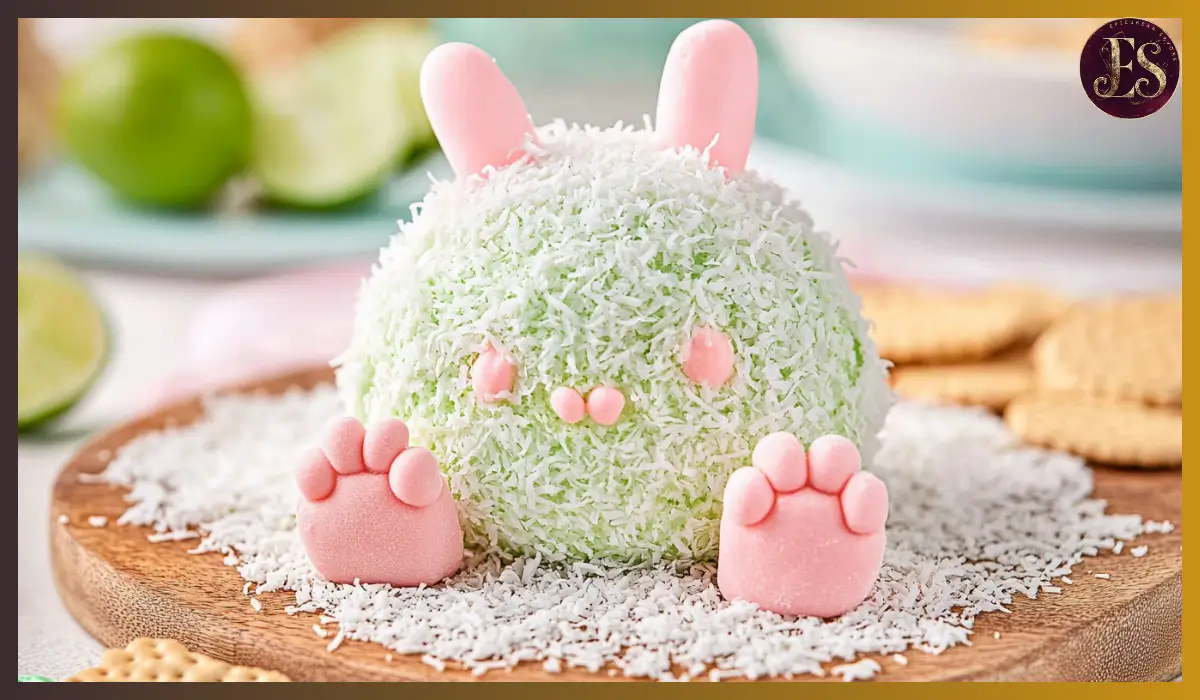
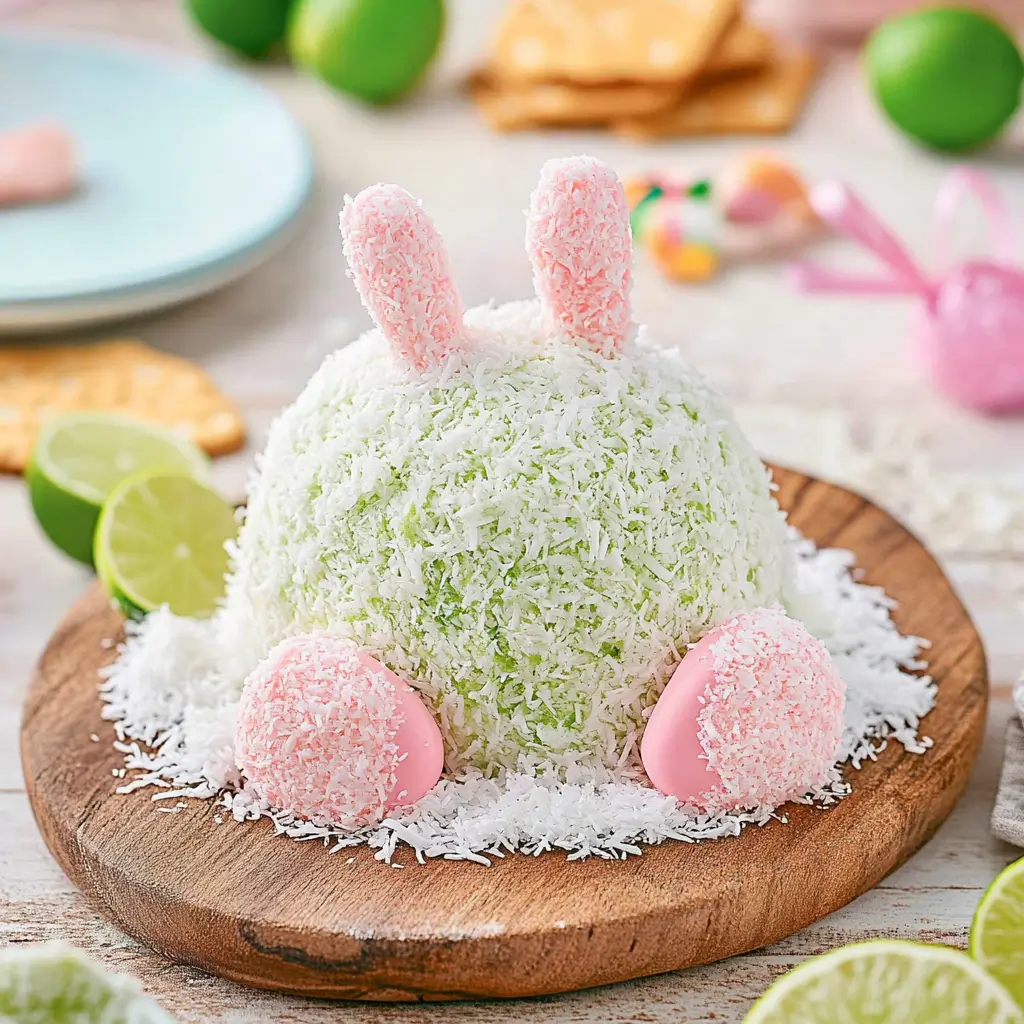
When it comes to making Easter treats that are both adorable and delicious, nothing beats the Bunny Butt Cheese Ball. This sweet, creamy, and tangy appetizer is shaped like a bunny’s fluffy bottom, covered in shredded coconut, and loaded with lime-flavored goodness. It’s the kind of dessert that not only makes everyone smile but also keeps them coming back for more. The Bunny Butt Cheese Ball is perfect for family gatherings, Easter brunches, or even as a fun project to do with the kids. Trust me, everyone will be talking about this treat long after the celebration ends.
The inspiration for this Bunny Butt Cheese Ball came from my desire to make something playful yet irresistible. It combines the refreshing taste of lime cream cheese with a fluffy coconut coating that feels like a treat straight out of a childhood dream. And while it looks fancy and elaborate, it’s surprisingly easy to make with just a handful of ingredients and a bit of creativity.
You’ll love how versatile and crowd-pleasing this dessert is. Plus, it’s such a fun way to get the kids involved in the kitchen. They’ll enjoy rolling the cheese balls, decorating the bunny feet, and of course, licking the beaters when you’re done. This recipe is all about creating joy and delicious memories. So, grab your mixing bowl and let’s hop right into this delightful creation!
Why You’ll Love This Recipe
The Bunny Butt Cheese Ball is more than just a cute centerpiece for your dessert table. It’s a deliciously sweet treat that everyone will rave about. Here’s why you’re going to love making (and eating) this adorable cheese ball:
First, it’s incredibly easy to prepare. With only a few ingredients and straightforward steps, you can whip up this delightful dessert without breaking a sweat. You don’t need to be a baking pro to make this work—it’s super beginner-friendly.
Second, the flavor combination is amazing. The creamy lime-flavored cheese ball is perfectly balanced between sweet and tangy, with a freshness that feels just right for springtime. The shredded coconut adds a wonderful texture, making each bite feel luscious and satisfying.
Another reason to love this recipe is how much fun it is to make. Kids and adults alike enjoy the process of shaping and decorating the cheese ball to resemble a bunny’s fluffy backside. It’s a playful dessert that brings smiles to everyone’s faces, especially when served with graham crackers or fresh fruit slices.
Plus, it’s a versatile treat. You can easily customize it by changing up the decorations or even the flavoring of the cheese ball itself. Want a pink bunny? Use strawberry gelatin mix instead of lime. Feeling fancy? Add a touch of vanilla extract to enhance the sweetness. The possibilities are endless.
Most importantly, this recipe is a crowd-pleaser. Whether you’re serving it at an Easter brunch, a springtime birthday party, or just for a fun family treat, it’s guaranteed to be a hit. It’s a unique conversation starter and a delicious treat all rolled into one.
Health Benefits
While the Bunny Butt Cheese Ball is definitely more of a treat than a health food, there are some benefits to the ingredients used:
The cream cheese provides a good source of calcium, which is essential for maintaining strong bones and teeth. It also contains protein, which can help you feel fuller longer. However, keep in mind that cream cheese is high in fat and should be enjoyed in moderation.
Lime juice and zest are rich in Vitamin C, which plays a vital role in boosting the immune system, promoting healthy skin, and aiding in the absorption of iron. Additionally, limes are known for their antioxidant properties, which help protect your cells from damage.
The shredded coconut adds a touch of fiber to this dessert. While it’s sweetened, it still offers small amounts of important minerals like iron and potassium. Fiber is essential for digestive health, making the coconut a beneficial addition to this cheese ball.
Butter, when consumed in moderation, provides fat-soluble vitamins like A, D, E, and K. While it’s high in calories, a little bit can contribute to your daily nutritional needs.
Although this recipe is a dessert and should be enjoyed as such, it’s nice to know that some of the ingredients offer nutritional benefits. If you’re looking to make this treat a little healthier, you can always opt for reduced-fat cream cheese or use unsweetened coconut.
Preparation Time, Servings, and Nutritional Information
Making this Bunny Butt Cheese Ball doesn’t require much time, but you will need to plan for chilling the cheese balls to help them hold their shape.
Total Time: 2 hours 20 minutes (including chilling time)
Active Preparation Time: 20 minutes
Servings: 12-14 (depending on portion size)
Nutritional Information (Per Serving):
Calories: 270
Protein: 3g
Carbohydrates: 16g
Fat: 22g
Sugar: 12g
Fiber: 2g
Keep in mind that nutritional values may vary based on the specific brands of ingredients you use and how large your servings are. This is meant to be a fun treat, so enjoy it without stressing over the numbers too much!
Ingredients List
To make the Bunny Butt Cheese Ball, you’ll need the following ingredients:
- 2 packages cream cheese (8 oz each, softened): The creamy base that makes this dessert rich and delicious. Make sure it’s softened for easier mixing.
- ½ cup unsalted butter (softened): Adds richness and helps with the creamy texture.
- 1 box lime gelatin mix (3 oz): Provides the vibrant lime flavor and beautiful green hue.
- 3 limes (zested): Adds a fresh, citrusy kick to enhance the lime flavor.
- 1 lime (juiced, about 2 tablespoons): Balances the sweetness with a touch of tang.
- 8 graham crackers (crushed, optional for serving): For serving and decorating the platter to resemble dirt or grass.
- 2 pastel nonpareils (for bunny feet decoration): Adds an adorable detail to the bunny’s paws.
- 6 strawberry yogurt-covered raisins (for bunny paws): Perfect for creating the bunny’s paw pads.
- 2 cups shredded sweetened coconut: Coats the cheese ball to give it a fluffy, bunny-like appearance.
You can also use alternative decorations if you like, such as candy pieces, mini marshmallows, or colored sugar. The beauty of this recipe is that you can get creative with it!
Step-By-Step Cooking Instructions
Making the Bunny Butt Cheese Ball is a straightforward process. Just follow these steps, and you’ll have a delightful treat ready to impress your guests.
Prepare the Cheese Ball Mixture
- In a large mixing bowl, combine the softened cream cheese, unsalted butter, lime gelatin mix, lime zest, and lime juice.
- Use an electric mixer on medium speed to beat the mixture until it’s smooth, creamy, and well-blended. This should take about 2–3 minutes.
Form the Cheese Balls
- Divide the mixture into two portions.
- Take one portion (about two-thirds of the mixture) and wrap it in plastic wrap. Shape it into a large ball to form the bunny’s body.
- With the remaining portion, divide it into three smaller balls: two medium-sized balls for the feet and one tiny ball for the tail.
- Wrap each of the smaller balls in plastic wrap and shape them accordingly.
Chill the Cheese Balls
- Refrigerate all the wrapped cheese balls for at least 2 hours, preferably overnight. The chilling process helps the balls firm up and makes them easier to handle.
Step 4: Prepare the Serving Plate
- Before assembling, spread crushed graham crackers over a serving plate. This not only adds flavor but also makes the bunny look like it’s resting on “dirt.”
Assemble the Bunny Butt
- Unwrap the large cheese ball and place it in the center of the serving plate.
- Position the two medium-sized balls at the bottom of the larger ball to resemble feet.
- Add the smallest ball at the top as the tail. Gently press the pieces together to ensure they stick.
Decorate the Feet and Tail
- Place the pastel nonpareils on the medium-sized balls to create the bunny’s paw pads. You can press them gently to ensure they adhere.
- Arrange the strawberry yogurt-covered raisins beneath the nonpareils to form the toes.
Coat with Coconut
- Press shredded sweetened coconut all over the cheese ball to cover it completely. This gives it that fluffy, bunny-like appearance.
Serve and Enjoy
- Pair the Bunny Butt Cheese Ball with graham crackers, fresh fruit slices, pretzels, or vanilla wafers.
- Serve immediately or keep it chilled until you’re ready to serve.
How to Serve
The Bunny Butt Cheese Ball is a versatile dessert that pairs well with various dippables. Here are some serving suggestions:
- Arrange vanilla wafers, graham crackers, pretzels, and fruit slices around the cheese ball on your platter.
- Serve on a platter decorated with additional coconut or crushed graham crackers to create a fun, whimsical look.
- For an extra festive touch, scatter a few pastel-colored candies around the platter to enhance the Easter theme.
- Consider serving this alongside other springtime treats like lemon bars, carrot cake cupcakes, or chocolate-dipped strawberries for a complete dessert table.
Pairing Suggestions
To elevate the experience of serving the Bunny Butt Cheese Ball, consider these delightful pairing options:
- Beverages: Serve with refreshing drinks like sparkling limeade, mint lemonade, or chilled iced tea.
- Additional Desserts: Pair with citrus-based desserts like lemon squares, key lime pie bars, or coconut macaroons.
- Savory Options: If you want to balance out the sweetness, serve alongside a cheese platter featuring mild cheeses, crackers, and fruit jams.
This cheese ball is so versatile that it works well as a dessert centerpiece or a fun addition to a larger spread of treats.
Storage, Freezing & Reheating Instructions
The Bunny Butt Cheese Ball is best enjoyed fresh, but you can store and even freeze it if you need to prepare it ahead of time.
Storage:
- Wrap the assembled cheese ball tightly in plastic wrap and store it in an airtight container.
- Keep it in the refrigerator for up to 3 days.
Freezing:
- For longer storage, wrap the cheese ball mixture (before decorating) tightly in plastic wrap, then place it in a freezer-safe bag.
- Store in the freezer for up to 1 month.
- Thaw in the refrigerator overnight before assembling and decorating.
Reheating:
- This dessert doesn’t require reheating. Simply bring it to room temperature for about 20 minutes before serving for the best texture.
Common Mistakes to Avoid
To make sure your Bunny Butt Cheese Ball turns out perfect, here are some common mistakes to watch out for:
- Using Cold Cream Cheese and Butter: Make sure both are fully softened before mixing to achieve a smooth, creamy texture.
- Skipping Chilling Time: Allow enough time for the cheese balls to chill properly. Otherwise, they’ll be too soft to hold their shape.
- Overmixing the Ingredients: Mix just until the ingredients are combined. Overmixing can cause the mixture to become too soft and difficult to shape.
- Not Wrapping the Balls Tightly: When wrapping the cheese balls in plastic wrap, ensure they are tightly sealed to maintain their shape during chilling.
- Using Too Much Coconut: Applying too much coconut can overwhelm the flavor. Aim for just enough to cover the cheese ball without making it overly sweet.
Pro Tips
To make this recipe even more foolproof and enjoyable, here are some helpful tips:
- Use High-Quality Cream Cheese: Opt for full-fat cream cheese for the creamiest texture. Reduced-fat versions work too but may result in a softer texture.
- Experiment with Flavors: While lime is classic, you can try other flavors by using different gelatin mixes such as strawberry, raspberry, or orange.
- Keep It Cold Until Serving: If your party lasts a while, keep the cheese ball refrigerated until just before serving to maintain its shape.
- Customize the Decorations: Feel free to get creative with the bunny paws. Mini M&M’s, pink marshmallows, or even tiny pieces of fruit can be used.
Frequently Asked Questions (FAQs)
Can I make this cheese ball without gelatin?
Yes! If you prefer a more natural flavor, you can use powdered sugar and a few drops of natural lime extract instead.
Can I use unsweetened coconut instead of sweetened?
Absolutely! If you prefer a less sweet treat, unsweetened coconut works well and adds a slightly nuttier flavor.
How long can I leave the cheese ball out before it starts to melt?
For the best texture, don’t leave it out for more than 2 hours. Keep it chilled until just before serving.
Can I make this cheese ball in advance?
Yes, you can prepare the cheese balls up to 2 days in advance. Just store them in the fridge until you’re ready to assemble and serve.
Conclusion & Call to Action
The Bunny Butt Cheese Ball is the perfect combination of adorable presentation and refreshing flavor. Its creamy lime filling, paired with the fluffy coconut coating, creates a treat that’s both fun and delicious. Whether you’re making this for an Easter brunch, a birthday party, or simply as a playful dessert to share with loved ones, it’s bound to be a hit.
Now that you’ve got all the steps, tips, and variations, it’s time to put your skills to the test. Give this recipe a try, and don’t forget to share your creations. I’d love to see your adorable Bunny Butt Cheese Ball and hear about how much everyone enjoyed it. Happy cooking, and may your dessert table be the cutest one around!
Print
Bunny Butt Cheese Ball
- Total Time: 2 hours 20 minutes
- Yield: 12-14 servings 1x
- Diet: Vegetarian
Description
This Bunny Butt Cheese Ball is a creamy, sweet, and tangy dessert perfect for Easter celebrations. Made with lime-flavored cream cheese, butter, and coconut, this adorable treat is sure to impress guests of all ages.
Ingredients
-
2 packages cream cheese (8 oz each, softened)
-
½ cup unsalted butter (softened)
-
1 box lime gelatin mix (3 oz)
-
3 limes (zested)
-
1 lime (juiced, about 2 tablespoons)
-
8 graham crackers (crushed, for serving)
-
2 pastel nonpareils (for bunny feet decoration)
-
6 strawberry yogurt-covered raisins (for bunny paws)
-
2 cups shredded sweetened coconut
Instructions
- In a large bowl, beat together cream cheese, butter, lime gelatin mix, lime zest, and lime juice until smooth and creamy.
- Divide mixture: Shape two-thirds into a large ball (bunny body) and the rest into two medium-sized balls (feet) and one small ball (tail).
- Wrap each ball in plastic wrap and refrigerate for at least 2 hours.
- Spread crushed graham crackers on a serving plate.
- Arrange the large cheese ball as the body, the medium balls as feet, and the small ball as the tail.
- Decorate feet with pastel nonpareils and yogurt-covered raisins.
- Cover all pieces with shredded coconut.
- Serve with graham crackers, fruit slices, or pretzels.
Notes
- For a pink version, substitute lime gelatin with strawberry gelatin.
- Store leftovers in the fridge for up to 3 days.
- Prep Time: 20 minutes
- Cook Time: 0 minutes (Chilling Time: 2 hours)
- Category: Dessert
- Method: No-Bake
- Cuisine: American


