
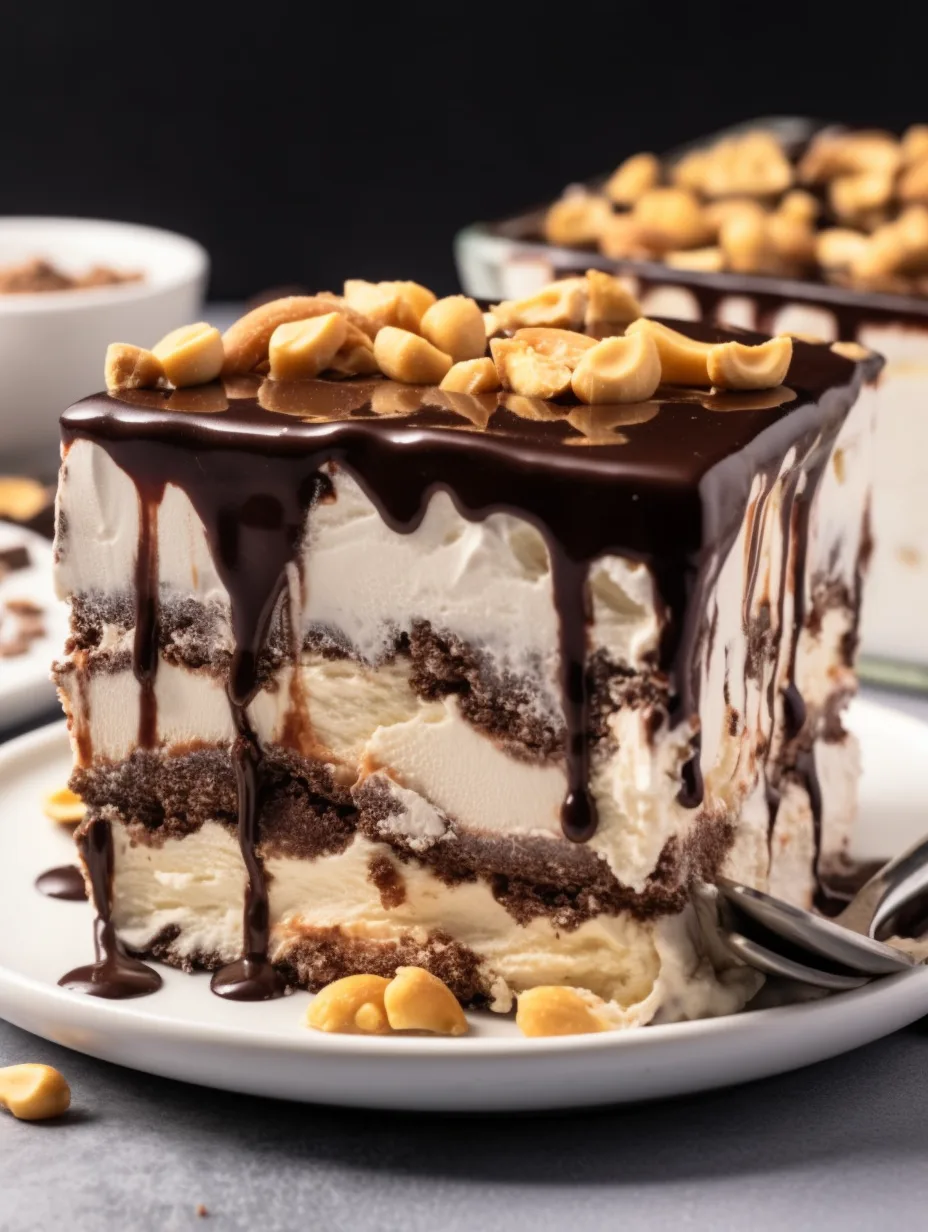
Buster Bar Ice Cream Cake is a delightful treat that combines the creamy goodness of ice cream with the rich flavors of chocolate and nuts. This layered dessert will satisfy your sweet tooth and impress your guests with its delicious taste and stunning presentation. Whether you’re celebrating a birthday, hosting a summer party, or just craving a sweet indulgence, this cake is the perfect solution. It offers layers of textures and flavors that dance on your palate, creating an experience that’s nothing short of amazing.
Imagine the joy of digging into a slice of Buster Bar Ice Cream Cake on a hot sunny day! The cold creaminess of the ice cream blends perfectly with the crunchy layers, while the richness of the chocolate adds an irresistible touch. Making this cake is not just about following a recipe; it’s about creating memories and making someone feel special. With each bite, you are transported into a world of delightful flavors that everyone will cherish.
In this guide, you’ll learn why this recipe is a must-have in your dessert repertoire, the preparation time you’ll need, a comprehensive list of ingredients, and step-by-step instructions to create this heavenly dessert. You don’t have to be a professional baker; anyone can master this incredible recipe with a bit of practice! Let’s explore what makes the Buster Bar Ice Cream Cake an essential addition to your dessert menu.
Why You’ll Love This Recipe
Buster Bar Ice Cream Cake brings together a medley of flavors and textures that will make it a favorite in your household. Here are some reasons why this recipe is simply irresistible:
1. Decadent Layers: The combination of ice cream and crunchy chocolate nut layers is a symphony of taste.
2. Versatile: You can customize it by using your favorite ice cream flavors or toppings.
3. No Baking Required: This recipe is perfect for those looking for a no-bake dessert option.
4. Easy to Make: With straightforward instructions, even beginners will succeed in making this delightful cake.
5. Great for Any Occasion: Whether it’s a birthday, holiday celebration, or just a random Tuesday, this cake fits the bill.
6. Impressive Presentation: The layers of different textures make for an eye-catching dessert that will wow your guests.
With these exciting qualities, it’s easy to see why the Buster Bar Ice Cream Cake is a beloved choice among dessert aficionados. Every slice serves not just a treat, but a moment of joy and indulgence.
Preparation and Cooking Time
The total time needed to prepare the Buster Bar Ice Cream Cake is approximately 4 hours and 15 minutes. This includes freezing time, so plan accordingly. Here’s how it breaks down:
– Preparation Time: 15 minutes
– Assembly Time: 30 minutes
– Freezing Time: 4 hours
These timings offer a good estimate and may vary based on your familiarity with the recipe or kitchen speed.
Ingredients
– 1 package (15 to 18 ounces) of graham crackers
– 1 cup unsalted butter, melted
– ½ cup granulated sugar
– 1 ½ quarts of your favorite ice cream (softened)
– 1 cup creamy peanut butter
– 1 cup powdered sugar
– 1 cup chopped nuts (peanuts or your choice)
– 1 cup hot fudge sauce (warmed)
– 1 cup whipped topping (or whipped cream)
– Optional: chocolate shavings or more nuts for garnish
Step-by-Step Instructions
Creating the Buster Bar Ice Cream Cake can be simple and fun if you follow these steps:
1. Prepare the Crust: In a bowl, mix the crushed graham crackers, melted butter, and granulated sugar until well combined. Press this mixture into the bottom of a 9×13-inch cake pan to form a crust.
2. First Layer of Ice Cream: Spread half of the softened ice cream over the graham cracker crust. Smooth it out evenly and return the pan to the freezer for at least 1 hour.
3. Peanut Butter Layer: In a mixing bowl, combine the peanut butter and powdered sugar until smooth. Carefully spread this mixture over the first layer of ice cream. Return to the freezer for another hour.
4. Second Layer of Ice Cream: Take out the cake from the freezer and spread the remaining half of the softened ice cream on top of the peanut butter mixture. Refreeze for about 1 to 2 hours until firm.
5. Add the Nuts: Once the ice cream is firm, sprinkle the chopped nuts over the top layer of ice cream, pressing them lightly into the ice cream for better adherence.
6. Fudge Layer: Drizzle the warmed hot fudge sauce over the layer of nuts, ensuring it’s evenly distributed.
7. Top with Whipped Topping: Spread the whipped topping evenly over the fudge layer. You may choose to garnish with chocolate shavings or nuts for presentation.
8. Final Freeze: Cover the cake with plastic wrap and freeze for at least 2 hours or until the dessert is fully set.
9. Slice and Serve: When ready to serve, remove the cake from the freezer. Let it sit at room temperature for about 10 minutes for easier slicing. Cut it into squares for serving.
How to Serve
When it’s time to serve your Buster Bar Ice Cream Cake, consider the following tips to impress your guests:
1. Presentation: Place the cake on a decorative dessert stand to elevate its look. A clean, simple design enhances its visual appeal.
2. Garnishes: Top individual slices with additional hot fudge, more whipped topping, or fresh berries to improve flavor and presentation.
3. Serving Size: Cut moderate-sized slices that allow everyone to indulge without overwhelming their palate. Remember, smaller slices can encourage seconds!
4. Beverage Pairing: Serve alongside coffee or chocolate milkshakes to complement the sweetness of the cake.
With these serving tips, you can ensure that your Buster Bar Ice Cream Cake becomes the star of the dessert table, leaving a lasting impression on all who enjoy it.
Additional Tips
– Use Fresh Ingredients: Quality matters. Fresh nuts and ice cream will enhance the overall taste.
– Allow Ice Cream to Soften: Letting the ice cream sit for a few minutes at room temperature before layering makes it easier to spread.
– Decorate Creatively: Use chocolate sauce, nuts, or sprinkles on top for an attractive finish.
– Serve with Slices of Fruit: To balance the sweetness, consider serving the cake with slices of fresh fruit, like strawberries or bananas.
Recipe Variation
Get creative with your Buster Bar Ice Cream Cake! Here are some fun variations to try:
1. Different Ice Cream Flavors: Mix it up by using cookie dough, mint chocolate chip, or even strawberry ice cream.
2. Healthier Options: Use low-fat ice cream and sugar substitutes to make it a lighter dessert option.
3. Add Cookie Crumbles: Incorporate crushed Oreos or chocolate chip cookies within the layers for extra crunch.
4. Layered Fudge: Instead of one layer of fudge, create multiple layers for an intense chocolate experience.
Freezing and Storage
– Storage: Keep leftovers covered in the freezer. It can stay fresh for up to 2 months.
– Thawing: When ready to enjoy, take the cake out and let it sit at room temperature for 10-15 minutes before slicing.
– Slicing: Warm a knife under hot water before cutting to make clean slices, which will help maintain the layers.
Special Equipment
Preparing the Buster Bar Ice Cream Cake requires a few basic tools:
– 9×13 inch Baking Pan: Essential for forming the layers of your cake.
– Mixing Bowls: For preparing the crust and peanut butter layer.
– Spatula: Useful for spreading layers evenly.
– Plastic Wrap: Needed for covering the cake while freezing.
– Knife: For slicing the cake when it’s ready to serve.
Frequently Asked Questions
Can I use any type of nuts?
Yes! Feel free to substitute almonds, walnuts, or pecans based on your preference.
How long can I keep the cake in the freezer?
The cake can be stored for up to 2 months in the freezer.
What’s the best way to slice the cake?
Warm the knife under hot water for smoother cuts, making sure to wipe it dry between slices.
Can I make a mini version of this cake?
Absolutely! You can scale down the recipe and use a smaller baking dish for a mini cake.
Is it possible to prepare the layers a day in advance?
Yes, you can prepare each layer separately and assemble them the next day, just make sure to keep everything well-covered in the freezer.
Conclusion
The Buster Bar Ice Cream Cake is a sensational dessert that promises to be a hit at any gathering. With its rich flavors and delightful texture, each bite is a celebration in itself. Easy to make and adaptable for various tastes, this cake is not just a treat; it’s a way to create sweet memories with friends and family. Next time you’re in the mood for an indulgent dessert, remember that this cake is always a fantastic option!
Buster Bar Ice Cream Cake: An Incredible Ultimate Recipe
- Total Time: 15 minutes
Ingredients
– 1 package (15 to 18 ounces) of graham crackers
– 1 cup unsalted butter, melted
– ½ cup granulated sugar
– 1 ½ quarts of your favorite ice cream (softened)
– 1 cup creamy peanut butter
– 1 cup powdered sugar
– 1 cup chopped nuts (peanuts or your choice)
– 1 cup hot fudge sauce (warmed)
– 1 cup whipped topping (or whipped cream)
– Optional: chocolate shavings or more nuts for garnish
Instructions
Creating the Buster Bar Ice Cream Cake can be simple and fun if you follow these steps:
1. Prepare the Crust: In a bowl, mix the crushed graham crackers, melted butter, and granulated sugar until well combined. Press this mixture into the bottom of a 9×13-inch cake pan to form a crust.
2. First Layer of Ice Cream: Spread half of the softened ice cream over the graham cracker crust. Smooth it out evenly and return the pan to the freezer for at least 1 hour.
3. Peanut Butter Layer: In a mixing bowl, combine the peanut butter and powdered sugar until smooth. Carefully spread this mixture over the first layer of ice cream. Return to the freezer for another hour.
4. Second Layer of Ice Cream: Take out the cake from the freezer and spread the remaining half of the softened ice cream on top of the peanut butter mixture. Refreeze for about 1 to 2 hours until firm.
5. Add the Nuts: Once the ice cream is firm, sprinkle the chopped nuts over the top layer of ice cream, pressing them lightly into the ice cream for better adherence.
6. Fudge Layer: Drizzle the warmed hot fudge sauce over the layer of nuts, ensuring it’s evenly distributed.
7. Top with Whipped Topping: Spread the whipped topping evenly over the fudge layer. You may choose to garnish with chocolate shavings or nuts for presentation.
8. Final Freeze: Cover the cake with plastic wrap and freeze for at least 2 hours or until the dessert is fully set.
9. Slice and Serve: When ready to serve, remove the cake from the freezer. Let it sit at room temperature for about 10 minutes for easier slicing. Cut it into squares for serving.
- Prep Time: 15 minutes
- Cook Time: 0 minutes
Nutrition
- Serving Size: 12 servings
- Calories: 405 kcal
- Fat: 25g
- Protein: 5g