
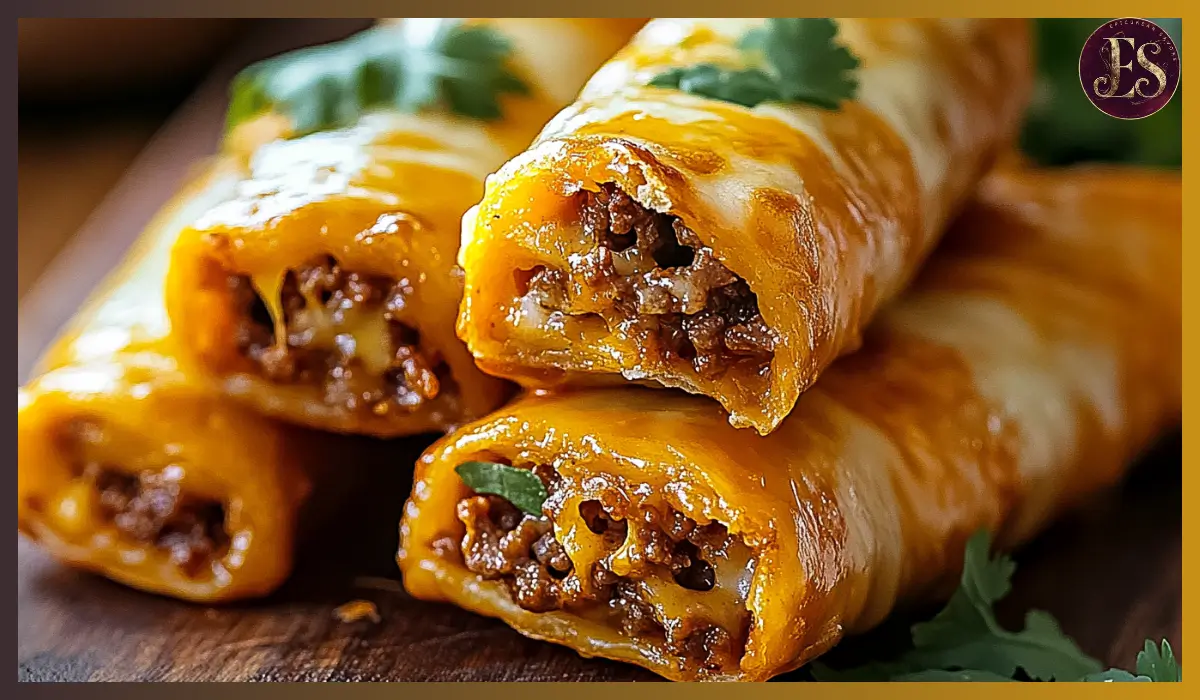
There’s something undeniably satisfying about biting into a crispy, cheesy, and perfectly seasoned taco stick. The combination of melted cheese, spiced ground beef, and a golden, flaky crust is pure comfort food. These Cheesy Taco Sticks take everything you love about tacos and wrap it up into a convenient, handheld snack that’s perfect for any occasion.
This recipe is incredibly simple, requiring just a handful of ingredients and minimal prep time. Whether you need a quick weeknight dinner, a fun game-day appetizer, or an easy snack for the kids, these taco sticks are guaranteed to be a hit. The best part? They’re baked, not fried, so you get all the crispy goodness without the extra grease.
I first made these for a family gathering, and they disappeared within minutes. The crispy pizza dough, gooey cheese, and flavorful taco-seasoned beef create the perfect bite every time. They quickly became a go-to recipe for parties, movie nights, and even lunchbox meals. Plus, they’re easy to customize—add extra heat with jalapeños, swap in different cheeses, or even make them vegetarian by using black beans instead of beef.
If you love tacos but want a fun and unique way to enjoy them, these Cheesy Taco Sticks are a must-try. With just a few steps, you’ll have a plate of warm, cheesy goodness ready to impress your family and friends.
Why You’ll Love This Recipe
These Cheesy Taco Sticks check all the right boxes—they’re quick, delicious, and endlessly customizable. Here’s why you’ll love them:
1. Quick and Easy to Make
With just 25 minutes from start to finish, this recipe is perfect for busy weeknights. The prep is minimal, and the oven does all the work.
2. Perfect for Any Occasion
These taco sticks work as a main dish, appetizer, or snack. Serve them for family dinners, game nights, or even as a fun twist on taco night.
3. Budget-Friendly and Uses Simple Ingredients
You don’t need any fancy ingredients—just ground beef, taco seasoning, cheese sticks, pizza dough, and a few pantry staples. It’s an affordable meal that doesn’t compromise on flavor.
4. Kid-Approved and Family-Friendly
Kids love anything cheesy and crispy, making these taco sticks an instant favorite. Plus, they’re easy to eat, so there’s no mess.
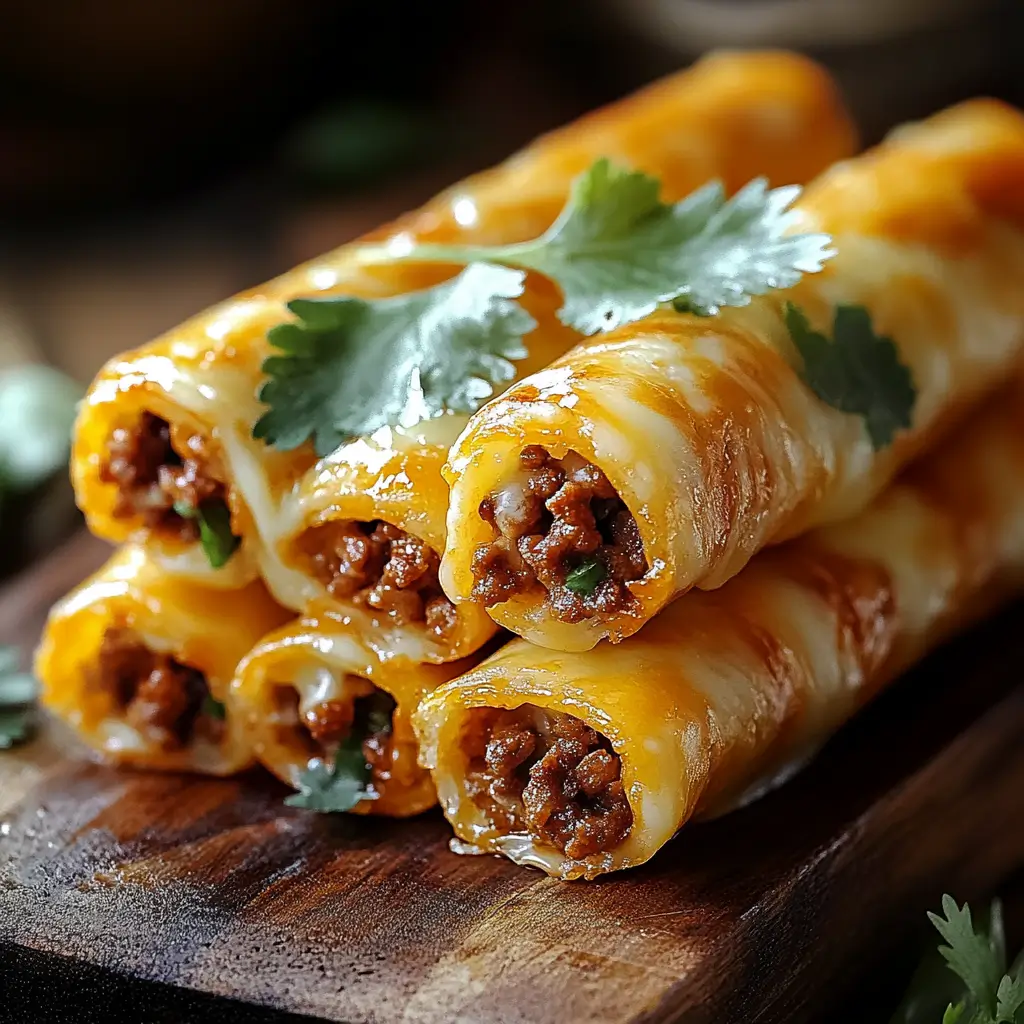
5. Crispy Outside, Gooey Inside
The pizza dough turns golden and crispy in the oven, while the cheese melts into a perfectly gooey filling. Every bite is packed with texture and flavor.
6. Customizable to Your Taste
You can switch up the fillings by using different cheeses, adding veggies, or making them spicy. It’s a flexible recipe that you can adapt to your cravings.
If you love simple, satisfying recipes that bring big flavors without a lot of effort, these taco sticks are perfect for you.
Health Benefits
While these Cheesy Taco Sticks are definitely comfort food, they can be enjoyed as part of a balanced diet. Here are some of their nutritional benefits:
1. High in Protein
Ground beef is an excellent source of protein, which is essential for muscle repair and energy. Each taco stick contains a good amount of protein, helping to keep you full longer.
2. Calcium-Rich
Cheese is loaded with calcium, which is important for strong bones and teeth. The combination of cheddar and colby jack provides a tasty way to get your daily dose.
3. Provides Essential Nutrients
Beef contains iron, zinc, and B vitamins, which support overall health, boost immunity, and increase energy levels.
4. Can Be Made Healthier
If you want a lighter version, you can use ground turkey instead of beef, opt for whole-wheat pizza dough, or reduce the cheese.
While these taco sticks are indulgent, they also offer important nutrients, making them a great option for a balanced meal.
Preparation Time, Servings, and Nutritional Information
- Total Time: 25 minutes
- Prep Time: 10 minutes
- Cook Time: 12-15 minutes
- Servings: 10 taco sticks
- Calories per Serving: Approximately 250 kcal
- Protein: 12g
- Carbs: 22g
- Fat: 14g
These taco sticks are filling, flavorful, and portioned perfectly. You can easily double the recipe to feed a crowd.
Ingredients List
To make these Cheesy Taco Sticks, you’ll need the following ingredients:
Main Ingredients:
- 1 lb ground beef
- 1 packet taco seasoning mix (or homemade)
- 1 tube refrigerated pizza dough
- 5 cheese sticks, halved (colby jack and cheddar work best)
Garlic Butter Topping:
- 4 tbsp melted butter
- 1 tsp garlic powder
- 1 tsp dried parsley
Optional Dipping Sauces:
- Salsa
- Guacamole
- Sour cream
These simple ingredients come together to create a crispy, cheesy, and perfectly seasoned snack.
Step-By-Step Cooking Instructions
Preheat the Oven
Set your oven to 400°F (200°C) and line a baking sheet with parchment paper. This prevents sticking and ensures even baking.
Cook the Ground Beef
- Heat a skillet over medium heat and add the ground beef.
- Cook until fully browned, breaking it up with a spatula.
- Drain any excess fat and stir in taco seasoning and a few tablespoons of water. Let it simmer for 2-3 minutes.
Prepare the Pizza Dough
- Roll out the pizza dough on a floured surface.
- Cut it into 10 equal rectangles using a knife or pizza cutter.
Assemble the Taco Sticks
- Place a small amount of taco-seasoned beef on each rectangle.
- Add one-half of a cheese stick on top of the beef.
- Carefully roll the dough over the filling, sealing the edges.
Brush with Garlic Butter
- In a small bowl, mix melted butter, garlic powder, and dried parsley.
- Brush the butter mixture over each taco stick for extra flavor.
Bake to Perfection
- Place the taco sticks on the prepared baking sheet.
- Bake for 12-15 minutes, or until golden brown and crispy.
Serve and Enjoy
- Let the taco sticks cool slightly before serving.
- Enjoy with salsa, guacamole, or sour cream for dipping.
How to Serve
These Cheesy Taco Sticks are best served fresh from the oven. Here are a few ways to enjoy them:
- With Dipping Sauces: Serve with salsa, guacamole, or a creamy chipotle sauce.
- As a Meal: Pair with a side salad or Mexican-style rice.
- For a Party: Arrange on a platter with assorted dips for a fun appetizer.
Pairing Suggestions
Pair these taco sticks with:
- Mexican Street Corn for a flavorful side.
- A Fresh Salad with avocado and lime dressing.
- Refreshing Drinks like homemade lemonade or fruit-infused water.
Storage, Freezing & Reheating Instructions
- Refrigerate: Store in an airtight container for up to 3 days.
- Freeze: Wrap individually and freeze for up to 2 months.
- Reheat: Bake at 350°F for 10 minutes to keep them crispy.
Common Mistakes to Avoid
Making Cheesy Taco Sticks is a straightforward process, but a few common mistakes can affect the final result. Avoid these pitfalls to ensure your taco sticks turn out crispy, cheesy, and perfectly golden every time.
1. Overfilling the Dough
One of the biggest mistakes is adding too much beef or cheese inside the dough. While it might be tempting to pack in extra filling, this can cause the dough to tear or leak while baking. Keep portions balanced—a small scoop of beef and half a cheese stick per piece is the perfect amount.
2. Not Sealing the Edges Properly
If the edges of your taco sticks are not sealed tightly, the cheese will ooze out during baking, leaving you with an empty shell and a mess on your baking sheet. To avoid this, press the edges firmly together and even use a fork to crimp them for extra security.
3. Skipping the Butter Topping
The butter, garlic, and parsley glaze adds so much flavor and helps the taco sticks achieve a beautiful golden-brown crust. Skipping this step will make them taste dull and appear pale. Always brush generously before baking.
4. Baking at the Wrong Temperature
If your oven is too hot, the outside of the taco sticks will brown too quickly, leaving the inside undercooked. If the temperature is too low, the crust won’t get crispy enough. Stick to 400°F (200°C) for the perfect balance of crispy crust and gooey filling.
5. Using Cold Dough
If your pizza dough is too cold, it may tear when you try to roll it. Let the dough rest at room temperature for 10 minutes before using it. This makes it easier to work with and helps it stretch without breaking.
6. Not Letting Them Cool Before Serving
Right out of the oven, the cheese inside is extremely hot and can burn your mouth. Let the taco sticks rest for 2-3 minutes before eating to allow the cheese to set slightly while still staying melty.
Avoiding these common mistakes will ensure that your Cheesy Taco Sticks turn out perfect every time—crispy on the outside, cheesy on the inside, and bursting with taco flavor.
Pro Tips
1. Use Freshly Grated Cheese for the Best Melt
Pre-packaged cheese sticks are convenient, but if you want extra gooey, melty cheese, try using freshly grated cheddar, colby jack, or pepper jack. Simply cut them into stick shapes and use them instead of store-bought cheese sticks.
2. Make It Extra Crispy by Broiling
If you love extra crispy taco sticks, place them under the broiler for 1-2 minutes after baking. Keep a close eye on them to prevent burning. This step adds a beautiful golden-brown crust with a slight crunch.
3. Customize Your Fillings for More Flavor
- Spicy Version: Add chopped jalapeños or a sprinkle of red pepper flakes inside.
- Veggie Option: Swap the beef for sautéed bell peppers, onions, and mushrooms.
- Extra Cheesy: Add a second layer of cheese on top of the beef before rolling.
4. Refrigerate for Easy Rolling
If your dough is getting too sticky while rolling, pop it in the fridge for 5 minutes. This helps it firm up slightly, making it easier to handle and shape.
5. Serve Immediately for the Best Texture
These taco sticks are best enjoyed fresh out of the oven. If you’re making them ahead of time, reheat them in the oven to keep them crispy instead of using the microwave, which can make them soggy.
6. Double the Recipe and Freeze for Later
If you love meal prepping, make a double batch and freeze some for later. Just assemble the taco sticks, place them on a baking sheet to freeze, then store them in a freezer bag. When you’re ready to eat, bake them straight from frozen—just add 2-3 extra minutes to the cooking time.
These pro tips will help you get the most out of this recipe, making sure your Cheesy Taco Sticks turn out absolutely perfect every single time.
Frequently Asked Questions (FAQs)
1. Can I use crescent roll dough instead of pizza dough?
Yes, crescent roll dough will work, but it will have a softer, flakier texture instead of a crispy crust. If using crescent dough, pinch the seams together before rolling to prevent gaps.
2. What type of cheese works best for this recipe?
Colby jack and cheddar cheese sticks are great choices, but you can also use mozzarella, pepper jack, or Monterey jack. Choose a cheese that melts well for the best results.
3. Can I make these ahead of time?
Yes! You can assemble the taco sticks and store them in the refrigerator for up to 24 hours before baking. Just brush them with butter and bake when ready.
4. How do I reheat leftover taco sticks?
To keep them crispy, reheat in the oven at 350°F (175°C) for 8-10 minutes. Avoid using the microwave, as it can make the dough chewy instead of crispy.
5. Can I freeze Cheesy Taco Sticks?
Yes! Place the baked or unbaked taco sticks in a single layer on a baking sheet and freeze for 1-2 hours. Then transfer them to a freezer bag and store for up to 2 months. Bake straight from frozen, adding a few extra minutes to the cooking time.
Conclusion & Call to Action
There you have it—the ultimate recipe for Cheesy Taco Sticks! These crispy, cheesy, and flavor-packed snacks are perfect for any occasion, from quick weeknight dinners to fun party appetizers. The crunchy golden crust, melty cheese, and seasoned beef make every bite absolutely irresistible.
One of the best things about this recipe is how easy and versatile it is. You can customize the fillings, switch up the cheese, or even make them spicy for an added kick. Plus, they store and reheat beautifully, so you can enjoy them anytime.
Now it’s your turn! Try making these Cheesy Taco Sticks and see why they’ve become a favorite in so many kitchens. I’d love to hear how yours turned out! Did you add any fun twists? What dipping sauces did you pair them with? Leave a comment below and let me know your thoughts.
If you love this recipe, don’t forget to share it with your friends and family. Snap a picture, post it on social media, and tag me—I’d love to see your delicious creations!
Happy cooking, and enjoy your Cheesy Taco Sticks!
Print
Cheesy Taco Sticks
- Total Time: 25 minutes
- Yield: 10 taco sticks 1x
Description
These Cheesy Taco Sticks are crispy, cheesy, and packed with flavorful taco-seasoned beef. They’re quick, easy, and perfect for snacks, parties, or game nights.
Ingredients
- 1 lb ground beef
- 1 packet taco seasoning mix
- 1 tube refrigerated pizza dough
- 5 cheese sticks, halved
- 4 tbsp melted butter
- 1 tsp garlic powder
- 1 tsp dried parsley
Instructions
- Preheat oven to 400°F (200°C) and line a baking sheet with parchment paper.
- Cook ground beef over medium heat until browned. Drain excess fat, stir in taco seasoning, and let it simmer for 2-3 minutes.
- Roll out pizza dough and cut into 10 equal rectangles.
- Add a small amount of seasoned beef to each piece, place a halved cheese stick on top, and roll tightly, sealing the edges.
- Brush with melted butter mixed with garlic powder and parsley.
- Bake for 12-15 minutes, until golden brown.
- Serve warm with salsa, guacamole, or sour cream for dipping.
Notes
- Try using ground turkey or chicken for a lighter version.
- Add chopped jalapeños for extra heat.
- Brush with egg wash for an extra golden crust.
- Prep Time: 10 minutes
- Cook Time: 15 minutes
- Category: Appetizer, Snack
- Method: Baking
- Cuisine: Mexican-American