

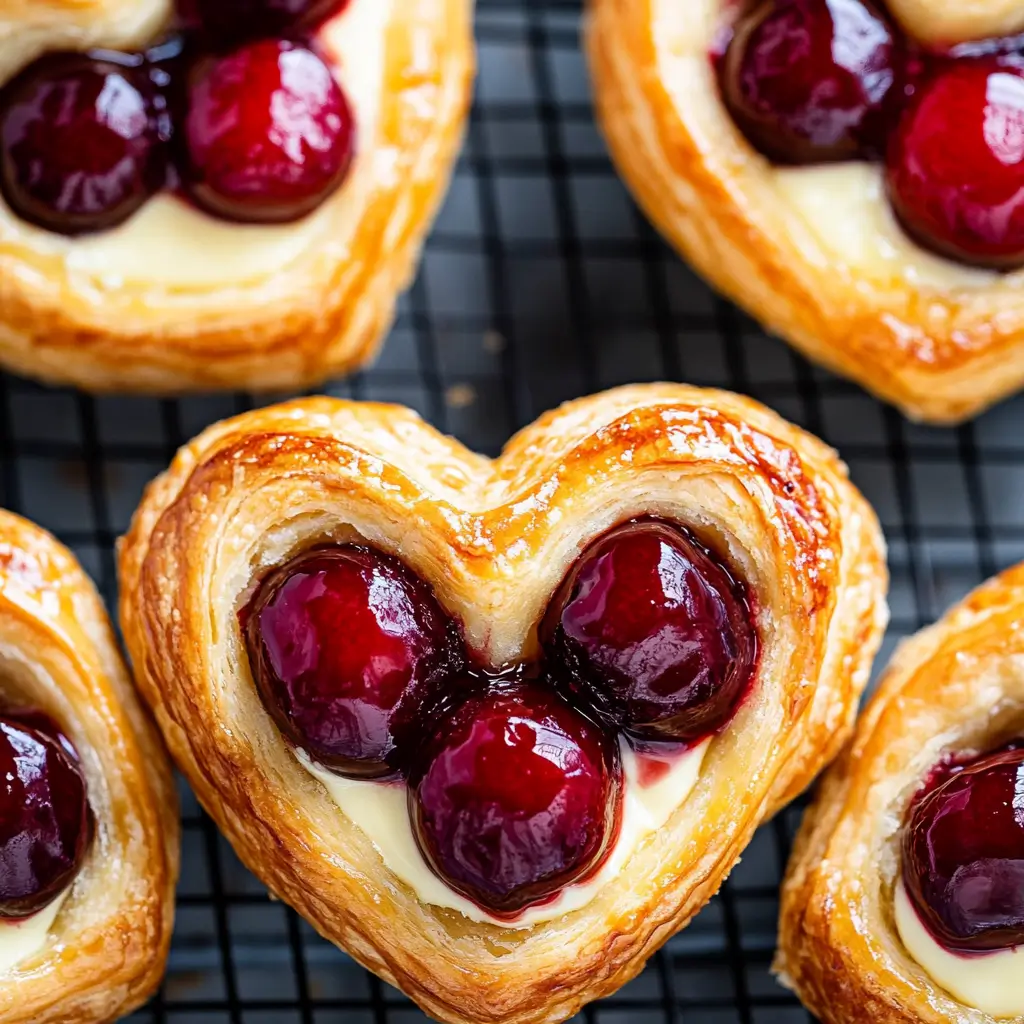
There’s something magical about a warm, flaky pastry that’s filled with creamy cheese and topped with glossy cherries. Whether you’re hosting a weekend brunch, preparing for a holiday breakfast, or simply satisfying a sweet craving on a random Tuesday, this Cherry Cheese Danish checks all the boxes. It’s buttery. It’s sweet. And it’s absolutely beautiful on the table.
This recipe is a go-to in our house, especially around the holidays when the kitchen is already humming with activity. I first made it on a whim with leftover puff pastry, and it was such a hit that now it’s practically a tradition. The flaky crust is golden and crisp, the cream cheese center is rich and tangy, and the cherry topping adds that perfect burst of tartness that ties everything together.
What makes this Danish even more lovable is how easy it is to make. We’re using store-bought puff pastry here, which cuts down on time without sacrificing that heavenly bakery-style flakiness. And trust me, once you see how quick and simple it is to assemble, you’ll want to whip it up for every special breakfast or dessert spread.
Why You’ll Love This Recipe
Easy and beginner-friendly
Even if you’re new to baking, this Cherry Cheese Danish recipe is very approachable. You’re mostly layering ingredients, and the oven takes care of the rest. There’s no need for complicated dough-making or lengthy proofing times.
Crowd-pleaser
This Danish is universally loved. The contrast of creamy cheese and tart cherry creates an addictive balance that keeps people coming back for seconds. It’s perfect for sharing with guests or family members of all ages.
Perfect for all occasions
You can serve this Danish for brunch, breakfast, or dessert. It works beautifully as part of a holiday spread or a sweet treat for a quiet Sunday morning.
Customizable
While we’re going with classic cherry pie filling today, the recipe welcomes creativity. You can switch out the topping with blueberry, raspberry, or even apple pie filling. Add a drizzle of icing or a dusting of powdered sugar for extra sweetness and style.
Delicious textures
The buttery, crisp puff pastry gives way to the soft, creamy cheese filling, while the cherries add a jammy, slightly tart bite. Every mouthful is a contrast of textures and flavors, making it incredibly satisfying.
Health Benefits
While Cherry Cheese Danish isn’t a health food per se, it does have a few redeeming qualities worth highlighting—especially when enjoyed in moderation.
-
Portion control: These pastries are rich and satisfying, so a small serving goes a long way.
-
Calcium-rich filling: Thanks to the cream cheese, you’re getting a boost of calcium, which is great for bones and teeth.
-
Antioxidants from cherries: Cherries contain antioxidants, especially anthocyanins, which are linked to reduced inflammation and better heart health.
-
Lower sugar customization: You can opt for reduced-sugar cherry pie filling or make your own with less sugar if you want to cut back.
So while this pastry may not be your everyday health snack, it’s certainly a worthwhile indulgence that can be enjoyed as part of a balanced lifestyle.
Preparation Time, Servings, and Nutritional Information
Total Time:
-
Prep Time: 15 minutes
-
Bake Time: 18–22 minutes
-
Cooling Time: 10 minutes
-
Total: Approximately 45 minutes
Servings:
Makes 6–8 Danish pastries
Nutritional Information (per serving):
-
Calories: 320
-
Protein: 4g
-
Carbohydrates: 29g
-
Sugars: 12g
-
Fat: 21g
-
Fiber: 1g
Ingredients List
Here’s what you’ll need to make these buttery cherry cheese Danishes:
-
1 sheet puff pastry, thawed (from a 17.3 oz package, typically contains 2 sheets)
-
This is the flaky base—make sure it’s fully thawed before using.
-
-
4 oz cream cheese, softened
-
Gives the Danish its signature creamy, tangy center.
-
-
2 tablespoons granulated sugar
-
Adds just enough sweetness to the cheese filling.
-
-
½ teaspoon vanilla extract
-
Enhances the flavor of the cream cheese mixture.
-
-
1 egg, beaten (for egg wash)
-
Gives the pastry a golden brown finish when baked.
-
-
⅓ cup cherry pie filling
-
Provides that glossy, fruity topping with a bit of tartness.
-
-
Optional: powdered sugar for dusting or icing for drizzling
-
Adds an extra sweet finish and bakery-style look.
-
Step-By-Step Cooking Instructions
Follow these detailed steps for the perfect cherry cheese Danish every time:
-
Preheat the oven
Set your oven to 400°F (200°C) and line a baking sheet with parchment paper or a silicone baking mat. This prevents sticking and ensures even baking. -
Prepare the cream cheese filling
In a small bowl, mix together the softened cream cheese, granulated sugar, and vanilla extract. Stir until the mixture is smooth and creamy with no lumps. Set aside. -
Roll out the puff pastry
Lightly flour your work surface and unfold one sheet of thawed puff pastry. Using a rolling pin, gently roll it out just enough to even the edges and slightly enlarge the surface. -
Cut the pastry
Cut the pastry into 6 or 8 equal rectangles or squares, depending on your preferred size. Use a sharp knife or pizza cutter for clean lines. -
Score the edges
Using a knife, lightly score a border about ½ inch from the edge of each piece. Be careful not to cut all the way through. This step helps create that puffed border when baked. -
Add the filling
Spoon about a tablespoon of the cream cheese mixture into the center of each pastry square. Spread it gently, staying inside the scored lines. -
Top with cherry filling
Add a spoonful of cherry pie filling on top of the cream cheese. About 2–3 cherries per Danish is plenty—don’t overload it or the filling will spill out. -
Brush with egg wash
Beat the egg in a small bowl and use a pastry brush to lightly coat the edges of the puff pastry. This gives it that beautiful golden color during baking. -
Bake
Transfer the baking sheet to the oven and bake for 18–22 minutes or until the edges are puffed and golden brown, and the filling is set. -
Cool slightly
Let the pastries cool on the baking sheet for 5–10 minutes before serving. This allows the filling to firm up a bit and makes them easier to handle. -
Finish and serve
If desired, dust with powdered sugar or drizzle with icing. Serve warm or at room temperature for the best flavor and texture.
How to Serve
This Cherry Cheese Danish is incredibly versatile when it comes to serving. Here are a few ideas to make your presentation even more special:
-
Serve warm for a melt-in-your-mouth experience.
-
Dust with powdered sugar for a pretty, snow-kissed finish.
-
Drizzle with a simple icing made from powdered sugar and milk for added sweetness.
-
Garnish with a fresh cherry or mint leaf for a touch of color and freshness.
-
Pair with a steaming mug of tea or a frothy latte to complete your brunch table.
Pairing Suggestions
These cherry cheese Danishes are delightful on their own, but they also pair well with a variety of side dishes and drinks:
-
Beverages: Try with black tea, coffee, or a vanilla chai latte.
-
Savory sides: Balance the sweetness with scrambled eggs or turkey sausage.
-
Fruit options: Serve with a side of fresh berries or melon for a light, refreshing contrast.
-
Other pastries: Create a mini pastry board with croissants, muffins, and scones for variety.
Storage, Freezing & Reheating Instructions
Storage:
Store any leftovers in an airtight container at room temperature for up to 1 day, or in the fridge for up to 3 days.
Freezing:
To freeze, allow the pastries to cool completely. Place them on a baking sheet and freeze until solid, then transfer to a freezer-safe bag or container. They’ll keep for up to 2 months.
Reheating:
To reheat, bake in a 325°F oven or toaster oven for about 10 minutes or until warmed through. This helps maintain the flakiness of the puff pastry.
Common Mistakes to Avoid
-
Not thawing the puff pastry: If it’s too cold, it will crack; if it’s too warm, it will get sticky. Let it thaw in the fridge until pliable.
-
Overloading the filling: Too much cream cheese or cherries can lead to soggy or runny pastries.
-
Skipping the egg wash: This is key for that golden, glossy finish.
-
Not scoring the border: This step helps define the puffed-up edges and prevents the filling from spreading too far.
-
Baking too long or too short: Underbaked Danishes will be soggy, and overbaked ones will be too crisp. Keep a close eye after 18 minutes.
Pro Tips
-
Use cold puff pastry: Keep the pastry chilled until just before baking to ensure maximum puff.
-
Make it mini: Cut the pastry into smaller squares for bite-sized Danishes—perfect for parties or brunch buffets.
-
Homemade cherry filling: You can make your own with frozen cherries, cornstarch, sugar, and lemon juice.
-
Add lemon zest: Stir a bit into the cream cheese filling for extra brightness.
-
Double the batch: These go fast, especially when served warm. Consider making two sheets if you’re feeding a group.
Frequently Asked Questions (FAQs)
Can I use a different fruit filling?
Absolutely! Blueberry, raspberry, or apple pie filling are all excellent choices.
Can I make this dairy-free?
You can try using dairy-free cream cheese and puff pastry made without butter.
Is puff pastry the same as phyllo dough?
No, they’re different. Puff pastry is thicker and buttery, while phyllo is thin and crisp. Stick with puff pastry for this recipe.
Can I make them ahead of time?
Yes, you can prep them and keep them chilled (unbaked) for a few hours before baking. Add a few extra minutes to the bake time if they’re cold.
How do I prevent the filling from spilling out?
Don’t overfill, and make sure to stay within the scored edges when adding the cheese and cherry mixture.
Can I use low-fat cream cheese?
Yes, though full-fat will give you a richer texture and flavor.
What if I don’t have vanilla extract?
You can substitute almond extract or even lemon zest for a different but delicious flavor.
Why didn’t my pastry puff properly?
It may have been too warm before going into the oven. Cold dough gives the best puff.
Can I use homemade puff pastry?
Yes, but it’s more time-consuming. Store-bought works perfectly for this recipe.
Do I need to glaze the pastry after baking?
No, but a simple icing drizzle adds a nice touch. It’s totally optional.
Conclusion & Call to Action
There you have it—your new go-to recipe for a showstopping Cherry Cheese Danish that’s as simple to make as it is beautiful to serve. Whether you’re baking for brunch, a family gathering, or just to treat yourself on a quiet morning, this recipe brings warmth, sweetness, and a whole lot of joy to the table.
I hope this recipe becomes a staple in your kitchen like it has in mine. If you give it a try, I’d love to hear how it turned out! Leave a comment, share your photos, or tag me on social media so I can see your beautiful creations. Happy baking!
Print
Cherry Cheese Danish
- Total Time: 45 minutes
- Yield: 6–8 servings 1x
Description
A buttery and flaky puff pastry filled with smooth cream cheese and topped with sweet-tart cherry pie filling. Easy to make and perfect for brunch or dessert.
Ingredients
-
1 sheet puff pastry, thawed
-
4 oz cream cheese, softened
-
2 tbsp granulated sugar
-
½ tsp vanilla extract
-
1 egg, beaten (for egg wash)
-
⅓ cup cherry pie filling
-
Optional: powdered sugar or icing for garnish
Instructions
-
Preheat oven to 400°F (200°C). Line a baking sheet with parchment paper.
-
Mix cream cheese, sugar, and vanilla in a bowl until smooth.
-
Roll out puff pastry and cut into 6–8 rectangles.
-
Lightly score a ½-inch border around each rectangle.
-
Spread cream cheese mixture in the center.
-
Add 2–3 cherries from the pie filling on top of the cheese.
-
Brush edges with egg wash.
-
Bake for 18–22 minutes until golden.
-
Cool slightly. Dust with powdered sugar or drizzle with icing, if desired.
Notes
- Do not overfill the pastry or the filling will spill out.
- For best puff, keep pastry cold until baking.
- You can use any pie filling as a topping (blueberry, raspberry, etc.).
- Prep Time: 15 minutes
- Cook Time: 22 minutes
- Category: Breakfast, Brunch, Dessert
- Method: Baking
- Cuisine: American