
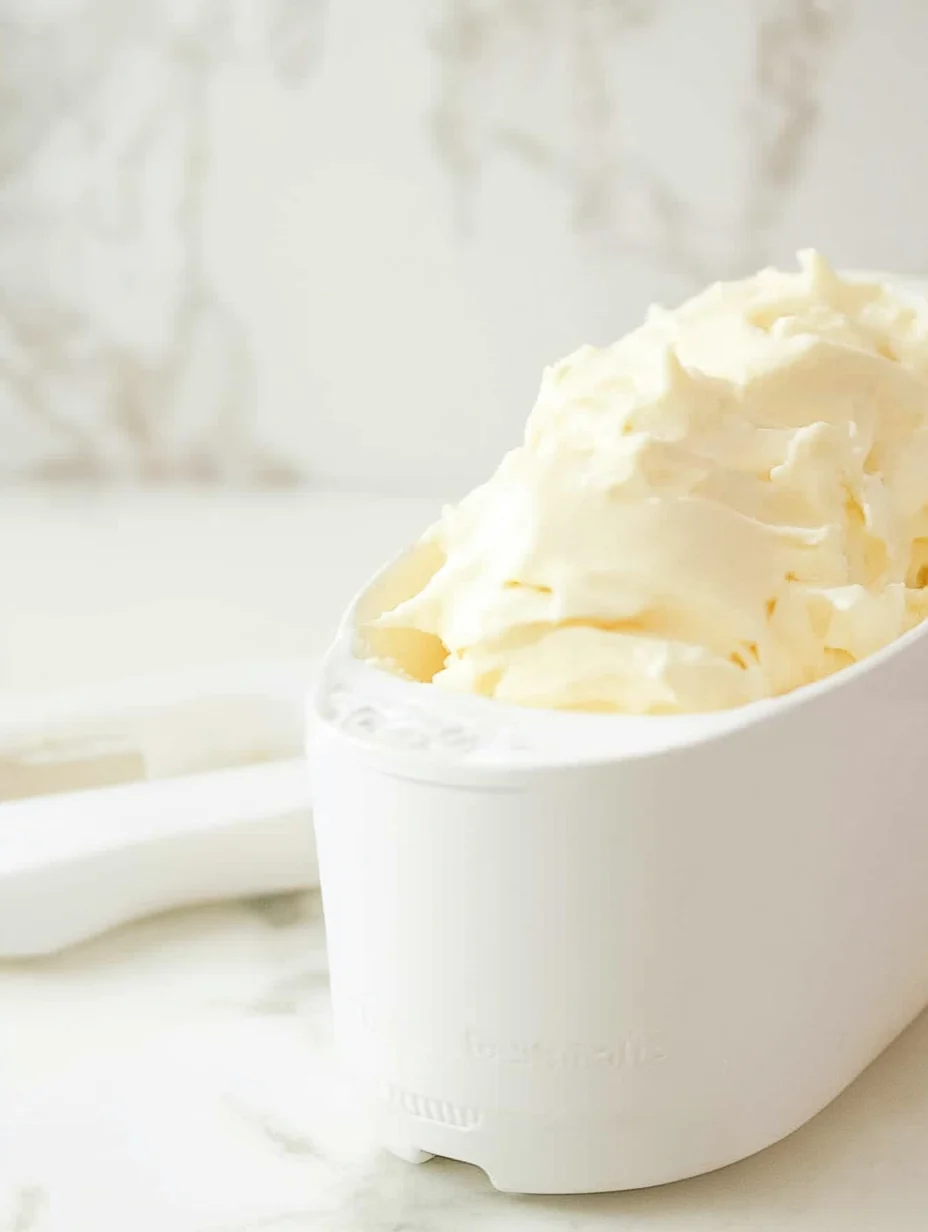
Custard Ice Cream is a rich and creamy dessert that will make your taste buds dance with excitement. This amazing ice cream has a smooth texture and a luscious flavor that is simply irresistible. The beauty of custard ice cream lies in its egg-based custard mixture, which infuses the final product with a velvety richness that standard ice creams simply can’t match. Imagine scooping up a bowl of homemade custard ice cream, with its thick texture and delightful taste—it’s a treat that everyone deserves to enjoy.
If you’ve never experienced the joy of custard ice cream, you’re in for a real treat. The first taste of this sweet delight will transport you to a dessert paradise where every bite is filled with richness and depth. Not only is it delicious, but making custard ice cream is a rewarding culinary experience. With a few simple ingredients and a straightforward process, you can create an incredible ice cream that outshines store-bought options. This guide will walk you through everything you need to know about making custard ice cream at home, why it’s so special, and tips for serving it.
Let’s dive deeper into the magic of custard ice cream. Whether for a special occasion or just to indulge, this recipe will surely become your new go-to. With its balance of creaminess and sweetness, custard ice cream is versatile enough to pair with various toppings and desserts, making it ideal for any event.
Why You’ll Love This Recipe
There are countless reasons to appreciate custard ice cream, and here are just a few:
1. Unique Texture: Custard ice cream boasts a creamier and richer texture than traditional ice cream.
2. Flavorful Base: The egg yolks provide a depth of flavor that makes this ice cream incredibly indulgent.
3. Customizable: You can easily customize flavors by adding different ingredients, such as vanilla, chocolate, or fruit.
4. Perfect for Any Occasion: Whether it’s a hot summer day or a cozy winter evening, custard ice cream fits right in.
5. Satisfying Treat: This ice cream is satisfying enough to enjoy on its own, but it also works well with various toppings.
6. Easy to Follow: Even if you’re a beginner in the kitchen, the steps are easy to understand and follow.
These reasons paint a vivid picture of why custard ice cream is such a beloved treat. It’s not just about the dessert; it’s about the enjoyment and fulfillment that comes from creating something special.
Preparation and Cooking Time
Creating custard ice cream is a delightful process that doesn’t take too long. Here’s an overview of the time involved:
– Preparation Time: 15 minutes
– Cooling Time: 1 hour (for the custard to cool)
– Churning Time: 20-25 minutes
– Freezing Time: 4-6 hours (for the best texture)
In total, you should allocate around 5-7 hours from start to finish if you include the freezing time. However, most of the time will involve waiting for the custard to cool and freeze, making it an easy yet rewarding recipe.
Ingredients
– 2 cups heavy cream
– 1 cup whole milk
– 1 cup granulated sugar
– 5 large egg yolks
– 1 teaspoon vanilla extract
– ½ teaspoon salt
– A pinch of nutmeg (optional)
Step-by-Step Instructions
Making custard ice cream can be straightforward if you follow these simple steps:
1. Heat the Cream and Milk: In a medium saucepan, combine the heavy cream and whole milk. Heat over medium heat until it begins to simmer, then remove it from heat.
2. Whisk Egg Yolks and Sugar: In a separate bowl, whisk together the egg yolks and granulated sugar until the mixture is pale and slightly thickened.
3. Temper the Eggs: Gradually pour a small amount of the hot cream mixture into the egg yolks, whisking constantly to prevent the eggs from scrambling. Continue to add the cream mixture slowly.
4. Combine Mixtures: Pour the tempered egg mixture back into the saucepan with the remaining cream and milk. Cook over low heat, stirring constantly, until it thickens enough to coat the back of a spoon (about 10 minutes).
5. Add Flavorings: Once thickened, remove the custard from heat. Stir in the vanilla extract, salt, and nutmeg (if using).
6. Cool the Custard: Pour the custard through a fine-mesh sieve into a bowl to ensure a smooth texture. Allow it to cool at room temperature for about 30 minutes, then cover and refrigerate for at least 1 hour (or until thoroughly chilled).
7. Churn the Custard: Once the custard is cold, pour it into your ice cream maker and churn according to the manufacturer’s instructions, typically for about 20-25 minutes, until it reaches a soft-serve consistency.
8. Freeze: Transfer the churned ice cream to an airtight container and freeze for at least 4 hours to firm up completely.
9. Serve or Store: Once the ice cream has firmed up, it’s ready to enjoy!
How to Serve
Serving custard ice cream is an ultimate treat experience. Here are some ideas to make your presentation special:
1. In a Bowl or Cone: Serve in classic ice cream bowls or cones for a nostalgic experience. A well-scooped presentation enhances the overall enjoyment.
2. With Toppings: Consider dressing up your custard ice cream with various toppings like chocolate syrup, fresh berries, chopped nuts, or whipped cream for added flavor and texture.
3. Pairing with Desserts: Serve alongside desserts such as brownies, pie, or cakes. The creamy taste of custard ice cream complements many sweet dishes.
4. Creating Sundaes: Build a classic sundae by layering custard ice cream with sauces and toppings.
5. Garnish: Add a sprig of mint or a dusting of cocoa powder as a garnish to elevate the visual appeal.
By thoughtfully considering how to serve custard ice cream, you’ll create a truly memorable experience that everyone will love! Enjoy the creamy goodness of homemade custard ice cream as much as the delightful process of making it!
Additional Tips
– Use Fresh Eggs: The freshness of the eggs enhances the flavor and richness of your custard ice cream. Look for eggs labeled as free-range or organic for the best taste.
– Chill Your Equipment: To achieve optimal results, chill your ice cream maker bowl in the freezer for a few hours before churning.
– Experiment with Flavorings: Beside vanilla, consider adding almond extract or a splash of bourbon for a unique twist to your custard ice cream.
– Keep It Smooth: If you notice any lumps in your custard before churning, respond promptly by passing it through a fine-mesh sieve again.
– Allow for Air Incorporation: When churning, switch to a higher speed for the last few minutes to introduce more air into your ice cream, ensuring it’s light and fluffy.
Recipe Variation
You can have fun with various custard ice cream adaptations! Here are some delightful variations to try:
1. Chocolate Custard Ice Cream: Substitute half a cup of cocoa powder for some of the sugar for a decadent chocolate flavor.
2. Fruit-Infused Custard: Stir in pureed fruits like strawberries or peaches before churning for a fruity twist.
3. Coffee Custard Ice Cream: Add 1 tablespoon of instant coffee or espresso powder to the warm cream and milk mixture for a rich coffee flavor.
4. Mint Chocolate Chip: Incorporate a few drops of mint extract and add chocolate chips during the churning process for a refreshing treat.
5. Nutty Delight: Fold in crushed pistachios or almonds after churning for a satisfying crunch.
Freezing and Storage
– Storage: Pour your custard ice cream into an airtight container. Seal tightly to keep out air and maintain flavor. Properly stored, it will last for about 2-3 weeks in the freezer.
– Freezing Tips: For a creamy texture, let the ice cream soften at room temperature for 5-10 minutes before scooping. This helps avoid the hard, icy scoop you sometimes find in homemade ice creams.
– Avoid Freezer Burn: It’s essential to press plastic wrap directly against the surface of the ice cream before closing the container. This helps prevent freezer burn and maintains the ice cream’s wonderful flavor.
Special Equipment
To create custard ice cream effectively, you’ll need several key pieces of equipment:
– Medium saucepan: For heating the cream and milk mixture.
– Mixing bowls: At least two bowls for whisking and combining ingredients.
– Whisk: To properly mix the egg yolks and sugar.
– Fine-mesh sieve: To ensure a smooth custard by removing any lumps before chilling.
– Ice cream maker: For churning the custard into its creamy form.
– Airtight container: For storing the finished ice cream.
Frequently Asked Questions
Can I make custard ice cream without an ice cream maker?
Yes, you can make custard ice cream using the freeze-and-stir method. Pour chilled custard into a shallow dish and place it in the freezer. Stir the mixture every 30 minutes until it reaches the desired texture.
How can I make my custard ice cream richer?
To enhance richness, consider adding an extra egg yolk or using more heavy cream in place of whole milk.
What is the best way to scoop ice cream?
For easy scooping, dip your ice cream scoop in warm water before serving. This helps it glide smoothly through the ice cream.
Can I use alternative milks?
While the flavor and texture will change, you can substitute whole milk with alternative milks like almond, soy, or oat milk. However, consider adding a thickener to maintain the creamy texture.
How do I know when the custard is ready?
The custard will thicken and coat the back of a spoon, testing as you stir. If you run your finger through it, a line should remain.
Conclusion
Making custard ice cream at home is a rewarding process that brings a touch of magic to your dessert table. With its creamy texture and delightful flavors, it’s a treat that caters to all ages and occasions. Each scoop of your homemade custard ice cream speaks of the care and attention you put into crafting it, making it an experience worth sharing with loved ones. So, gather your ingredients, follow the steps, and enjoy the indulgent taste of homemade custard ice cream.
Custard Ice Cream: The Incredible Ultimate Recipe for Everyone
- Total Time: 25 minutes
Ingredients
– 2 cups heavy cream
– 1 cup whole milk
– 1 cup granulated sugar
– 5 large egg yolks
– 1 teaspoon vanilla extract
– ½ teaspoon salt
– A pinch of nutmeg (optional)
Instructions
Making custard ice cream can be straightforward if you follow these simple steps:
1. Heat the Cream and Milk: In a medium saucepan, combine the heavy cream and whole milk. Heat over medium heat until it begins to simmer, then remove it from heat.
2. Whisk Egg Yolks and Sugar: In a separate bowl, whisk together the egg yolks and granulated sugar until the mixture is pale and slightly thickened.
3. Temper the Eggs: Gradually pour a small amount of the hot cream mixture into the egg yolks, whisking constantly to prevent the eggs from scrambling. Continue to add the cream mixture slowly.
4. Combine Mixtures: Pour the tempered egg mixture back into the saucepan with the remaining cream and milk. Cook over low heat, stirring constantly, until it thickens enough to coat the back of a spoon (about 10 minutes).
5. Add Flavorings: Once thickened, remove the custard from heat. Stir in the vanilla extract, salt, and nutmeg (if using).
6. Cool the Custard: Pour the custard through a fine-mesh sieve into a bowl to ensure a smooth texture. Allow it to cool at room temperature for about 30 minutes, then cover and refrigerate for at least 1 hour (or until thoroughly chilled).
7. Churn the Custard: Once the custard is cold, pour it into your ice cream maker and churn according to the manufacturer’s instructions, typically for about 20-25 minutes, until it reaches a soft-serve consistency.
8. Freeze: Transfer the churned ice cream to an airtight container and freeze for at least 4 hours to firm up completely.
9. Serve or Store: Once the ice cream has firmed up, it’s ready to enjoy!
- Prep Time: 15 minutes
- Cook Time: 10 minutes
Nutrition
- Serving Size: 6-8 servings
- Calories: 300 kcal (per serving)
- Fat: 20g
- Protein: 4g