
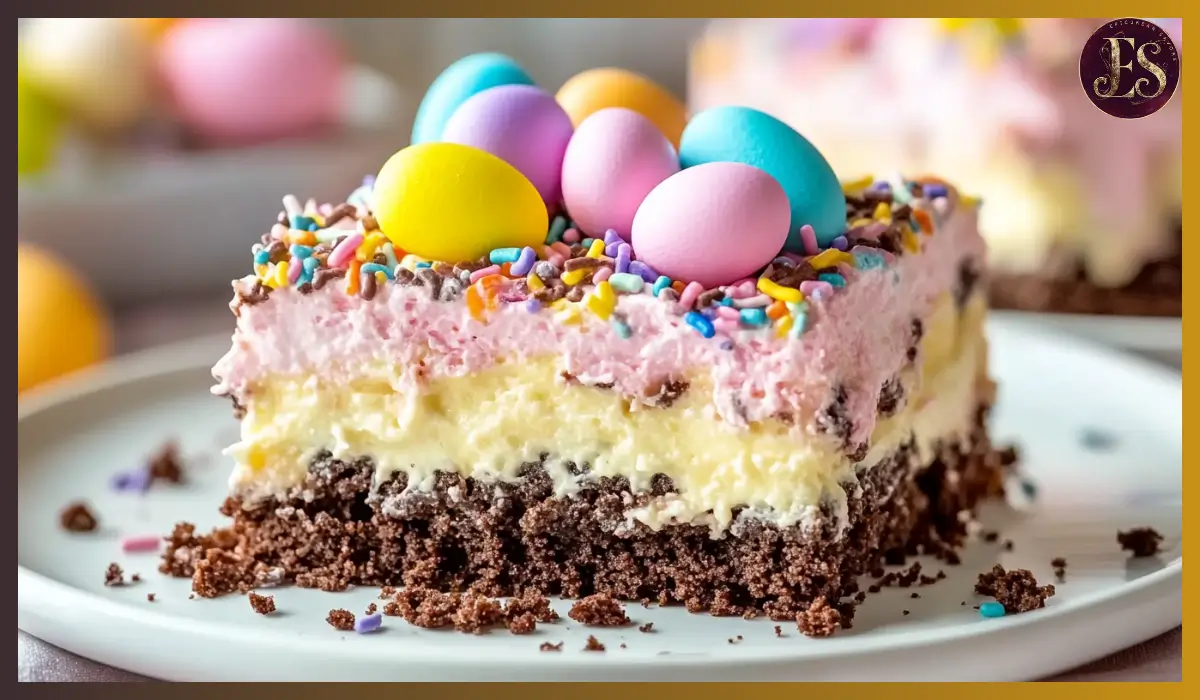
There’s something irresistibly joyful about Easter desserts—they’re colorful, whimsical, and just plain fun. And this Easter Dirt Cake Casserole might just be the ultimate treat to brighten up your holiday table. Imagine layers of velvety chocolate pudding, a creamy cheesecake filling, and crushed Oreos mimicking rich “dirt,” all crowned with candy eggs and gummy worms. It’s as delicious as it is adorable.
This dessert has quickly become a staple at our family’s Easter brunch. The first time I made it, my nieces and nephews were absolutely enchanted by the garden-like decoration—one of them even brought a mini shovel to serve himself a portion. It’s lighthearted, nostalgic, and surprisingly easy to make, which makes it ideal whether you’re hosting a big gathering or just want to surprise your family with a special treat.
What I love most about this Easter Dirt Cake Casserole is how easily it brings people together. It sparks conversation, draws smiles, and tastes like a chocolatey dream. Plus, it doesn’t require baking, which is a huge win when you’re juggling a dozen things for a holiday meal. Whether you’re a seasoned cook or just starting out, you’ll find this dessert delightfully doable.
So if you’re looking for a festive, no-fuss, make-ahead Easter dessert that checks all the boxes—flavorful, fun, and family-friendly—this recipe is going to be your new go-to. Let’s dig in!
Why You’ll Love This Recipe
This recipe isn’t just cute—it’s got the taste and texture to back up the hype. Here’s why you’re going to fall in love with this Easter Dirt Cake Casserole:
- Versatile for Any Occasion: Although it’s themed for Easter, you can easily swap the toppings and enjoy this dirt cake for birthdays, baby showers, or just a cozy family night.
- Budget-Friendly Ingredients: Everything you need is easy to find at the grocery store, and most items are affordable pantry staples.
- Quick Assembly: With no baking required, the steps come together quickly, making this perfect for those who want a hassle-free dessert.
- Kid-Approved and Adult-Loved: The combination of textures—smooth pudding, creamy filling, and crunchy Oreos—makes every bite delightful. And let’s be honest, who doesn’t love an edible Easter garden?
- Totally Customizable: Don’t have candy eggs? Use mini marshmallows or jelly beans. Want to change the pudding flavor? Go for vanilla, white chocolate, or even cookies and cream.
Each layer adds something special: the crushed Oreos create that classic “dirt” texture, the cream cheese filling adds a tangy richness, and the chocolate pudding brings in velvety depth. Topped with festive candies, it’s the kind of dessert that looks like you spent hours on it—even though you didn’t.
Health Benefits
While this is definitely a treat and not a health food, there are still a few silver linings in the ingredient list. Let’s take a look at what this dessert has to offer:
- Portion Control Friendly: Since it’s served from a large casserole, you can easily scoop smaller portions to suit your needs.
- Calcium-Rich: Thanks to the milk, pudding, and cream cheese, this dessert provides a modest source of calcium, which supports strong bones and teeth.
- Mood-Boosting Chocolate: Chocolate is known to release endorphins, so it’s the perfect pick-me-up after a big holiday meal.
- Customizable for Dietary Needs: You can easily substitute low-fat cream cheese, sugar-free pudding mix, or dairy-free alternatives to better suit your health preferences.
When enjoyed in moderation, this Easter Dirt Cake can be a sweet part of a joyful and balanced celebration.
Preparation Time, Servings, and Nutritional Information
Total Time: 25 minutes (plus at least 2 hours of chilling)
Servings: 12
Calories per Serving: 390
Protein: 5g
Carbohydrates: 41g
Fat: 22g
Sugar: 27g
Fiber: 1g
Ingredients List
Here’s what you’ll need to bring this dessert to life:
- 1 (14.3 oz) package of Oreos, crushed – These form the “dirt” layers and give the dessert its signature crunch and chocolate flavor.
- ½ cup unsalted butter, softened – Helps blend the cream cheese mixture smoothly.
- 8 oz cream cheese, softened – Adds creaminess and a tangy contrast to the sweetness of the pudding.
- 1 cup powdered sugar – Sweetens the cream cheese layer without making it grainy.
- Two (3.9 oz) boxes instant chocolate pudding mix – The rich chocolate base for the main pudding layer.
- 3½ cups cold milk – Used to prepare the instant pudding mix.
- 1 (12 oz) container whipped topping, thawed – Lightens the pudding mixture and adds a fluffy texture.
- Candy-coated chocolate eggs – Perfect for decorating the top with an Easter vibe.
- Optional: Gummy worms – Adds a playful, kid-friendly touch.
You can also consider using sugar-free pudding or reduced-fat cream cheese if you want to lighten the dessert a bit.
Step-By-Step Cooking Instructions
- Crush the Oreos
Begin by placing your Oreos in a food processor or zip-top bag and crush them into fine crumbs. You want a dirt-like texture with no big chunks. Set aside half of the crumbs for layering on top later. - Make the Cream Cheese Layer
In a large mixing bowl, beat the softened butter and cream cheese together until the mixture is smooth and fluffy. Add in the powdered sugar and continue to mix until well incorporated. This layer will be slightly sweet and creamy. - Prepare the Pudding
In a separate bowl, whisk the chocolate pudding mix with cold milk. Make sure the mixture is smooth and thickened, which should take about 5 minutes. Let it sit to thicken fully while you move to the next step. - Combine Pudding and Whipped Topping
Fold the whipped topping into the pudding gently using a spatula. This will create a mousse-like texture that is light yet indulgent. - Assemble the Casserole
- Grab a 9×13-inch casserole dish and layer half of the crushed Oreos on the bottom. This forms the crunchy base.
- Spread the cream cheese mixture evenly on top of the Oreos. Try to cover the entire surface without mixing the layers.
- Next, spoon the pudding-whipped topping mixture over the cream cheese layer and smooth it out with a spatula.
- Finish by sprinkling the remaining crushed Oreos over the top, covering the pudding layer entirely.
- Decorate the Top
Arrange candy-coated chocolate eggs across the top to mimic Easter eggs hidden in the dirt. If using gummy worms, nestle them halfway into the “dirt” to look like they’re poking out of the ground. Get creative and have fun with the design. - Chill Before Serving
Place the casserole in the refrigerator for at least 2 hours to let the layers set. You can also prepare it the night before for convenience. When ready to serve, scoop into bowls and enjoy cold.

How to Serve
There are so many fun ways to serve this Easter Dirt Cake Casserole:
- Scoop it into small mason jars or clear cups for individual portions.
- Garnish with fresh mint leaves for a little green “grass” effect.
- Add extra dollops of whipped topping for an even creamier presentation.
- Serve it straight from the casserole dish for a more casual, family-style dessert.
Pairing Suggestions
This light, creamy dessert pairs beautifully with other Easter classics:
- Fresh Fruit: Sliced strawberries or kiwi add brightness and balance.
- Hot Beverages: Serve with decaf coffee or mint tea for a cozy combo.
- Savory Mains: This dessert is a sweet contrast to hearty dishes like roasted chicken or glazed carrots.
Storage, Freezing & Reheating Instructions
Storage: Cover the dish tightly with plastic wrap or transfer leftovers to an airtight container. Store in the refrigerator for up to 3 days.
Freezing: Not recommended. The pudding and whipped topping don’t hold up well after thawing and may become watery.
Reheating: This dessert is meant to be served cold, so reheating is not needed. If it has been in the fridge overnight, just let it sit at room temperature for 10 minutes before serving to soften slightly.
Common Mistakes to Avoid
- Not Softening the Cream Cheese: Cold cream cheese won’t blend well and may leave lumps in your mixture.
- Skipping the Chill Time: The layers need time to firm up, or the dessert may turn out too loose.
- Using Cook-and-Serve Pudding: Make sure you’re using instant pudding for the right consistency.
- Overmixing the Pudding and Whipped Topping: Fold gently to keep the mixture light and airy.
- Not Crushing Oreos Finely Enough: Large chunks can make the texture uneven.
Pro Tips
- Use a Food Processor: For ultra-fine Oreo crumbs, a food processor does the job quickly and thoroughly.
- Prep Ahead: This dessert is even better the next day, so make it the night before to save time.
- Play with Flavors: Try using vanilla or white chocolate pudding for a different twist.
- Keep Decorations Fresh: Add candy decorations just before serving so they don’t get soggy.
- Portion Smart: If serving a crowd, use mini cups for individual servings—kids love the personal touch.
Frequently Asked Questions (FAQs)
Can I use homemade whipped cream instead of whipped topping?
Yes, you can substitute with freshly whipped cream. Just make sure it’s stabilized if you plan to make the dessert in advance.
Can I use vanilla pudding instead of chocolate?
Absolutely. Vanilla, white chocolate, or even banana pudding can be fun variations, especially for a spring theme.
Can I make this gluten-free?
Yes. Just use gluten-free sandwich cookies instead of regular Oreos.
Can I prepare this dessert more than one day in advance?
It’s best to make it no more than 24 hours in advance to maintain freshness and texture.
What’s the best way to crush Oreos without a food processor?
Place them in a zip-top bag and use a rolling pin or heavy pan to crush them until fine.
Is this safe for kids with nut allergies?
Always check the labels on the cookies and candy decorations to make sure they are nut-free.
Can I reduce the sugar content?
Yes, use sugar-free pudding and a lower-sugar whipped topping to cut down on the sweetness.
Will the layers stay separated after chilling?
Yes, if assembled properly and chilled long enough, the layers will hold their shape beautifully.
Can I add fruit to this dessert?
Definitely. Sliced bananas or strawberries between the layers can add a fruity surprise.
Can I double the recipe for a larger crowd?
Yes, just use a larger baking dish or two 9×13 pans and double all the ingredients.
Conclusion & Call to Action
There’s just something magical about a dessert that brings both fun and flavor to the table—and this Easter Dirt Cake Casserole does exactly that. It’s simple, festive, and guaranteed to make people smile, whether they’re five years old or fifty. Best of all, you don’t need to be a pastry chef to pull it off.
If you give this recipe a try, I’d love to hear how it turns out! Leave a comment below or share your masterpiece on social media and tag me. Your version might even inspire someone else’s Easter dessert lineup.
Now go grab those Oreos, whip up some pudding, and create your own edible Easter garden. Happy baking!
Print
Easter Dirt Cake Casserole
- Total Time: 2 hours 25 minutes (with chilling)
- Yield: 12 servings 1x
- Diet: Vegetarian
Description
This fun and festive no-bake Easter Dirt Cake Casserole layers creamy chocolate pudding, sweetened cream cheese, crushed Oreos, and colorful Easter candies for a whimsical dessert that’s perfect for spring gatherings.
Ingredients
-
1 (14.3 oz) package Oreos, crushed
-
½ cup unsalted butter, softened
-
8 oz cream cheese, softened
-
1 cup powdered sugar
-
Two (3.9 oz) boxes instant chocolate pudding mix
-
3½ cups cold milk
-
12 oz whipped topping, thawed
-
Candy-coated chocolate eggs
-
Optional: Gummy worms
Instructions
-
Crush the Oreos and set half aside for topping.
-
Beat butter and cream cheese until smooth. Add powdered sugar and mix well.
-
In another bowl, whisk pudding mix with milk until thickened.
-
Fold in whipped topping to the pudding.
-
In a 9×13 dish, layer half the Oreos, the cream cheese mixture, then the pudding mixture.
-
Top with remaining Oreos and decorate with candy eggs and gummy worms.
-
Chill for at least 2 hours before serving.
Notes
- For best results, soften cream cheese before mixing.
- Make it a day ahead for easier holiday prep.
- Substitute pudding flavors or add fruits like strawberries for variety.
- Prep Time: 25 minutes
- Cook Time: 0 minutes (no-bake)
- Category: Dessert
- Method: No-Bake
- Cuisine: American