

There’s something downright magical about a sweet treat that’s both ridiculously easy to make and mouthwateringly delicious. Enter: Easy Oreo Truffles. This simple, no-bake recipe is a lifesaver for anyone craving a luscious, chocolatey dessert without spending hours in the kitchen. Plus, they’re practically foolproof, making them the perfect choice for beginners and seasoned bakers alike.
I first stumbled upon these delightful truffles during a last-minute dessert emergency for a family gathering. You know, the kind of panic where you realize you need to bring something impressive, but time is ticking away. Thankfully, Oreo Truffles saved the day. After that first try, I was hooked. Not only were they a hit with everyone at the party, but they also became my go-to recipe for whenever I needed a quick sweet fix.
The beauty of this recipe is in its simplicity. All you need are Oreos, cream cheese, and some sort of coating—whether it’s vanilla almond bark, melting wafers, or chocolate chips. The process is so easy: crush, mix, shape, coat, and voila! You’ve got yourself a batch of rich, creamy, chocolatey bites that are guaranteed to be the star of any dessert table. And let’s not forget how versatile these truffles are. You can dress them up with sprinkles, drizzle them with colorful candy melts, or even shape them to fit the theme of your party.
If you’re ready to become everyone’s favorite dessert hero, then stick around. I’m going to walk you through every step of making these fantastic truffles, plus some pro tips and variations to make them uniquely yours. By the end of this guide, you’ll be whipping up Oreo Truffles like a pro.
Why You’ll Love This Recipe
There are so many reasons to fall head over heels for these Oreo Truffles, but let’s break down the biggest ones.
First and foremost, they are incredibly easy to make. We’re talking about a recipe that requires minimal effort and produces show-stopping results. All you need is a package of Oreos, some cream cheese, and a coating of your choice. The best part? No baking required. You simply mix, roll, dip, and chill. Even if you’ve never made a dessert in your life, you can absolutely nail this recipe.
Another reason you’ll love these truffles is their rich, decadent flavor. The combination of crushed Oreos and smooth, creamy cream cheese is pure perfection. And when you add a coating of vanilla almond bark or chocolate, it takes things to a whole new level. Every bite is creamy, sweet, and utterly satisfying. Plus, if you want to get creative, you can mix in different flavors of Oreos or add fun toppings to give your truffles a unique twist.
These truffles are also incredibly versatile. Whether you’re making them for a holiday party, a birthday celebration, or just a cozy night in, they’re guaranteed to please. You can dress them up with colorful sprinkles, drizzle them with contrasting chocolate, or even shape them into fun designs for themed events. The possibilities are endless, making them the perfect dessert for any occasion.
Lastly, they’re great for making ahead. If you’ve got a busy week ahead or want to prepare a dessert in advance for a party, these truffles can be stored in the fridge or even frozen until you’re ready to serve them. Convenience never tasted this good.
Once you try them, I guarantee these Easy Oreo Truffles will become a staple in your dessert repertoire.
Health Benefits
Now, let’s be honest: Oreo Truffles are more of an indulgent treat than a health food. But that doesn’t mean they can’t be enjoyed as part of a balanced lifestyle. In fact, there are a few silver linings when it comes to their nutritional profile.
For starters, the base of these truffles is cream cheese, which contains calcium, vitamin A, and healthy fats. While cream cheese is certainly rich, it can offer some beneficial nutrients that your body needs, especially when consumed in moderation. Additionally, the chocolate coating, especially if you choose dark chocolate, can provide antioxidants and flavonoids that have potential health benefits.
Making homemade truffles also gives you control over the ingredients. You can opt for reduced-fat cream cheese or even vegan cream cheese if you prefer a plant-based option. Similarly, using dark chocolate or sugar-free chocolate can help reduce the sugar content and make your truffles slightly more nutritious.
Believe it or not, Oreos themselves are dairy-free and vegan-friendly, making these truffles suitable for various dietary preferences if you use dairy-free cream cheese and chocolate. It’s a great way to cater to different needs without sacrificing flavor.
Furthermore, these truffles are portion-controlled by nature. Because they’re small and satisfying, they can be enjoyed in moderation as a special treat without overdoing it. After all, life is all about balance, and a little sweetness now and then can certainly be part of a healthy lifestyle.
The bottom line? While these Oreo Truffles are undeniably a dessert, there are ways to make them a little bit better for you. Whether you choose to lighten them up or simply enjoy them as an occasional indulgence, there’s no shame in treating yourself to something delicious.
Preparation Time, Servings, and Nutritional Information
Preparation Time:
Making Oreo Truffles is a quick and straightforward process. From start to finish, you can have these ready in under an hour. Here’s a breakdown of the time you’ll need:
- Prep Time: 20 minutes
- Chill Time: 30 minutes
- Total Time: 50 minutes
Servings:
This recipe yields approximately 24 truffles, depending on the size of the balls you roll.
Nutritional Information (Per Serving):
- Calories: 120
- Fat: 7g
- Saturated Fat: 4g
- Carbohydrates: 14g
- Sugar: 10g
- Protein: 1g
- Sodium: 85mg
Keep in mind that the nutritional values will vary depending on the type of chocolate or coating you use and any additional decorations you decide to add. However, these numbers should give you a general idea of what to expect.
Ingredients List
To make these delicious and decadent Oreo Truffles, you’ll need just a handful of simple ingredients. Let’s break down what you need and why each ingredient plays a crucial role in the recipe.
Oreos: 1 package (15.25 oz) – The classic base of this recipe, Oreos provide the chocolatey, slightly crunchy goodness that makes these truffles so irresistible. Feel free to use any flavor of Oreos you like for a fun twist.
Cream Cheese: 8 oz, softened – Cream cheese is what gives the truffles their creamy, rich texture. Make sure to soften it before using so it blends smoothly with the crushed Oreos. You can use reduced-fat or vegan cream cheese if preferred.
Vanilla Almond Bark: 6 oz – This is the coating that gives the truffles their beautiful, smooth exterior. You can also use melting wafers, white chocolate, milk chocolate, or dark chocolate based on your personal preference.
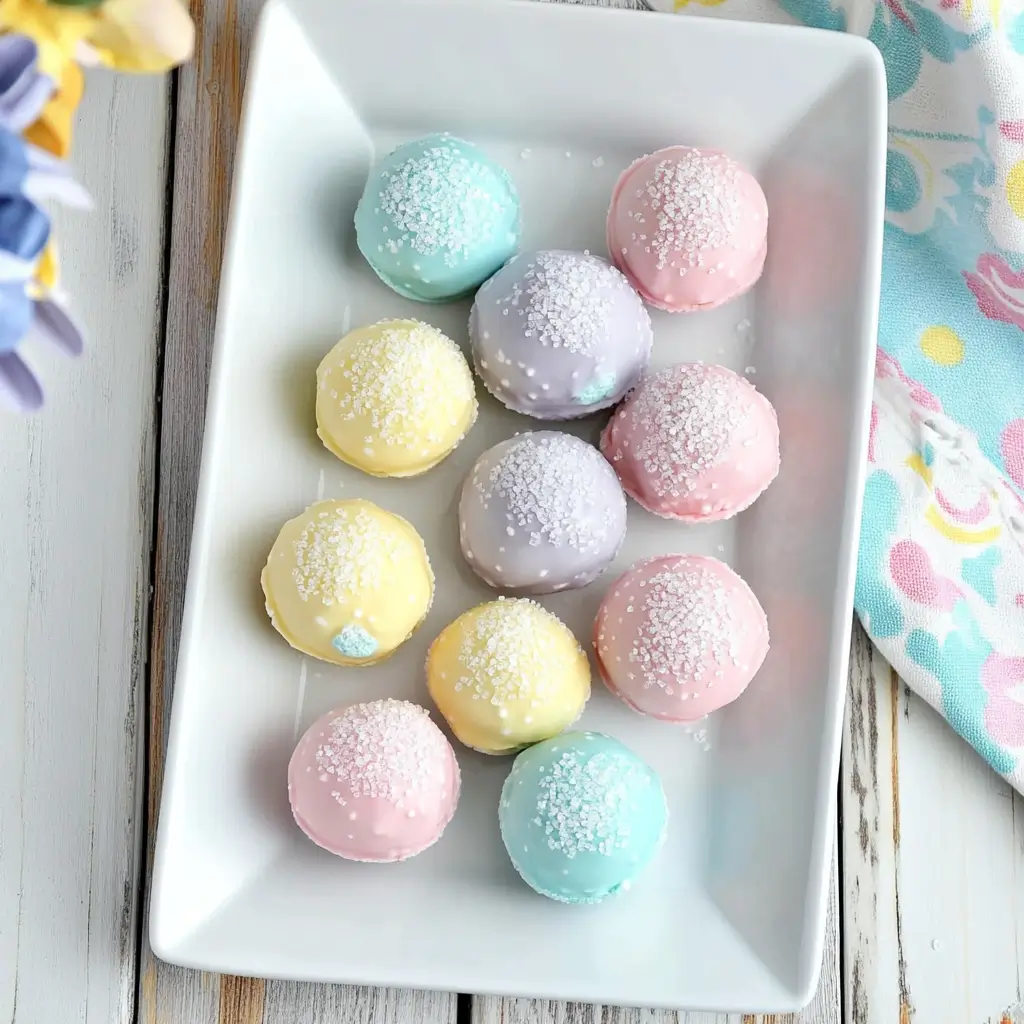
Food Coloring (Optional): Adding a bit of food coloring to your coating can make these truffles perfect for themed events or holidays. Think red and green for Christmas or pastel colors for Easter.
Step-By-Step Cooking Instructions
Making Oreo Truffles is a breeze, and the whole process can be broken down into three simple steps: prepare, shape, and coat. Let’s get started.
Step 1: Prepare the Mixture
- Crush the Oreos: Place the Oreos (filling included) into a food processor and pulse until they become fine crumbs. If you don’t have a food processor, place them in a zip-top bag and crush them with a rolling pin.
- Combine with Cream Cheese: In a large bowl, mix the crushed Oreos with softened cream cheese until well combined. You can use a spoon, but using your hands makes it easier to blend everything thoroughly. The mixture should have a thick, dough-like consistency.
Step 2: Shape and Freeze
- Roll the Mixture: Scoop out about 1 tablespoon of the mixture and roll it between your hands to form a ball. Repeat until all the mixture is used up.
- Chill: Place the balls on a baking sheet lined with parchment paper. Freeze them for about 30 minutes. This helps the truffles firm up, making them easier to dip.
Step 3: Coat and Decorate
- Melt the Coating: While the truffles are chilling, melt your vanilla almond bark (or chocolate of choice) in the microwave, stirring every 30 seconds until smooth.
- Dip the Truffles: Using a fork or a toothpick, dip each truffle into the melted coating, ensuring it’s fully covered. Let the excess drip off before placing the truffle back on the parchment paper.
- Decorate: If desired, sprinkle with decorations like sprinkles, crushed Oreos, or drizzle with contrasting chocolate.
- Set the Coating: Let the truffles sit at room temperature until the coating hardens. This usually takes about 15 minutes.
And that’s it! Your delicious Oreo Truffles are ready to be enjoyed.
How to Serve
These Oreo Truffles are versatile enough to be served in several fun ways:
- Classic Presentation: Arrange them on a decorative platter and sprinkle with extra crushed Oreos for a classy touch.
- Gift Boxes: Pack them into cute boxes or jars for a thoughtful homemade gift.
- Dessert Boards: Add them to a dessert board with cookies, fruits, and chocolates for a festive spread.
- Ice Cream Topping: Chop a few truffles and sprinkle them over vanilla or chocolate ice cream for an extra indulgent treat.
Pairing Suggestions
Pairing Oreo Truffles with other treats can enhance your dessert experience. Here are some ideas:
- Hot Beverages: Serve them alongside hot coffee, tea, or hot chocolate for a cozy treat.
- Milkshakes: Blend a few truffles into a vanilla or chocolate milkshake for a rich, decadent drink.
- Fruit Platter: Pair with fresh strawberries or raspberries to balance the sweetness with a fruity, tangy twist.
- Cheesecake: Add them as a topping or crumble them into a cheesecake for extra flavor and texture.
Storage, Freezing & Reheating Instructions
These truffles store well, making them a convenient make-ahead treat.
Storage: Store in an airtight container in the fridge for up to 1 week.
Freezing: Place the truffles on a baking sheet and freeze until solid. Transfer to a freezer-safe container and store for up to 3 months. Thaw in the fridge before serving.
Reheating (If Coating is Too Hard): Let the truffles sit at room temperature for about 10 minutes before serving if you want them slightly softer.
Common Mistakes to Avoid
Making Oreo Truffles is easy, but here are some mistakes to avoid:
- Using Warm Cream Cheese: Make sure the cream cheese is softened but not too warm, or the mixture will be too runny.
- Overheating the Coating: Melt the chocolate or almond bark slowly to avoid burning it.
- Skipping the Freezing Step: Freezing the truffles before coating ensures they don’t fall apart during dipping.
- Over-Dipping: Try not to overload the truffles with too much coating. Letting excess drip off gives a cleaner look.
- Using Wet Decorations: Always use dry toppings like sprinkles or nuts. Moist decorations can cause the coating to melt.
Pro Tips
To make sure your Oreo Truffles turn out perfect every time, keep these tips in mind:
- Use High-Quality Chocolate: If using chocolate chips, add a teaspoon of vegetable oil or coconut oil for smoother melting.
- Chill the Coated Truffles: After coating, chill the truffles briefly in the fridge to help the coating set faster.
- Customize the Coating: Try using white chocolate, milk chocolate, or dark chocolate based on your preference.
- Add Extracts for Extra Flavor: A dash of mint, vanilla, or almond extract can enhance the flavor profile.
Frequently Asked Questions (FAQs)
Can I Use Flavored Oreos?
Yes! Flavored Oreos like mint, peanut butter, or golden Oreos work wonderfully for a fun twist.
How Long Can I Store Oreo Truffles?
They stay fresh in the refrigerator for up to a week or in the freezer for up to 3 months.
Can I Make These Truffles Ahead of Time?
Absolutely! Prepare and freeze them until you’re ready to coat and decorate.
What If My Mixture Is Too Soft?
If the mixture is too soft to roll, chill it in the fridge for about 10 minutes to firm up.
Can I Use Reduced-Fat Cream Cheese?
Yes, but it may result in a slightly softer texture. Regular cream cheese provides the best consistency.
Conclusion & Call to Action
And there you have it! Your own batch of Easy Oreo Truffles, ready to impress everyone lucky enough to try them. This recipe is the perfect combination of simplicity and indulgence, making it ideal for everything from casual family treats to impressive party desserts.
Whether you keep it classic with regular Oreos or experiment with different flavors and coatings, these truffles are bound to become a beloved favorite. Plus, they make a fantastic homemade gift that everyone will adore.
Now it’s your turn. Go ahead and whip up a batch of these Easy Oreo Truffles and let me know how they turn out. I’d love to hear about your creative twists and fun decorating ideas. And if you’re feeling extra generous, share your masterpiece on social media and tag me so I can see your delicious creations!
Ready to make some magic in the kitchen? Let’s do this!
Print
Easy Oreo Truffles
- Total Time: 50 minutes
- Yield: 24 truffles 1x
- Diet: Vegetarian
Description
These Easy Oreo Truffles are a decadent, no-bake treat made with crushed Oreos, creamy cream cheese, and a smooth chocolate coating. Perfect for parties, gifts, or satisfying your sweet cravings in just under an hour.
Ingredients
- 1 package Oreos (15.25 oz)
- 8 oz cream cheese, softened
- 6 oz vanilla almond bark (or chocolate of choice)
- Food coloring (optional)
- Sprinkles or toppings (optional)
Instructions
- Crush Oreos: Pulse Oreos in a food processor until fine crumbs form.
- Mix: Combine crushed Oreos with softened cream cheese until fully mixed.
- Shape: Roll mixture into 1-inch balls and place on a parchment-lined tray.
- Freeze: Freeze the balls for 30 minutes to firm up.
- Melt Coating: Melt almond bark or chocolate in the microwave, stirring until smooth.
- Dip & Decorate: Dip truffles into melted coating, place on parchment paper, and decorate with sprinkles if desired.
- Set: Allow truffles to harden at room temperature or chill in the fridge until firm.
Notes
- Store truffles in the refrigerator for up to 1 week or freeze for up to 3 months.
- Use different Oreo flavors for variety.
- Adding a teaspoon of coconut oil to melted chocolate ensures smoother coating.
- Prep Time: 20 minutes
- Cook Time: 30 minutes
- Category: Dessert
- Method: No-Bake
- Cuisine: American