
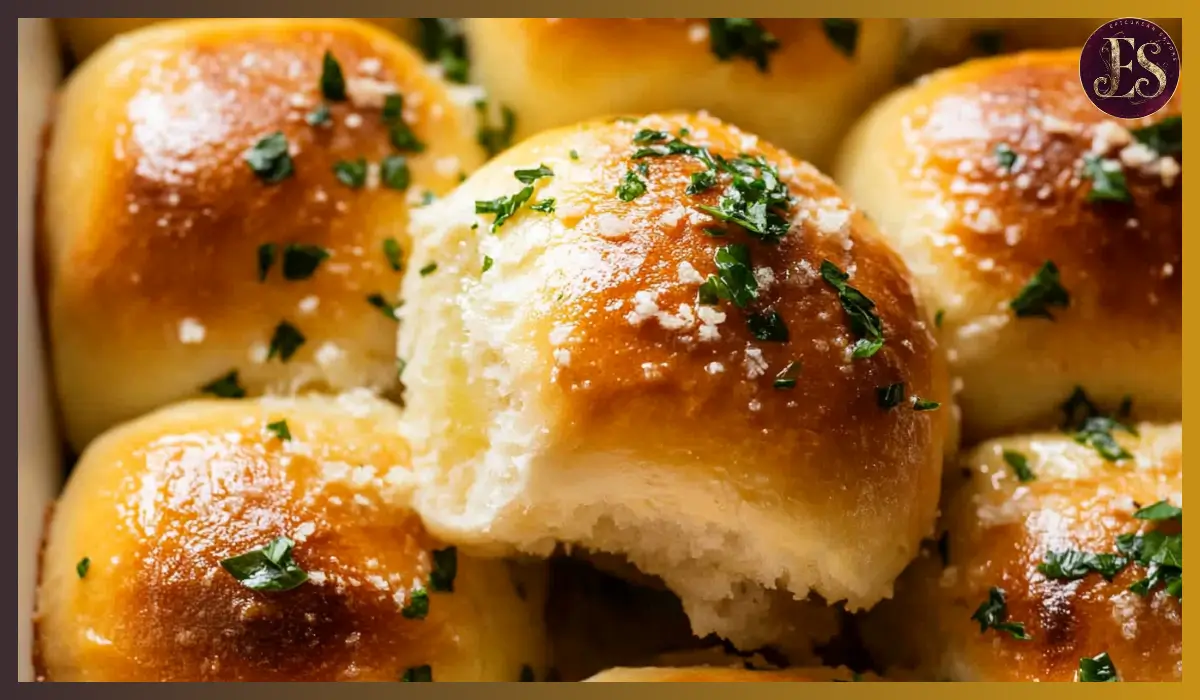
There’s something about homemade bread that feels like a warm hug. The smell of fresh dough rising, the golden-brown crust, and that first bite of pillowy softness—pure comfort. But when you add garlic butter into the mix? It’s next-level perfection. These garlic butter bread rolls combine everything you love about classic dinner rolls with the rich, savory goodness of garlic bread.
Whether you’re preparing for a cozy family dinner, a holiday feast, or just want to treat yourself to the best bread rolls ever, this recipe delivers. The dough is soft, slightly sweet, and easy to work with. Once baked, the rolls are brushed with a generous layer of garlic-infused butter, making them irresistibly flavorful.
What makes this recipe truly special is how easy it is to make. No fancy equipment required, just simple ingredients, a bit of patience for the dough to rise, and a whole lot of deliciousness waiting at the end. If you’ve never made bread before, don’t worry! I’ll guide you through each step, making sure you end up with golden, fluffy, and buttery rolls that taste like they came straight from a bakery.
If you love garlic bread and soft dinner rolls, these garlic butter bread rolls are about to become your new favorite. So, let’s get baking!
Why You’ll Love This Recipe
These garlic butter bread rolls check all the boxes for the perfect homemade bread experience. Here’s why you’ll fall in love with this recipe:
1. Soft and Pillowy Texture
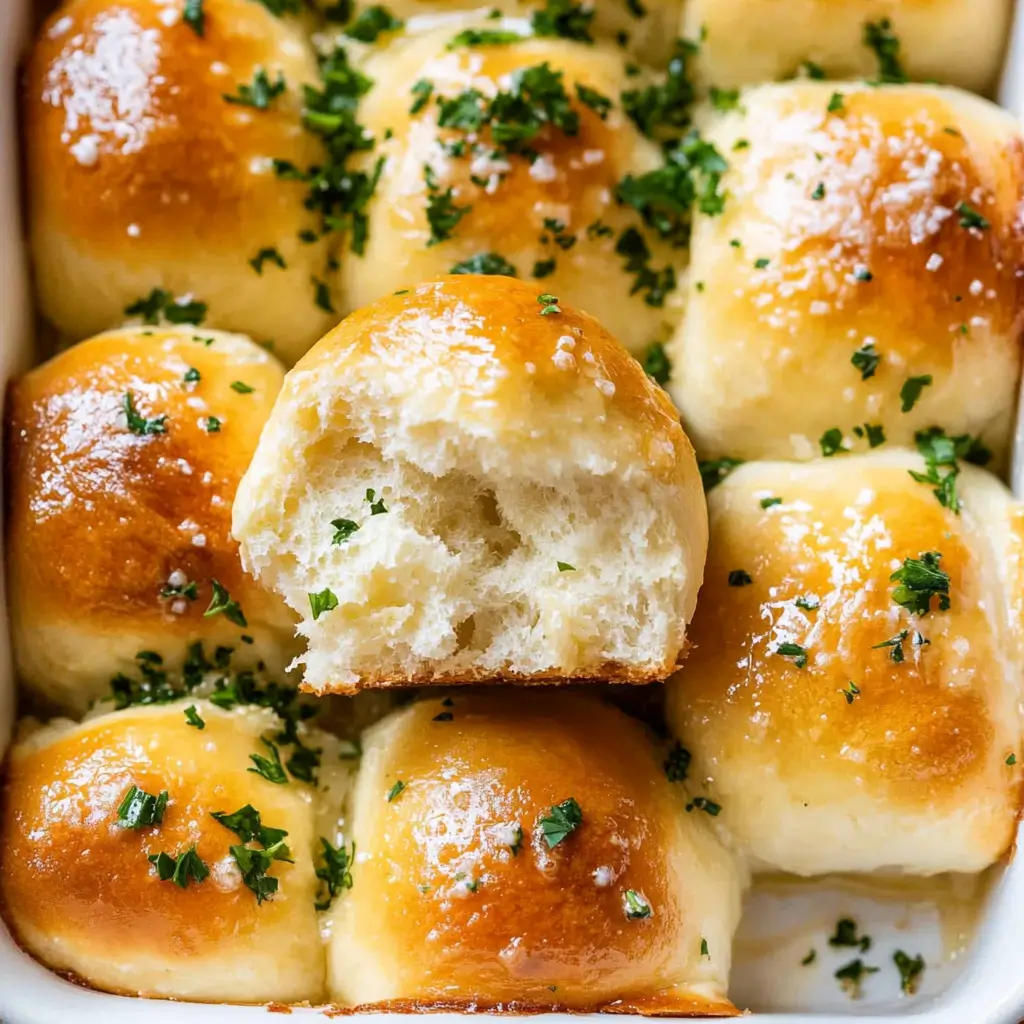
These rolls are unbelievably soft, thanks to the perfect balance of flour, butter, and milk. Each bite practically melts in your mouth, making them the perfect addition to any meal.
2. Bursting with Garlic Butter Flavor
Garlic lovers, this one’s for you! The rolls are brushed with homemade garlic butter both before and after baking, ensuring every bite is packed with rich, garlicky goodness.
3. Easy to Make, Even for Beginners
Making bread from scratch might sound intimidating, but this recipe is straightforward and foolproof. With step-by-step instructions, you’ll be amazed at how simple it is to create bakery-quality rolls at home.
4. Perfect for Any Occasion
From holiday dinners to everyday meals, these rolls fit right in. They pair well with soups, pastas, roasted meats, or even a simple salad.
5. Customizable and Adaptable
You can easily tweak this recipe to match your taste! Add cheese for a cheesy twist, swap herbs for different flavors, or go for extra garlic if you can’t get enough of it.
Once you try these garlic butter bread rolls, you’ll never go back to store-bought again!
Health Benefits
While these rolls are undeniably indulgent, they also come with some surprising health benefits.
1. No Preservatives or Artificial Ingredients
Homemade bread is free from the preservatives and additives found in many store-bought versions. You control exactly what goes into your dough, ensuring a cleaner and healthier option.
2. Rich in Essential Nutrients
- Flour provides carbohydrates for energy.
- Milk adds calcium and protein, helping support bone health.
- Garlic is packed with antioxidants and has natural antibacterial properties.
3. Garlic Supports Heart Health
Garlic isn’t just for flavor—it’s known to help reduce cholesterol, lower blood pressure, and boost overall heart health.
4. Balanced Energy Release
The combination of protein, fats, and carbs in these rolls ensures a steady release of energy, preventing blood sugar spikes.
5. Encourages Mindful Eating
Making bread from scratch encourages mindfulness and appreciation for homemade food. Plus, the process itself is a great way to relax and unwind!
Preparation Time, Servings, and Nutritional Information
Total Time:
- Prep Time: 20 minutes
- Rise Time: 1-2 hours
- Bake Time: 20-25 minutes
- Total Time: Approximately 2.5 hours
Servings:
Makes 12 large rolls or 16 smaller ones
Nutritional Information (Per Roll):
- Calories: 180
- Carbohydrates: 28g
- Protein: 5g
- Fat: 5g
- Sodium: 180mg
Ingredients List
For the Dough:
- 3 ½ cups (420g) all-purpose flour
- 2 ¼ teaspoons (1 packet) instant yeast
- ¼ cup (50g) granulated sugar
- 1 teaspoon salt
- ¾ cup (180ml) warm milk (110°F/45°C)
- ¼ cup (56g) unsalted butter, melted
- 1 large egg
For the Garlic Butter Topping:
- ¼ cup (56g) unsalted butter, melted
- 3 cloves garlic, minced
- 1 tablespoon fresh parsley, finely chopped
Step-By-Step Cooking Instructions
Prepare the Dough
- In a large bowl, combine flour, sugar, yeast, and salt. Mix well to distribute the ingredients evenly.
- Add warm milk, melted butter, and the egg. Stir with a wooden spoon or a dough hook attachment until a rough dough forms.
Knead the Dough
- Transfer the dough to a lightly floured surface. Knead for 8-10 minutes until the dough is smooth, elastic, and slightly tacky. If using a stand mixer, knead on medium speed for about 5-6 minutes.
First Rise
- Place the dough in a greased bowl, cover with a damp towel, and let it rise in a warm place for 1-2 hours, or until doubled in size.
Shape the Rolls
- Punch down the dough to remove air bubbles. Divide it into 12-16 equal pieces.
- Shape each piece into a smooth ball and place them in a greased 9×13-inch baking dish.
Second Rise
- Cover and let the rolls rise again for about 30-45 minutes, until they double in size.
Bake the Rolls
- Preheat the oven to 350°F (175°C).
- Bake the rolls for 20-25 minutes until golden brown.
Add the Garlic Butter
- While the rolls bake, melt the butter and stir in minced garlic and parsley.
- Once the rolls are out of the oven, immediately brush them with the garlic butter.
How to Serve
- Serve warm with extra butter for spreading.
- Pair with soups, stews, or pasta dishes.
- Use as sandwich buns for sliders or mini burgers.
- Toast leftovers for a crispy garlic bread twist.
Pairing Suggestions
- Soups: Tomato soup, chicken noodle, creamy mushroom.
- Pasta: Spaghetti, Alfredo, Bolognese.
- Main Dishes: Roast chicken, grilled steak, seafood.
Storage, Freezing & Reheating Instructions
- Room Temperature: Store in an airtight container for 2-3 days.
- Freezing: Freeze for up to 3 months in a freezer-safe bag.
- Reheating: Warm in the oven at 350°F for 5-10 minutes.
Common Mistakes to Avoid
Making homemade garlic butter bread rolls is straightforward, but a few common mistakes can affect the texture, flavor, or overall result. Avoiding these pitfalls will ensure your rolls come out soft, fluffy, and delicious every time.
One of the biggest mistakes is not kneading the dough enough. Kneading develops the gluten structure, which gives the rolls their soft and airy texture. If you don’t knead long enough, your dough might be too dense or crumbly. Aim for 8-10 minutes of kneading by hand or 5-6 minutes with a stand mixer until the dough is smooth and slightly elastic.
Another common issue is using cold ingredients. If your milk or butter is too cold, it can slow down the yeast’s activity, leading to a longer rising time or even preventing the dough from rising properly. Always ensure your milk is warm but not hot (around 110°F/45°C) to activate the yeast without killing it.
Many people skip the second rise, thinking it’s unnecessary. However, this final proofing step is crucial for ensuring the rolls turn out light and fluffy. If you bake the dough immediately after shaping, the rolls won’t have enough air pockets inside, resulting in a denser texture. Always let them rise until they double in size.
Adding too much flour is another mistake that can make the dough too dry and tough. The dough should be soft and slightly tacky but not overly sticky. If you add too much flour, your rolls will turn out dense instead of light and airy. Start with the recommended amount and only add extra if absolutely necessary.
Baking at the wrong temperature is another issue. If the oven is too hot, the rolls may brown too quickly on the outside while staying undercooked inside. If the oven is too cool, they may take too long to bake and become dry. Always preheat your oven to 350°F (175°C) and use an oven thermometer if needed to ensure accurate temperature.
Finally, many people forget to brush the rolls with garlic butter immediately after baking. This step adds incredible flavor and keeps the rolls moist. Skipping this will result in dry-tasting bread that lacks that signature garlic-butter richness.
By avoiding these mistakes, you’ll end up with perfectly soft, flavorful, and golden-brown garlic butter bread rolls every time!
Pro Tips
Making bakery-quality garlic butter bread rolls at home is easier than you think if you follow these expert tips. These small adjustments can make a huge difference in flavor, texture, and overall success.
Always use fresh yeast for the best rise. If you’re using instant yeast, make sure it’s not expired. If you prefer active dry yeast, proof it in warm milk for five minutes before adding it to the dough. This ensures your yeast is alive and ready to help your rolls rise.
For a stronger garlic flavor, mix garlic powder into the dough in addition to the fresh garlic in the butter topping. This infuses the flavor throughout the rolls instead of just on the surface.
If you want extra fluffy rolls, let them rise a little longer than recommended. The dough should be puffy and airy before baking. If your kitchen is cold, place the dough in a slightly warm oven (turned off) or near a sunny window to speed up the rising process.
When shaping the rolls, try to make them as uniform as possible so they bake evenly. Using a kitchen scale to measure equal portions of dough ensures every roll is the same size, preventing some from overbaking while others remain undercooked.
Don’t skimp on the garlic butter topping! For maximum flavor, brush the rolls once when they come out of the oven and again after they’ve slightly cooled. This double-coating ensures a deep, rich garlic flavor in every bite.
If you love cheesy garlic bread, sprinkle shredded mozzarella or Parmesan on top of the rolls before baking. The cheese will melt into the dough, adding another layer of indulgence.
For an extra crispy crust, bake the rolls at 350°F (175°C) for the first 20 minutes, then increase the temperature to 375°F (190°C) for the last 5 minutes. This creates a golden-brown, slightly crispy exterior while keeping the inside soft and fluffy.
If you’re making these rolls ahead of time, you can refrigerate the unbaked, shaped dough overnight. Just bring them to room temperature and let them rise before baking. This is a great time-saving trick for holiday meals!
Finally, always let the rolls cool for at least 10 minutes before serving. This helps retain their moisture and gives the flavors time to settle. But don’t wait too long—garlic butter bread rolls are best enjoyed warm and fresh!
Frequently Asked Questions (FAQs)
Can I use whole wheat flour instead of all-purpose flour?
Yes, but keep in mind that whole wheat flour absorbs more liquid and can make the rolls denser. For a softer texture, try using half whole wheat and half all-purpose flour instead of 100% whole wheat.
What can I use instead of milk?
You can use water or plant-based milk (like almond or oat milk), but keep in mind that milk adds richness and softness to the dough. If using water, add an extra tablespoon of butter for better texture.
Can I freeze these rolls?
Yes! Once baked, let them cool completely, then store them in a freezer-safe bag for up to 3 months. Reheat them in the oven at 350°F (175°C) for 10 minutes or until warm.
Conclusion & Call to Action
Homemade garlic butter bread rolls are the ultimate comfort food—soft, fluffy, buttery, and packed with rich garlic flavor. Whether you’re serving them alongside a hearty soup, a delicious pasta dish, or as part of a holiday feast, these rolls are guaranteed to be a hit. They’re simple to make, beginner-friendly, and incredibly rewarding.
Baking from scratch may seem intimidating, but once you taste these fresh-out-of-the-oven garlic rolls, you’ll realize how easy and satisfying it is to make homemade bread. The smell alone is enough to make your kitchen feel warm and inviting, and the taste? Absolutely unbeatable.
If you’ve never made bread before, this is the perfect recipe to start with. It doesn’t require any special equipment, just basic ingredients and a little patience. The best part? You can customize it with extra cheese, different herbs, or even a spicy kick with chili flakes.
Now, it’s time to get baking! Try this recipe and let me know how it turns out in the comments. If you loved these garlic butter bread rolls, take a picture and tag me on social media—I’d love to see your creations! Don’t forget to share this recipe with friends and family who love homemade bread.
So, what are you waiting for? Gather your ingredients, roll up your sleeves, and start baking the most delicious garlic butter bread rolls ever!
Print
Garlic Butter Bread Rolls
- Total Time: 2 hours 30 minutes
- Yield: 12-16 rolls 1x
- Diet: Vegetarian
Description
These homemade garlic butter bread rolls are soft, fluffy, and packed with rich garlic flavor. Perfect as a side for soups, pasta, or holiday dinners!
Ingredients
- 3 ½ cups all-purpose flour
- 2 ¼ tsp instant yeast
- ¼ cup sugar
- 1 tsp salt
- ¾ cup warm milk (110°F)
- ¼ cup unsalted butter, melted
- 1 large egg
For the Garlic Butter Topping:
- ¼ cup unsalted butter, melted
- 3 cloves garlic, minced
- 1 tbsp fresh parsley, chopped
Instructions
- Mix flour, sugar, yeast, and salt in a bowl.
- Add warm milk, melted butter, and egg. Mix to form a dough.
- Knead for 8-10 minutes until smooth. Let rise for 1-2 hours.
- Divide dough into 12-16 pieces, shape into balls, and place in a baking dish.
- Let rise for another 30-45 minutes.
- Preheat oven to 350°F (175°C). Bake for 20-25 minutes.
- Mix butter, garlic, and parsley. Brush rolls with garlic butter while warm.
Notes
- Use fresh garlic for the best flavor.
- For a cheesy twist, sprinkle grated Parmesan on top before baking.
- Store in an airtight container for 2-3 days or freeze for up to 3 months.
- Prep Time: 20 minutes
- Cook Time: 25 minutes
- Category: Bread
- Method: Baking
- Cuisine: American