
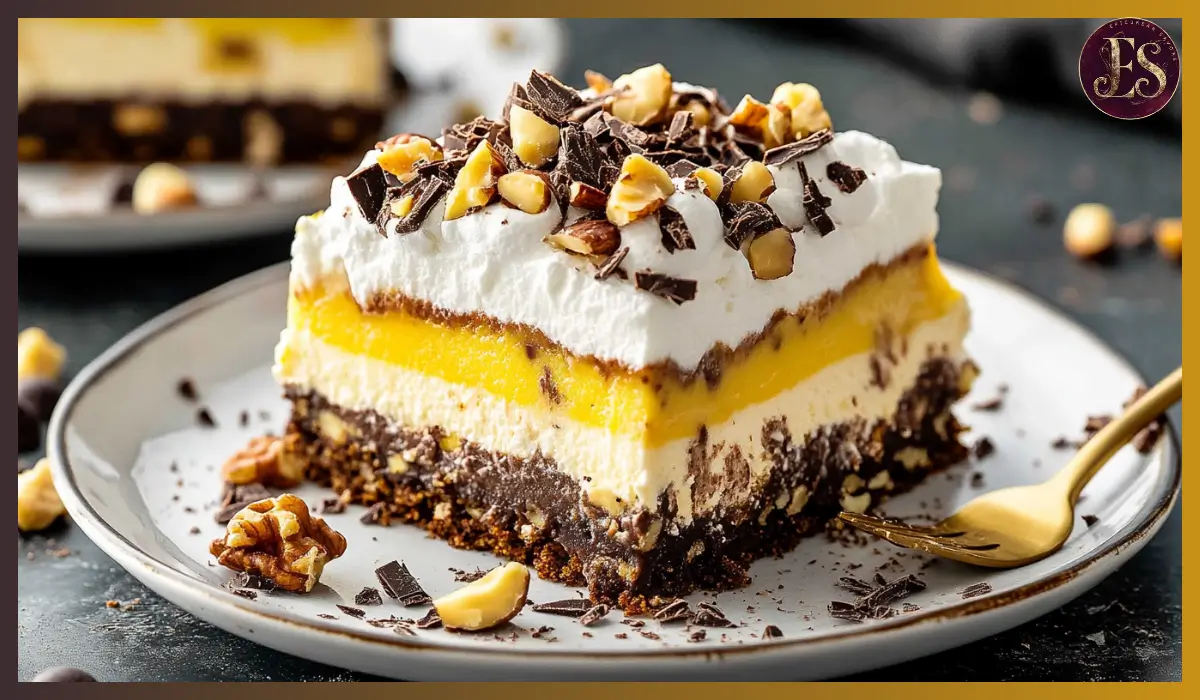
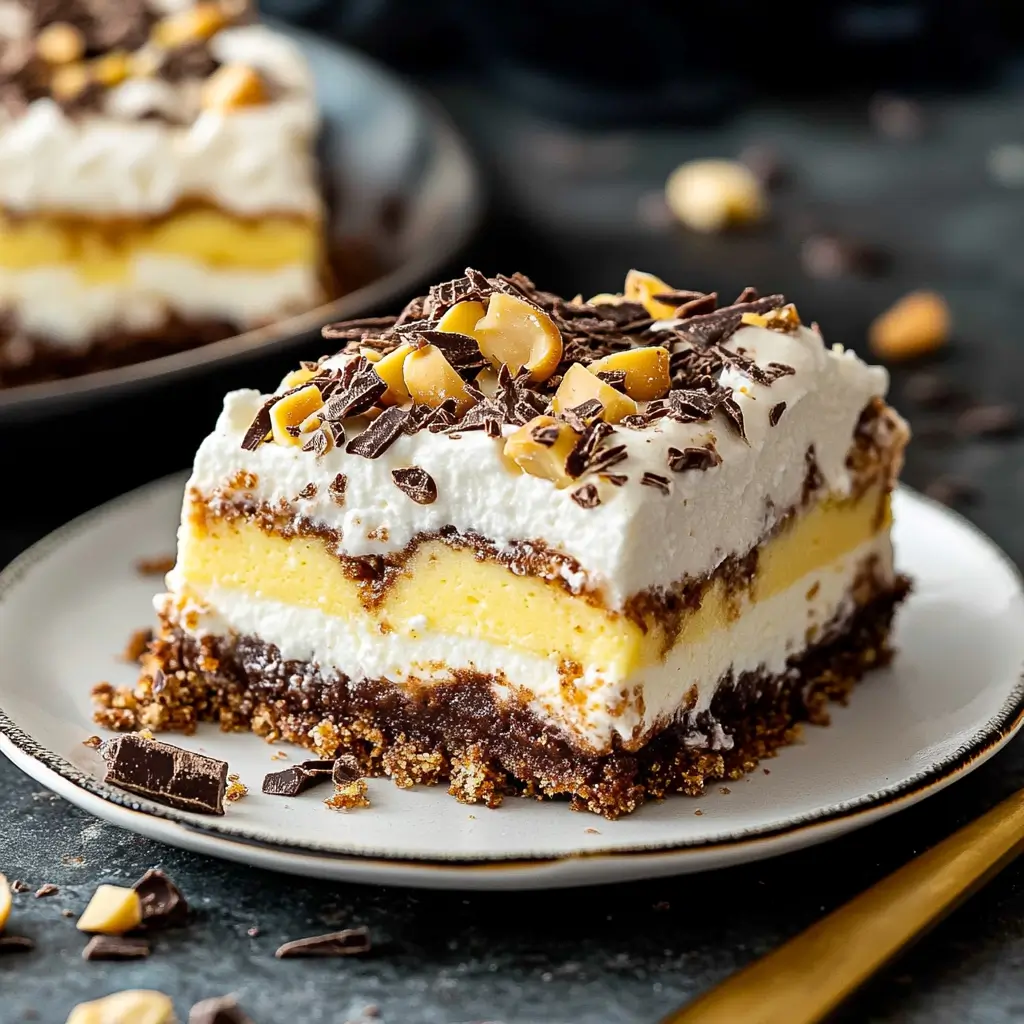
There’s something about a rich, creamy, and delightfully layered pudding dessert that makes every bite feel like pure comfort. Whether you’re hosting a family gathering, celebrating a special occasion, or just craving something sweet, this heavenly layered pudding dessert is the ultimate indulgence. It features a buttery pecan crust, a luscious cream cheese filling, smooth layers of vanilla and chocolate pudding, and a whipped topping that ties everything together beautifully. The contrast of textures—from the crunchy crust to the silky pudding—makes this dessert a showstopper at any event.
I first discovered this recipe at a potluck, where it completely stole the spotlight. People kept going back for second (and third) servings, raving about its creamy layers and nutty crunch. After one bite, I knew I had to recreate it at home, tweaking it slightly to make it even more flavorful and foolproof. What I love most about this dessert is that it’s effortless to make, yet it looks and tastes like something from a fancy bakery.
This Heavenly layered pudding dessert is perfect for any occasion, from holiday dinners to casual weekend treats. It’s a great make-ahead dessert, which means you can prepare it the night before and let the layers meld together in the refrigerator for an even richer taste. Plus, it’s beginner-friendly—if you can mix, spread, and layer, you can make this dessert!
Why You’ll Love This Heavenly layered pudding
This Heavenly layered pudding dessert isn’t just delicious; it’s an experience. Each layer brings something unique to the table, creating a harmonious balance of flavors and textures that keep you coming back for more. Here’s why this recipe deserves a spot in your dessert repertoire:
1. Easy to Make
No advanced baking skills are required. This dessert is all about simple mixing, layering, and chilling—no complicated techniques or baking expertise needed. Even if you’re new to the kitchen, you’ll nail this on the first try!
2. Perfect for Any Occasion
Whether it’s a family dinner, holiday celebration, potluck, or just a weekend treat, this dessert fits any setting. It’s elegant enough for special occasions but easy enough for a casual get-together.
3. Balanced Flavors and Textures
The buttery pecan crust adds a delightful crunch, while the smooth cream cheese layer provides a tangy contrast to the sweet puddings. The vanilla and chocolate pudding layers bring richness, and the whipped topping finishes it off with a light, airy touch.
4. Make-Ahead Convenience
This dessert actually gets better with time! The layers meld together beautifully when chilled for a few hours, making it a great prepare-in-advance option for stress-free hosting.
5. Crowd-Pleasing Favorite
No matter where I bring this dessert, it’s always a hit. It’s one of those treats that everyone—kids and adults alike—will love.
Health Benefits
While this dessert is definitely an indulgence, it does have a few ingredients that offer nutritional benefits. Here’s a look at how some of these components contribute to your diet:
1. Pecans – A Heart-Healthy Nut
Pecans are rich in healthy monounsaturated fats, which can help lower bad cholesterol levels. They also contain fiber, antioxidants, and essential minerals like manganese and magnesium, which support brain and heart health.
2. Cream Cheese – A Source of Calcium
While cream cheese is often associated with indulgence, it provides calcium, which is essential for strong bones and teeth. Using a reduced-fat version can help cut down on excess calories while still offering a creamy texture.
3. Pudding – A Source of Protein and Vitamins
Instant pudding mix, especially when prepared with milk, provides protein, calcium, and vitamin D. Using reduced-fat or plant-based milk can make the pudding layers slightly healthier.
4. Whipped Topping – A Light Alternative to Frosting
Compared to heavy frostings or butter-based toppings, whipped topping is lighter in texture and calories. You can also opt for homemade whipped cream with minimal sugar for a healthier alternative.
Although this dessert is meant to be a treat, these ingredients add a touch of nutrition to balance out the indulgence.
Preparation Time, Servings, and Nutritional Information
- Total Time: 3 hours (including chilling time)
- Active Preparation Time: 30 minutes
- Servings: 12-15
Nutritional Information (Per Serving)
- Calories: 320
- Carbohydrates: 35g
- Protein: 4g
- Fats: 18g
- Fiber: 2g
- Sugar: 20g
Ingredients List
The Crust
- 1 cup chopped pecans
- 1 cup all-purpose flour
- ½ cup melted butter
The Cream Cheese Layer
- 8 oz cream cheese, softened
- 1 cup powdered sugar
- 1 cup Cool Whip (or homemade whipped cream)
The Pudding Layers
- 1 package (3.4 oz) instant vanilla pudding mix
- 1 package (3.4 oz) instant chocolate pudding mix
- 3 cups cold milk
The Toppings
- 2 cups Cool Whip (or homemade whipped cream)
- ¼ cup chocolate shavings or cocoa powder for garnish
Step-By-Step Cooking Instructions
Prepare the Crust
- Preheat your oven to 350°F (177°C).
- In a bowl, combine chopped pecans, all-purpose flour, and melted butter. Stir until the mixture resembles a coarse dough.
- Press the mixture evenly into the bottom of a 9×13-inch baking dish.
- Bake for 15-20 minutes or until the edges turn golden brown. Let it cool completely before adding the next layers.
Make the Cream Cheese Layer
- In a mixing bowl, beat cream cheese and powdered sugar until smooth and creamy.
- Gently fold in 1 cup of Cool Whip until combined.
- Spread this mixture evenly over the cooled crust.
Prepare the Pudding Layers
- In two separate bowls, prepare the vanilla and chocolate puddings by whisking each with 1.5 cups of cold milk. Let them sit for a few minutes until they thicken.
- Spread the vanilla pudding layer over the cream cheese layer.
- Next, carefully spread the chocolate pudding over the vanilla layer.
Add the Whipped Topping and Garnish
- Spread Cool Whip evenly over the pudding layers.
- Sprinkle with chocolate shavings or cocoa powder for a decorative touch.
Chill and Serve
- Cover and refrigerate for at least 2 hours before serving. This allows the layers to set properly.
- Slice and serve chilled for the best texture and flavor.
How to Serve
This heavenly layered pudding dessert is best served chilled, straight from the refrigerator. The cooling time allows the layers to fully set, ensuring a clean slice with every serving. Whether you’re plating it for an elegant dinner or scooping it straight from the dish for a casual gathering, here are some ways to serve it for maximum enjoyment:
1. Classic Style
- Slice the dessert into neat squares using a sharp knife.
- Serve on a dessert plate with a small fork or spoon for easy eating.
- Garnish with extra chocolate shavings or a light dusting of cocoa powder for an elegant finish.
2. Extra Chocolate Indulgence
- Drizzle each serving with warm chocolate sauce or a spoonful of Nutella for an ultra-rich experience.
- Sprinkle with mini chocolate chips or chocolate curls for extra texture.
3. Fruity Twist
- Serve with a side of fresh berries like raspberries, strawberries, or blueberries. The slight tartness of the fruit balances out the creamy sweetness of the dessert.
- Top with a drizzle of raspberry sauce for a gourmet touch.
4. Individual Servings for Special Occasions
- Instead of using a large dish, assemble the layers in individual dessert cups or mason jars for a stylish presentation.
- This works great for parties, baby showers, or holiday gatherings, allowing guests to grab their own serving without cutting from a large dish.
Pairing Suggestions
While this dessert is indulgent on its own, pairing it with complementary drinks or side treats can enhance the experience. Whether you’re serving it at a dinner party or just treating yourself, here are some great pairings:
1. Coffee and Espresso Pairings
- Classic Black Coffee: The slight bitterness of coffee contrasts beautifully with the sweetness of the dessert, balancing every bite.
- Espresso: A shot of strong espresso enhances the rich chocolate and cream cheese flavors.
- Cappuccino or Latte: The creamy texture of a latte pairs wonderfully with the soft pudding layers, making each bite even more luscious.
2. Tea Pairings
- Earl Grey Tea: The subtle citrus and floral notes of Earl Grey complement the sweetness of the pudding.
- Chai Tea: The warm spices in chai add a comforting contrast to the cool and creamy dessert.
- Green Tea: If you prefer a lighter pairing, green tea offers a refreshing cleanse to the palate.
3. Dessert Pairings
- Shortbread Cookies: Buttery shortbread or vanilla wafers add an extra crunch to contrast with the smooth pudding layers.
- Chocolate-Covered Strawberries: The fruity chocolate combination makes an elegant addition to this dessert.
- Vanilla Ice Cream: If you love a cold and creamy pairing, a small scoop of vanilla ice cream on the side adds a fun twist.
4. Holiday and Special Occasion Pairings
- For Thanksgiving, serve this dessert with a warm spiced cider or pumpkin-flavored coffee.
- During the summer, pair it with a cold iced coffee or lemonade for a refreshing contrast.
Storage, Freezing & Reheating Instructions
One of the best things about this Heavenly layered pudding dessert is that it stores exceptionally well. Whether you’re making it ahead or saving leftovers, follow these storage guidelines to maintain its freshness and texture.
1. Storing in the Refrigerator
- Cover the dessert tightly with plastic wrap or aluminum foil to prevent it from absorbing odors.
- Store in the refrigerator for up to 4 days.
- For best texture, consume it within the first 2-3 days when the layers are freshest.
2. Freezing Instructions
- This dessert can be frozen, but some layers (like the whipped topping) may slightly change in texture.
- To freeze:
- Wrap the dessert tightly with plastic wrap, then cover it with a layer of aluminum foil.
- Store in the freezer for up to 3 months.
- To thaw:
- Transfer to the refrigerator and let it thaw overnight (6-8 hours) before serving.
3. Reheating Instructions
- This dessert is meant to be served cold, so reheating is not necessary.
- However, if you like a slight warmth to the crust, you can:
- Let the dessert sit at room temperature for 10-15 minutes before serving.
- Warm individual servings in the microwave for 5-10 seconds, but avoid melting the pudding layers.
Common Mistakes to Avoid
1. Not Allowing the Crust to Cool Completely
- If the crust is still warm when you add the cream cheese layer, it can melt the filling, making the layers messy and unstable. Always let the crust cool completely before assembling.
2. Using Too Much Milk in the Pudding
- Many instant pudding mixes call for 3 cups of milk, but for this recipe, use only 1.5 cups per pudding. This ensures the layers are thick and set properly.
3. Overmixing the Cream Cheese Layer
- Overmixing can cause the cream cheese layer to become too runny, making it hard to layer. Beat until smooth and creamy, but avoid excessive mixing.
4. Not Chilling Long Enough
- This dessert needs at least 2 hours in the fridge to firm up properly. For best results, refrigerate for 4 hours or overnight before serving.
5. Using a Warm Knife to Cut
- If you want clean, sharp slices, chill the dessert well and use a sharp knife dipped in warm water. Wipe the knife between cuts for perfect slices.
Pro Tips
1. Toast the Pecans for Extra Flavor
- Lightly toast the pecans before adding them to the crust. This enhances their nutty flavor and gives the crust a deeper, richer taste.
2. Chill Your Mixing Bowls
- When making the whipped topping layer, chill your mixing bowls and beaters for a fluffier texture.
3. Use a Piping Bag for Neater Layers
- If you want ultra-neat layers, transfer the cream cheese and pudding layers to piping bags, then pipe them evenly over the crust before spreading.
4. Make a Caramel Version
- Swap the chocolate pudding for butterscotch pudding and drizzle the top with caramel sauce for a delicious variation.
5. Experiment with Different Toppings
- Try adding chopped nuts, crushed Oreos, or sprinkles for a decorative touch.
Frequently Asked Questions (FAQs)
1. Can I make this dessert ahead of time?
Yes! This is actually best when made a day ahead, as it allows the flavors to meld together beautifully.
2. Can I use homemade whipped cream instead of Cool Whip?
Absolutely! Beat 1 cup of heavy cream with 2 tablespoons of powdered sugar until stiff peaks form.
3. What can I use instead of pecans in the crust?
You can use walnuts, almonds, or even graham cracker crumbs for a nut-free version.
4. How do I prevent the pudding layers from mixing?
Make sure each layer is completely set before adding the next one. You can also refrigerate between layers for extra stability.
5. Can I make this gluten-free?
Yes! Simply replace the flour in the crust with gluten-free all-purpose flour.
Conclusion & Call to Action
Now that you have everything you need to create this heavenly layered pudding dessert, it’s time to bring this masterpiece to life! Try it for your next gathering, and watch how quickly it disappears. If you make this, I’d love to hear how it turned out—leave a comment or share your results. Happy baking!
Print
Heavenly Layered Pudding Dessert
- Total Time: 3 hours (including chilling)
- Yield: 12-15 servings
- Diet: Vegetarian
Description
A rich and creamy layered pudding dessert with a crunchy pecan crust, smooth cream cheese filling, and luscious chocolate and vanilla pudding layers.
Ingredients
- For the Crust: 1 cup chopped pecans, 1 cup all-purpose flour, ½ cup melted butter
- For the Cream Cheese Layer: 8 oz cream cheese, 1 cup powdered sugar, 1 cup Cool Whip
- For the Pudding Layers: 1 package (3.4 oz) instant vanilla pudding mix, 1 package (3.4 oz) instant chocolate pudding mix, 3 cups cold milk
- For the Toppings: 2 cups Cool Whip, ¼ cup chocolate shavings
Instructions
- Preheat oven to 350°F (177°C) and grease a 9×13-inch dish.
- Prepare the crust by mixing pecans, flour, and melted butter. Press into the dish and bake for 15-20 minutes. Cool completely.
- Make the cream cheese layer by beating cream cheese and powdered sugar until smooth. Fold in Cool Whip and spread over the cooled crust.
- Prepare the puddings with 1.5 cups milk each and let them thicken. Layer vanilla pudding over the cream cheese layer, followed by chocolate pudding.
- Add whipped topping evenly over the pudding layers.
- Garnish with chocolate shavings and refrigerate for at least 2 hours before serving.
Notes
- Use less milk in the pudding for a thicker texture.
- For a nut-free version, replace the pecan crust with crushed graham crackers.
- Chill the dessert overnight for the best consistency.
- Prep Time: 30 minutes
- Cook Time: 15 minutes
- Category: Dessert
- Method: No-Bake (except for crust)
- Cuisine: American