
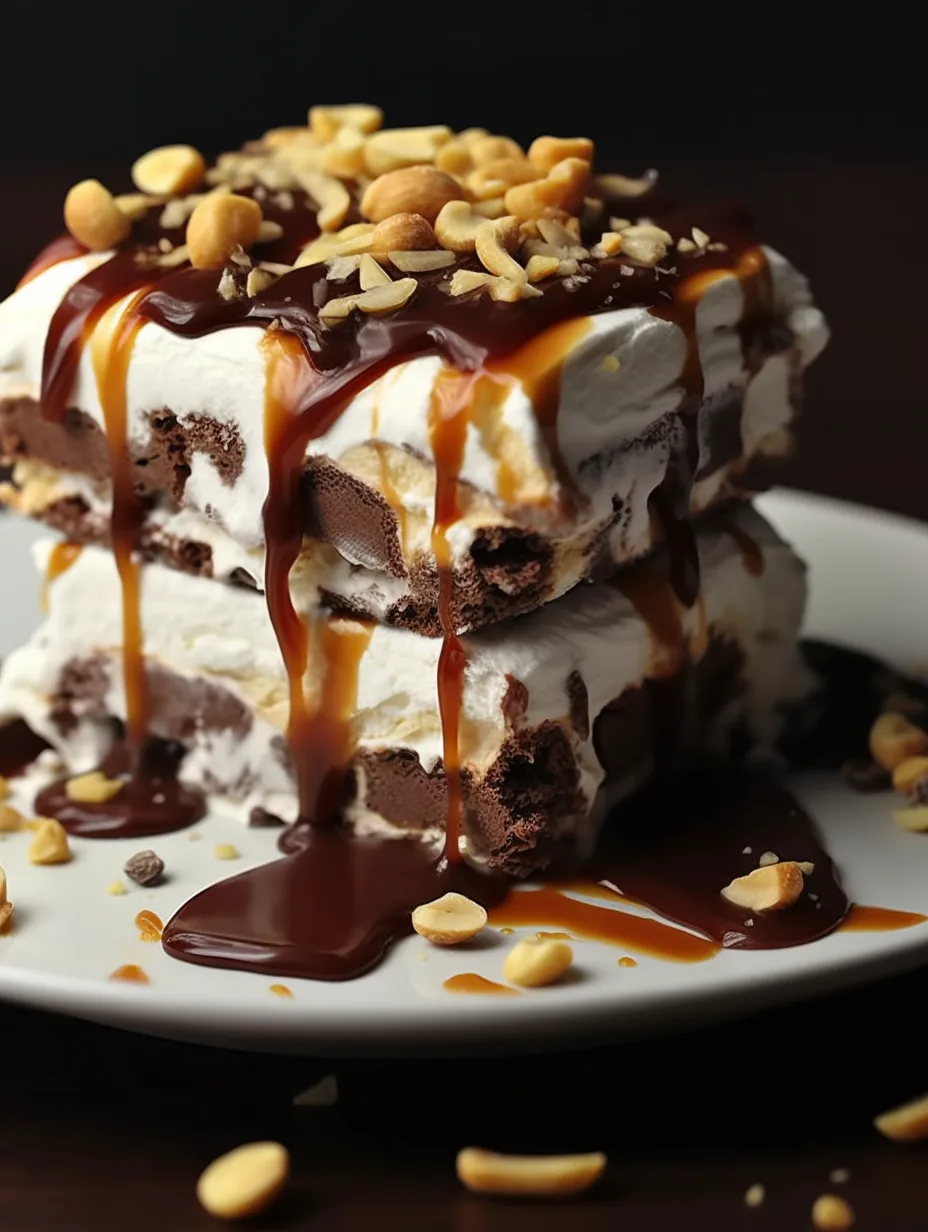
Ice Cream Sandwich Cake is a wondrous way to delight your taste buds and satisfy your sweet cravings. This colossal treat is built on layers of chocolate and vanilla, blending the goodness of classic ice cream sandwiches with your favorite toppings. It’s the perfect dessert to serve at parties, family gatherings, or even just a cozy movie night at home. The simplicity of the recipe, combined with its rich flavors, makes it an ultimate favorite among dessert lovers.
Imagine layers of creamy vanilla and rich chocolate ice cream sandwiched between delicious cookies, all topped off with whipped cream and delightful toppings. This cake isn’t just a dessert; it’s an experience that can bring smiles to the faces of everyone who gets to taste it!
If you love ice cream, you’re in for a treat. This Ice Cream Sandwich Cake is incredibly easy to make and even more fun to customize. You can adapt it for various occasions by changing the flavors and toppings. In this guide, you’ll learn why this recipe is a must-try, how to prepare it, and tips for serving it successfully. Get ready to indulge in this amazing Ice Cream Sandwich Cake that promises to be a showstopper!
Why You’ll Love This Recipe
There are many reasons why Ice Cream Sandwich Cake will win over your heart. Here are some reasons why this delightful dessert is a must-try:
1. No Baking Required: This dessert requires no oven, meaning you can stay cool while preparing it.
2. Quick and Easy: It takes just a few steps to create this delicious cake, making it perfect for last-minute gatherings.
3. Customizable: You can easily swap the flavors of ice cream and cookies to match your preferences or the seasons.
4. Family-Friendly: Kids and adults alike love this treat, making it a great option for family events.
5. Visual Appeal: The towering layers create an impressive presentation on any table.
6. Cool and Refreshing: This cake is a fantastic choice for hot summer days, providing a delicious, cool dessert.
These aspects make this Ice Cream Sandwich Cake an irresistible option for anyone seeking a delightful dessert that can be enjoyed any time of year!
Preparation and Cooking Time
To create this amazing Ice Cream Sandwich Cake, you’ll need a little time, but the effort is entirely worth it. Here’s a breakdown of the time involved:
– Preparation Time: 20 minutes
– Setting Time: 4 hours (minimum, but overnight is best)
Combining these, you’ll need approximately 4 hours and 20 minutes to prepare and set the dessert. The majority of this time is for it to chill in the freezer, ensuring that every delicious layer sets perfectly.
Ingredients
– 12 ice cream sandwiches (chocolate or vanilla)
– 2 cups whipped topping (such as Cool Whip)
– 1 cup chocolate ice cream
– 1 cup vanilla ice cream
– 1 cup hot fudge sauce
– 1/2 cup crushed cookies (e.g., Oreos or chocolate wafers)
– 1/2 cup rainbow sprinkles (optional)
– Maraschino cherries (for garnish)
These straightforward ingredients come together to create a dessert that is as fun to make as it is to eat!
Step-by-Step Instructions
Creating your Ice Cream Sandwich Cake is easy. Follow these straightforward steps:
1. Prepare a Cake Pan: Use a 9×13-inch cake pan and line it with parchment paper, leaving some overhang to make removal easier.
2. Layer the Sandwiches: Place the first layer of ice cream sandwiches in the pan, fitting them tightly for a solid base. Cut some sandwiches if necessary to make them fit snugly.
3. Spread Ice Cream: Scoop the chocolate ice cream and spread it evenly over the layer of sandwiches. Use a spatula to smooth it out.
4. Add Hot Fudge Sauce: Drizzle a generous amount of hot fudge sauce over the chocolate ice cream layer.
5. Add More Sandwiches: Place another layer of ice cream sandwiches on top of the hot fudge sauce. Press down lightly.
6. Spread Vanilla Ice Cream: Add the vanilla ice cream over this layer, smoothing it out just like the chocolate.
7. Add Whipped Topping: Use the whipped topping to create a creamy layer on top of the vanilla ice cream.
8. Final Toppings: Sprinkle the crushed cookies and rainbow sprinkles all over the whipped cream for a festive look.
9. Cover and Freeze: Cover the pan with plastic wrap or aluminum foil. Place it in the freezer and freeze for at least 4 hours or overnight for best results.
10. Slice and Serve: When ready to serve, carefully lift the dessert out of the pan using the parchment overhang. Cut into squares and plate.
These steps will guide you through making a splendid Ice Cream Sandwich Cake that everyone will love.
How to Serve
When serving Ice Cream Sandwich Cake, consider the following tips:
1. Presentation: Place your cake slices on a colorful dessert plate for a beautiful arrangement.
2. Toppings: Offer extra hot fudge, chocolate sauce, or caramel sauce on the side for guests to drizzle over their slices.
3. Accompaniments: Pair with fresh fruit or berries for a refreshing contrast to the creamy cake.
4. Chill Before Serving: Keep the cake chilled until serving time to ensure it maintains its structure.
5. Garnish: Add a maraschino cherry on top of each slice for a classic touch.
With these serving tips, your Ice Cream Sandwich Cake will not only taste incredible but look stunning as well, making it a dessert to remember!
Additional Tips
– Use Quality Ice Cream: For the best flavor, opt for premium ice cream brands that feature a rich, creamy texture.
– Layer Uniformly: Ensure the ice cream spreads evenly over the sandwiches so each slice gets a taste of all flavors.
– Chill Your Tools: Keep your spatula and cake pan slightly chilled for smoother spreading of ice cream and whipped topping.
– Ready-to-Serve Presentation: Slice the cake using a warm knife (run it under hot water) for cleaner edges and a more appealing look.
Recipe Variation
You can easily put your twist on the classic Ice Cream Sandwich Cake! Here are some fun variations to explore:
1. Cookie Lovers: Swap ice cream sandwiches for your favorite flavored cookies, like snickerdoodles or peanut butter, for a unique texture.
2. Seasonal Fruit Addition: Incorporate fresh seasonal fruits like diced strawberries or raspberries between layers for a fruity burst.
3. Chocolate Overload: For a chocolate lover, use chocolate chip ice cream and drizzle additional chocolate sauce on top.
4. Nutty Surprise: Add chopped nuts like almonds or walnuts as a sprinkle between the layers for a crunchy contrast.
Freezing and Storage
– Storage: Keep the Ice Cream Sandwich Cake covered in a strict way to maintain its freshness. It can last up to 5–7 days in the freezer.
– Freezing: If you want to prepare it ahead of time, you can freeze the cake whole, or cut into individual servings that you can savor later. Just ensure each piece is wrapped tightly to prevent freezer burn.
Special Equipment
To make your Ice Cream Sandwich Cake, you’ll need a few kitchen essentials:
– 9×13-inch cake pan for assembling the cake
– Parchment paper for easy removal of the cake
– Spatula for spreading ice cream smoothly
– Plastic wrap or aluminum foil to cover the cake while it freezes
– Knife for slicing through the cake with ease
Frequently Asked Questions
Can I use different flavors of ice cream?
Absolutely! Feel free to mix and match ice cream according to your preferences—just make sure the texture stays similar for the best results.
How do I prevent the ice cream from melting while assembling?
Work quickly, and keep your ice cream in the freezer until you’re ready to use it. If it starts to soften, return it to the freezer for a few minutes.
Can I make this cake a day in advance?
Yes! Making it a day before serving allows flavors to meld beautifully, and it’s a great time-saver.
Is it possible to substitute the whipped topping?
Certainly! Homemade whipped cream can be used instead of premade whipped topping for a fresher option.
What if I want to make this cake gluten-free?
You can look for gluten-free ice cream sandwiches or make your own from gluten-free cookies for a customized delight.
Conclusion
Making an Ice Cream Sandwich Cake is a delightful adventure that embraces creativity and fun in the kitchen. With its layer of creamy ice cream, delectable toppings, and a multitude of flavor combinations, this dessert is destined to be a favorite among friends and family. Easy to assemble and customize, this cake will certainly be a hit at any gathering, ensuring everyone leaves with a smile. Indulge in this delicious treat and enjoy the endless possibilities it offers!

Ice Cream Sandwich Cake: An Incredible Ultimate Delight for Everyone
- Total Time: 34 minute
Ingredients
– 12 ice cream sandwiches (chocolate or vanilla)
– 2 cups whipped topping (such as Cool Whip)
– 1 cup chocolate ice cream
– 1 cup vanilla ice cream
– 1 cup hot fudge sauce
– 1/2 cup crushed cookies (e.g., Oreos or chocolate wafers)
– 1/2 cup rainbow sprinkles (optional)
– Maraschino cherries (for garnish)
These straightforward ingredients come together to create a dessert that is as fun to make as it is to eat!
Instructions
Creating your Ice Cream Sandwich Cake is easy. Follow these straightforward steps:
1. Prepare a Cake Pan: Use a 9×13-inch cake pan and line it with parchment paper, leaving some overhang to make removal easier.
2. Layer the Sandwiches: Place the first layer of ice cream sandwiches in the pan, fitting them tightly for a solid base. Cut some sandwiches if necessary to make them fit snugly.
3. Spread Ice Cream: Scoop the chocolate ice cream and spread it evenly over the layer of sandwiches. Use a spatula to smooth it out.
4. Add Hot Fudge Sauce: Drizzle a generous amount of hot fudge sauce over the chocolate ice cream layer.
5. Add More Sandwiches: Place another layer of ice cream sandwiches on top of the hot fudge sauce. Press down lightly.
6. Spread Vanilla Ice Cream: Add the vanilla ice cream over this layer, smoothing it out just like the chocolate.
7. Add Whipped Topping: Use the whipped topping to create a creamy layer on top of the vanilla ice cream.
8. Final Toppings: Sprinkle the crushed cookies and rainbow sprinkles all over the whipped cream for a festive look.
9. Cover and Freeze: Cover the pan with plastic wrap or aluminum foil. Place it in the freezer and freeze for at least 4 hours or overnight for best results.
10. Slice and Serve: When ready to serve, carefully lift the dessert out of the pan using the parchment overhang. Cut into squares and plate.
These steps will guide you through making a splendid Ice Cream Sandwich Cake that everyone will love.
- Prep Time: 15 minutes
- Cook Time: Total Time: 4 hours 15 minutes
Nutrition
- Serving Size: 12 slices
- Calories: 350 kcal
- Fat: 15g
- Protein: 5g