
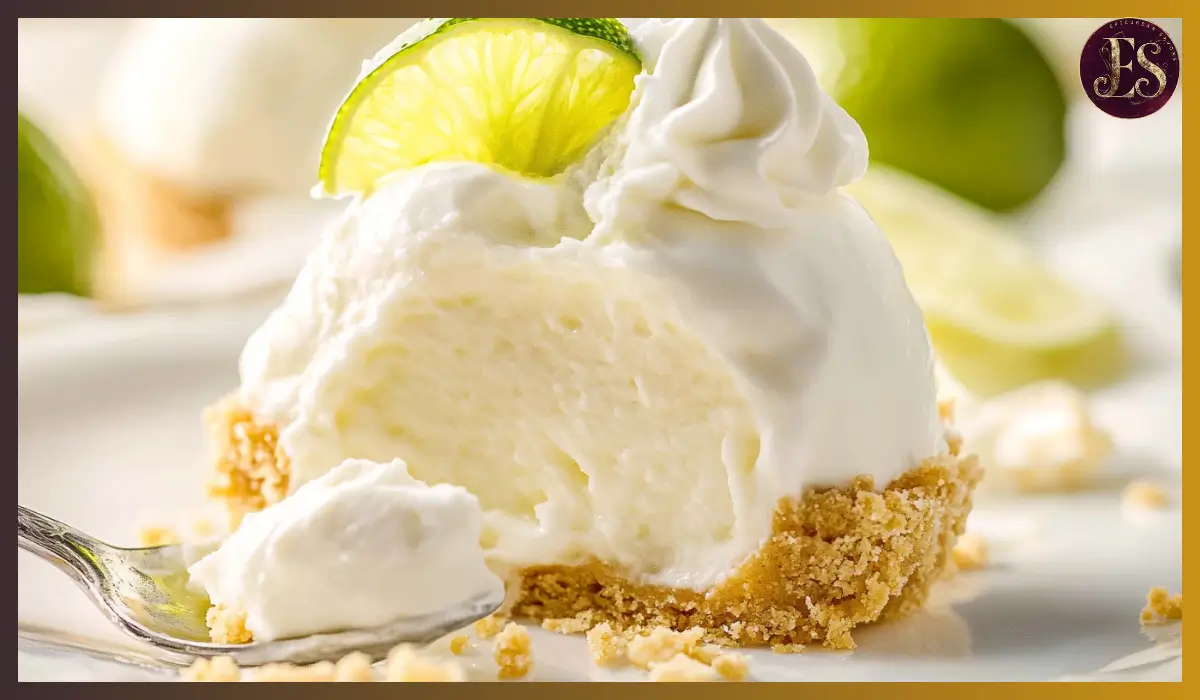
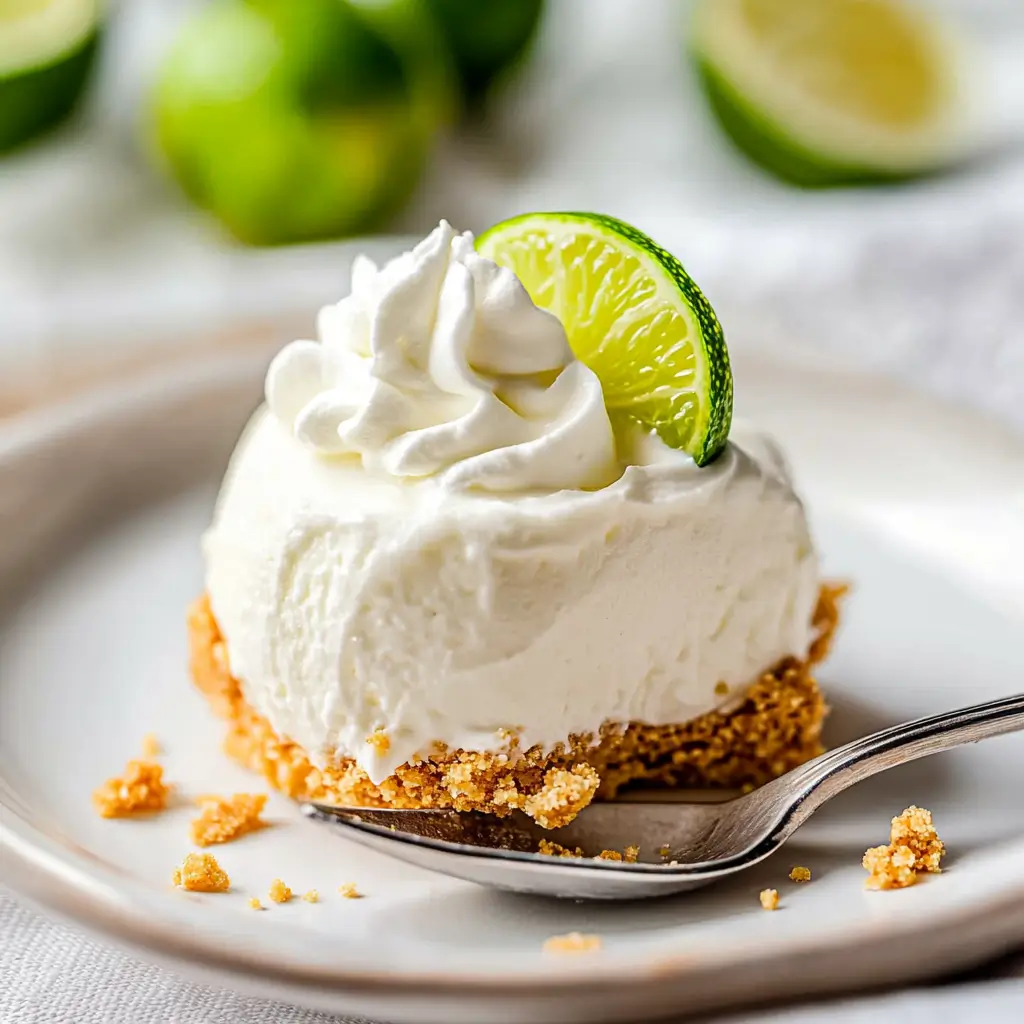
There’s just something magical about key lime pies, especially when they’re cold, creamy, and served in adorable individual portions. These Individual Frozen Key Lime Pies are like little bursts of sunshine on a spoon. Whether you’re hosting a summer barbecue, celebrating a birthday, or just craving something tangy and refreshing, this recipe is the perfect go-to. It’s no-bake, incredibly simple to make, and guaranteed to impress.
What really makes these pies special is their balance. The tartness from the key lime juice is perfectly mellowed by the rich, sweetened condensed milk and the light, fluffy whipped topping. Each bite is creamy and smooth with just the right amount of zing. And then there’s the crust—a buttery, crumbly graham cracker base that ties the whole thing together.
This dessert is a nostalgic favorite in my household. I remember making these individual frozen key lime pies for the first time with my little niece during one of those sweltering summer days when the idea of turning on the oven just didn’t make sense. She helped mix the crust and sneakily licked the spoon after we whipped up the filling. They were a hit then, and they’ve been on repeat ever since.
If you’ve never made frozen desserts before, don’t worry—this one is absolutely beginner-friendly. It doesn’t require any fancy equipment or complicated techniques. Plus, you can make it ahead of time, which is always a win in my book. Whether you serve them in muffin tins, ramekins, or little jars, these mini pies are sure to bring a smile to everyone’s face.
Why You’ll Love This Recipe
There are so many reasons to fall in love with these individual frozen key lime pies. Let’s break down exactly why this dessert might just become your new favorite.
Easy and No-Bake:
One of the best parts about this recipe is that there’s no oven involved. If you’ve ever tried to bake during the summer, you know what a blessing that is. All you need to do is mix, layer, and freeze—no sweat, literally.
Great for Entertaining:
Because these pies are made in individual portions, they’re perfect for serving at parties or family gatherings. No need to worry about slicing and serving a full pie. Everyone gets their own perfect little portion.
Bright, Tangy Flavor:
Key lime juice adds such a unique flavor—bright, citrusy, and slightly floral. It’s perfectly balanced by the sweetened condensed milk, giving you a sweet-and-tart combo that’s irresistibly refreshing.
Make-Ahead Friendly:
You can prepare these pies several days in advance and just keep them in the freezer until you’re ready to serve. That makes them a great option for stress-free hosting or meal planning.
Kid-Friendly and Crowd-Pleasing:
These pies are a huge hit with kids and adults alike. They’re easy to eat, not too sweet, and have a smooth, creamy texture that everyone loves.
Health Benefits
While this dessert leans more toward indulgent than health food, there are a few silver linings worth highlighting:
Portion Control:
Since the pies are made in individual cups or molds, it’s much easier to keep your servings in check. This naturally helps avoid overindulging.
Vitamin C Boost:
Key lime juice is a great source of vitamin C, an essential antioxidant that supports immune function and skin health.
Calcium and Protein:
Thanks to the sweetened condensed milk, each serving delivers a bit of calcium and protein, both of which are important for bone and muscle health.
No Artificial Preservatives:
By making these pies at home, you’re avoiding many of the preservatives and additives found in store-bought frozen desserts.
Preparation Time, Servings, and Nutritional Information
Total Time:
Prep time: 15 minutes
Freeze time: At least 4 hours (preferably overnight)
Servings:
This recipe makes 8 individual mini pies.
Nutritional Information (Per Serving):
Calories: 280
Protein: 4g
Carbohydrates: 28g
Fat: 17g
Fiber: 1g
Sugar: 22g
Ingredients List
Here’s everything you’ll need to whip up these refreshing little treats:
- 1½ cups graham cracker crumbs
Adds that classic, buttery crunch and acts as the perfect base. - 6 tablespoons unsalted butter, melted
Helps bind the crust and adds a rich flavor. - 1 can (14 ounces) sweetened condensed milk
Creamy, sweet, and essential for that luscious filling texture. - ½ cup key lime juice (freshly squeezed or bottled)
Delivers the signature tangy kick—use fresh if you can! - 1½ cups whipped topping (like Cool Whip), thawed
Lightens the filling and gives it a silky-smooth consistency. - Optional: Zest of 1 lime, for garnish
Adds a pop of color and a touch of extra zing.
Step-By-Step Cooking Instructions
Let’s walk through how to make these individual frozen key lime pies, step by step.
1. Prepare the crust
- In a medium bowl, combine the graham cracker crumbs with melted butter.
- Stir until the mixture resembles wet sand and is evenly moistened.
- Spoon the crumb mixture into the bottom of individual muffin tins, ramekins, or small jars (you can use paper liners if using a muffin tin).
- Press the crumbs firmly into the bottom using the back of a spoon or the bottom of a small glass.
2. Mix the filling
- In a large mixing bowl, pour in the sweetened condensed milk.
- Add the key lime juice and stir until smooth and creamy.
- Gently fold in the whipped topping, being careful not to deflate it too much. Mix until everything is well incorporated.
3. Assemble the pies
- Spoon the filling evenly over each graham cracker crust layer.
- Smooth the tops with a spoon or spatula to create a nice even surface.
4. Freeze the pies
- Carefully place the filled molds or jars into the freezer.
- Let them freeze for at least 4 hours, or until completely firm. Overnight works best if you’re planning ahead.
5. Serve and garnish
- Remove the pies from the freezer about 5–10 minutes before serving to allow them to soften slightly.
- If desired, top each mini pie with a sprinkle of lime zest or a small dollop of whipped topping for an extra-pretty finish.
How to Serve
There are so many fun and creative ways to serve these little pies:
- In glass jars for a rustic, picnic-style presentation
- In silicone muffin molds for easy pop-out servings
- On a dessert platter topped with fresh lime slices for color
- As part of a dessert buffet alongside other mini treats
These little pies are so versatile, they fit right into just about any celebration.
Pairing Suggestions
Beverage Pairings:
- Iced mint tea or lemonade for a light and refreshing pairing
- Sparkling water with lime for a fizzy, non-alcoholic option
- For a cozy winter variation, serve with a hot green tea to complement the citrus notes
Food Pairings:
- Grilled chicken, shrimp skewers, or veggie kebabs for a light summer dinner
- Fresh fruit salad or a crisp arugula salad with citrus dressing for a refreshing side
- Turkey burgers or BBQ chicken wings for a casual family meal
Storage, Freezing & Reheating Instructions
Storage:
Keep these mini pies stored in the freezer in an airtight container for up to 1 month. Be sure to let them sit out for a few minutes before serving so they’re not too hard to bite into.
Freezing Tips:
If you’re using muffin tins, pop the frozen pies out once firm and transfer them to a freezer-safe zip-top bag or container. Place parchment paper between layers to prevent sticking.
Reheating:
These are meant to be served frozen or just barely thawed. Avoid microwaving, as it will melt the filling and ruin the texture. Simply thaw at room temperature for 5–10 minutes before serving.
Common Mistakes to Avoid
Using regular lime juice instead of key lime:
Key limes have a unique flavor that regular limes can’t quite replicate. If you must substitute, look for bottled key lime juice for a closer match.
Not fully mixing the filling:
Be sure to stir the condensed milk and lime juice thoroughly before adding the whipped topping. This ensures an even, creamy texture.
Overfreezing without covering:
Always cover your pies while freezing to avoid freezer burn and off-flavors. A layer of plastic wrap or a tight-fitting lid works well.
Serving straight from the freezer:
Letting the pies sit out for a few minutes before serving softens the texture and enhances the flavor.
Pro Tips
- For an extra-crispy crust, bake the graham cracker base at 350°F for 5–6 minutes before filling. Let cool completely first.
- Want more lime flavor? Add a little zest directly into the filling for extra citrus punch.
- Use silicone molds or flexible muffin trays for the easiest release.
- Make a double batch and keep extras in the freezer for last-minute desserts.
- Serve with a tiny spoon or dessert fork for a touch of elegance.
Frequently Asked Questions (FAQs)
Can I use store-bought lime juice?
Yes, but key lime juice is preferred for that authentic flavor. Bottled key lime juice is a great option if fresh key limes aren’t available.
Can I make these ahead of time?
Absolutely. These pies can be made up to a week in advance and stored in the freezer.
Do I need to thaw them before serving?
Just let them sit at room temperature for 5–10 minutes so they soften slightly. They should still be cool and creamy when served.
Can I use a different crust?
Sure! Crushed digestive biscuits or vanilla wafers also work well. You can even try a chocolate cookie crust for a twist.
What if I don’t have whipped topping?
You can use homemade whipped cream. Just beat 1 cup of heavy cream with 2 tablespoons of sugar until soft peaks form.
Are these gluten-free?
Not by default, but you can easily make them gluten-free by using gluten-free graham crackers for the crust.
Can I use mini pie tins instead of cups?
Yes, any small mold will work as long as it can be frozen. Just adjust the crust and filling amounts to match the size.
How do I prevent the crust from crumbling?
Make sure your butter is fully melted and evenly mixed with the crumbs. Press down firmly when forming the base.
Can I double the recipe?
Yes! This recipe scales beautifully for larger gatherings.
Can I make this dairy-free?
You can experiment with dairy-free condensed milk and whipped topping alternatives, but the texture and taste may vary slightly.
Conclusion & Call to Action
These Individual Frozen Key Lime Pies are proof that dessert doesn’t have to be complicated to be completely delightful. They’re light, creamy, and bursting with citrusy flavor—the kind of treat that makes people pause and say, “Wow, you made these?”
Perfect for hot days, busy schedules, or just a fun afternoon in the kitchen, these no-bake mini pies check all the boxes. Whether you’re serving them at a party or keeping a stash in the freezer for surprise cravings, they’re sure to become a repeat favorite.
Give this recipe a try and let me know how it turns out! I’d love to hear your twist on it. Tag your creations or drop a comment below—I can’t wait to see your mini key lime masterpieces.
Print
Individual Frozen Key Lime Pies
- Total Time: 4 hours 15 minutes (with freeze time)
- Yield: 8 servings 1x
- Diet: Vegetarian
Description
These no-bake individual frozen key lime pies are refreshingly tart, creamy, and served in single portions—perfect for summer parties or quick treats.
Ingredients
-
1½ cups graham cracker crumbs
-
6 tbsp unsalted butter, melted
-
1 can (14 oz) sweetened condensed milk
-
½ cup key lime juice (fresh or bottled)
-
1½ cups whipped topping (like Cool Whip), thawed
-
Optional: Lime zest, for garnish
Instructions
-
Combine graham cracker crumbs with melted butter. Press into serving cups.
-
Mix condensed milk and key lime juice until smooth.
-
Fold in whipped topping gently.
-
Spoon filling over crusts and smooth the tops.
-
Freeze at least 4 hours or overnight.
-
Let thaw for 5–10 mins before serving. Garnish with lime zest.
Notes
- Use silicone molds or jars for easy serving.
- For a stronger lime flavor, add zest into the filling.
- Keep frozen and serve cold for best texture.
- Prep Time: 15 minutes
- Cook Time: 0 minutes
- Category: Dessert
- Method: No-bake
- Cuisine: American