
Easter is a time of joy, renewal, and, of course, delicious treats. There’s something special about celebrating with homemade cookies, especially when they are as colorful and fun as these Marbled Easter Egg Sugar Cookie Cutouts. Inspired by beautifully dyed Easter eggs, these cookies are not only delightful to eat but also a joy to make. They feature a mesmerizing marbled effect that makes each cookie unique, just like real Easter eggs.
One of the best parts about this recipe is that it’s incredibly easy to prepare. By using Betty Crocker™ Sugar Cookie Mix, you can skip the hassle of making the dough from scratch while still achieving bakery-level results. This makes it perfect for anyone who wants to create stunning cookies without spending hours in the kitchen.
These cookies are great for Easter baskets, party favors, or simply enjoying with family and friends. If you have kids, they will absolutely love helping with the marbling technique and cutting out the egg-shaped cookies. The process is similar to playing with colorful dough, making it a perfect kitchen activity for little hands.
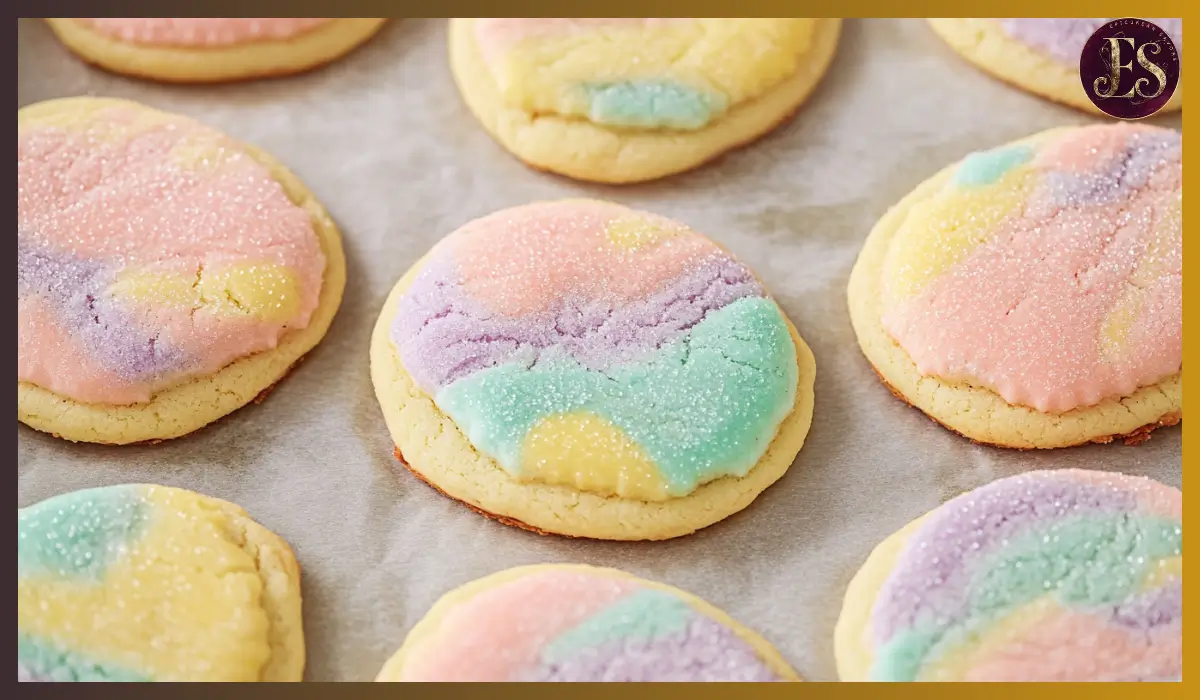
The marbled effect is achieved by dividing the dough into different portions, tinting them with food coloring, and then gently mixing them together. The result is a visually stunning treat that looks almost too pretty to eat. A sprinkle of coarse white sugar on top adds a bit of sparkle, making these cookies shine on any Easter dessert table.
Whether you’re hosting an Easter gathering, looking for a fun activity to do with the family, or wanting to create a festive homemade gift, these cookies are the perfect choice. They’re soft, buttery, and just the right amount of sweet, making them irresistible for kids and adults alike.
Why You’ll Love This Marbled Easter Egg Cookies Recipe
These cookies are more than just pretty; they have several qualities that make them a must-try Easter treat.
Easy to Make
Thanks to Betty Crocker™ Sugar Cookie Mix, this recipe saves time while still delivering delicious homemade flavor. The mix ensures that the cookies have a soft, buttery texture without requiring multiple ingredients or complicated steps.
Vibrant and Festive
The marbled effect creates a stunning, colorful appearance that makes these cookies stand out. With a combination of pastel blues, pinks, purples, and yellows, they perfectly capture the essence of Easter.
Perfect for Gifting
Pack these cookies in decorative bags, boxes, or Easter baskets for a thoughtful homemade treat. They make fantastic party favors or gifts for family, friends, and teachers.
Kid-Friendly Activity
Making these cookies is a fantastic way to get kids involved in the kitchen. They will have a blast rolling out the dough, mixing the colors, and cutting out the shapes. It’s a hands-on experience that makes baking even more enjoyable.
Deliciously Buttery and Sweet
Beyond their visual appeal, these cookies have a melt-in-your-mouth texture with a rich buttery flavor. The addition of a coarse sugar topping adds a slight crunch, making them even more delightful.
Health Benefits
While these cookies are an indulgent treat, they still offer some benefits when enjoyed in moderation.
Homemade Goodness
Baking at home allows you to control the ingredients and avoid unnecessary preservatives and artificial flavors found in store-bought cookies.
Portion Control
Since these cookies are individually portioned, it’s easier to enjoy them in moderation. Unlike a large cake or pie, you can have just one or two to satisfy your sweet tooth without overindulging.
Fun and Creative Activity
Baking these cookies is not only enjoyable but also a great stress reliever. The process of mixing, rolling, and decorating is a creative outlet that can boost your mood.
Sharing Brings Joy
Homemade cookies have a way of bringing people together. Whether you’re baking with family or gifting them to friends, the joy of sharing food is a health benefit in itself.
Preparation Time, Servings, and Nutritional Information
Servings
This recipe makes approximately 22 cookies, depending on the size of your cookie cutter.
Preparation Time
- Prep Time: 30 minutes
- Total Time: 1 hour 20 minutes
Nutritional Information (Per Cookie)
- Calories: 140 kcal
- Carbohydrates: 21g
- Fat: 6g
- Protein: 1g
Ingredients List
To make these Marbled Easter Egg Sugar Cookie Cutouts, you will need the following ingredients:
For the Cookies
- 1 pouch (17.5 oz) Betty Crocker™ Sugar Cookie Mix
- Flour, butter, and egg (as listed on the package for cutout cookies)
- Betty Crocker™ Gel Food Colors (blue, pink, purple, yellow)
For Decoration
- 2 tablespoons coarse white sparkling sugar (optional, for added texture and sparkle)
Step-By-Step Cooking Instructions
Preheat the Oven
Set your oven to 375°F (190°C) and line a baking sheet with parchment paper. This ensures even baking and prevents sticking.
Prepare the Dough
In a large mixing bowl, combine the cookie mix, flour, butter, and egg according to the package instructions. Mix until a soft dough forms.
Divide and Color the Dough
- Divide the dough into four equal portions and place them in separate bowls.
- Add a few drops of food coloring to each portion—one blue, one pink, one purple, and one yellow.
- Knead each portion until the color is evenly distributed.
Create the Marbled Effect
- Lightly flour a clean surface.
- Drop random tablespoons of each colored dough onto the surface to form a rough rectangle.
- Gently press the pieces together, being careful not to overmix, so the colors remain distinct.
- Roll the dough out to ¼-inch thickness using a rolling pin.
Cut Out the Cookies
- Use a 3-inch egg-shaped cookie cutter to cut out cookies.
- Place the cookies 2 inches apart on the prepared baking sheet.
- Sprinkle coarse white sugar on top for added shimmer.
- Gather and reroll the leftover dough scraps to cut out more cookies.
Bake the Cookies
- Bake for 7-9 minutes or until the edges turn light golden brown.
- Let them cool on the baking sheet for 2 minutes, then transfer them to a wire rack to cool completely.

How to Serve
- As a Festive Easter Treat – Arrange the cookies on a platter for Easter brunch or dessert.
- With a Cup of Tea or Coffee – These cookies pair perfectly with a warm drink.
- Decorated with Icing – Add extra detail with royal icing or melted white chocolate.
- As a Gift – Wrap them in decorative packaging for a thoughtful Easter present.
Pairing Suggestions
- Beverages – Serve with milk, hot cocoa, or herbal tea for a comforting treat.
- Fruits – Pair with fresh berries or citrus slices for a refreshing contrast.
- Other Easter Desserts – Complement these cookies with carrot cake or chocolate eggs.
Storage, Freezing & Reheating Instructions
- Store in an airtight container at room temperature for up to 5 days.
- Freeze raw dough for up to 2 months; thaw before rolling and baking.
- Reheat cookies in a low oven (300°F) for 5 minutes to refresh them.
Common Mistakes to Avoid
Making marbled Easter egg sugar cookies is a fun and rewarding process, but there are some common pitfalls that can affect the final result. Avoiding these mistakes will help ensure that your cookies come out perfectly every time.
One of the biggest mistakes is overmixing the dough when combining the different colors. If you knead the dough too much, the colors will blend together too much and create a muddy appearance instead of a distinct marbled effect. The key is to mix just enough to swirl the colors without fully incorporating them.
Another common issue is rolling the dough too thin. If the dough is rolled thinner than ¼ inch, the cookies can become too crispy and may not hold their shape well. On the other hand, rolling the dough too thick can result in uneven baking, where the centers remain undercooked while the edges brown too much.
Using too much flour when rolling out the dough can also be problematic. While a light dusting of flour helps prevent sticking, excess flour can dry out the dough, leading to crumbly cookies. If you find that the dough is too sticky, chilling it for 10 minutes before rolling can help without adding too much flour.
Lastly, not allowing the cookies to cool properly can affect their texture. Let them sit on the baking sheet for about two minutes before transferring them to a wire rack. Moving them too soon can cause them to break, while leaving them on the sheet too long can cause them to continue cooking from the residual heat.
Pro Tips
To make sure your marbled Easter egg sugar cookies turn out beautifully every time, follow these expert tips for the best results.
For the most vibrant and consistent colors, use gel food coloring instead of liquid food coloring. Gel-based colors are more concentrated, so you get brighter hues without adding extra moisture to the dough. This helps maintain the right dough consistency and prevents it from becoming too sticky.
When marbling the dough, be gentle when swirling the colors together. Instead of kneading the colors into one another, lightly press and fold them a couple of times to create streaks of color. Overmixing will blend the colors too much, resulting in a less defined marbled effect.
If you want an extra touch of shimmer, sprinkle a little coarse white sparkling sugar on the cookies before baking. This not only adds a beautiful sparkle but also provides a slight crunch that enhances the texture.
For uniform cookies, chill the dough for about 10 minutes before rolling it out. This helps firm up the butter and makes the dough easier to work with, especially if it starts feeling too soft from handling. It also helps the cookies maintain their shape while baking.
If you’re having trouble rolling out the dough evenly, use rolling pin guides or two rulers of equal thickness placed on either side of the dough. This ensures that your cookies are an even ¼ inch thick, which helps them bake uniformly.
If you want to get even more creative, try using different pastel colors for a unique marbled look. You can experiment with shades of lavender, mint green, and peach in addition to the traditional blue, pink, yellow, and purple.
Frequently Asked Questions (FAQs)
Can I make the dough ahead of time?
Yes! You can prepare the dough in advance and store it in the refrigerator for up to two days. Just make sure to wrap it tightly in plastic wrap to prevent it from drying out. When you’re ready to bake, let the dough sit at room temperature for about 10 minutes before rolling it out.
Can I freeze the cookie dough?
Absolutely! To freeze, shape the dough into a disc, wrap it tightly in plastic wrap, and place it in an airtight container. It will last for up to two months. When you’re ready to use it, thaw the dough in the refrigerator overnight before rolling and cutting out the cookies.
What if I don’t have gel food coloring?
While gel food coloring is recommended for the best color intensity, you can use liquid food coloring in a pinch. Just be aware that you may need to add a little more flour if the dough becomes too sticky.
Why did my cookies turn out too hard?
Overbaking is the most common cause of hard cookies. Be sure to remove them from the oven as soon as the edges turn lightly golden brown. They will continue to firm up as they cool.
How do I prevent the cookies from spreading too much?
If your cookies are spreading, try chilling the dough for about 10 minutes before baking. Also, make sure you are measuring the flour correctly—too little flour can cause cookies to spread.
Conclusion & Call to Action
Marbled Easter egg sugar cookies are a delightful way to celebrate Easter with family and friends. Their soft, buttery texture combined with a beautiful swirled design makes them a showstopper at any holiday gathering. Whether you’re making them for an Easter party, gifting them to loved ones, or simply enjoying them at home, these cookies are sure to bring smiles to everyone who tries them.
If you love baking with kids, this recipe is a fantastic hands-on activity. Little ones will enjoy mixing the colors, rolling out the dough, and cutting out the cookies. It’s a great way to make lasting Easter memories in the kitchen.
Now it’s your turn to try these delicious cookies! If you make them, share your results in the comments below or tag your creations on social media. I’d love to see how your marbled Easter egg cookies turn out! If you found this recipe helpful, don’t forget to save it for later and share it with friends who might enjoy a fun and easy Easter baking project. Happy baking!
Print
Marbled Easter Egg Sugar Cookie Cutouts
- Total Time: 1 hour 20 minutes
- Yield: 22 cookies 1x
- Diet: Vegetarian
Description
These festive Marbled Easter Egg Sugar Cookie Cutouts are soft, buttery, and beautifully swirled with pastel colors. Perfect for Easter baskets, parties, and gifting, these cookies are easy to make with Betty Crocker™ Sugar Cookie Mix and a simple marbling technique.
Ingredients
- 1 pouch (17.5 oz) Betty Crocker™ Sugar Cookie Mix
- Flour, butter, and egg (as listed on package for cutout cookies)
- Betty Crocker™ Gel Food Colors (blue, pink, purple, yellow)
- 2 tablespoons coarse white sparkling sugar (optional, for decoration)
Instructions
- Preheat oven to 375°F (190°C).
- Prepare the dough by mixing the cookie mix, flour, butter, and egg.
- Divide dough into 4 equal portions and tint each with a different gel food color.
- Create a marbled effect by layering the colors, pressing them together, and rolling out the dough to ¼-inch thickness.
- Cut out cookies using a 3-inch egg-shaped cookie cutter.
- Place on a baking sheet, sprinkle with coarse sugar, and bake for 7-9 minutes until edges turn lightly golden brown.
- Cool on the sheet for 2 minutes, then transfer to a wire rack to cool completely.
Notes
- Avoid overmixing the dough to maintain a distinct marbled effect.
- Use gel food coloring for vibrant colors without adding extra moisture.
- Store cookies in an airtight container at room temperature for up to 5 days.
- Freeze raw dough for up to 2 months; thaw before rolling and baking.
- Prep Time: 30 minutes
- Cook Time: 9 minutes
- Category: Dessert
- Method: Baking
- Cuisine: American