
There’s something seriously magical about making your own ice cream. And when you can do it without any fancy equipment, in just one mason jar, and with only a handful of simple ingredients, it kind of feels like a kitchen superpower. This Mason Jar Ice Cream recipe is one of those little discoveries that make you wonder, “Why haven’t I been doing this forever?”
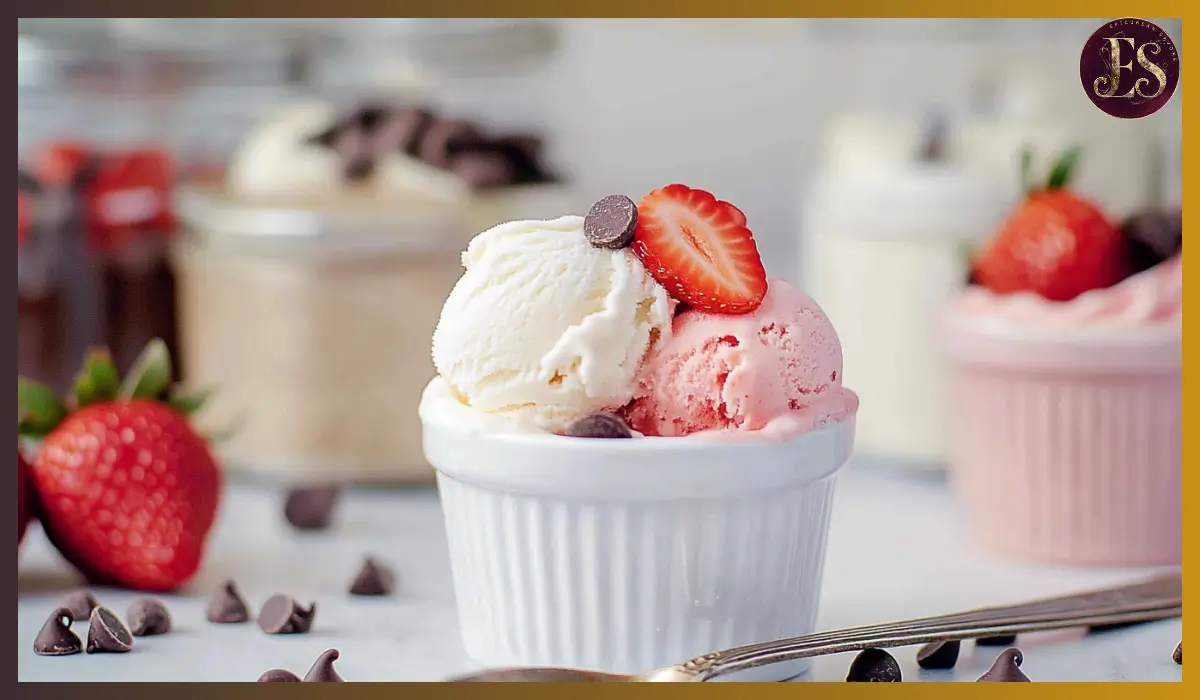
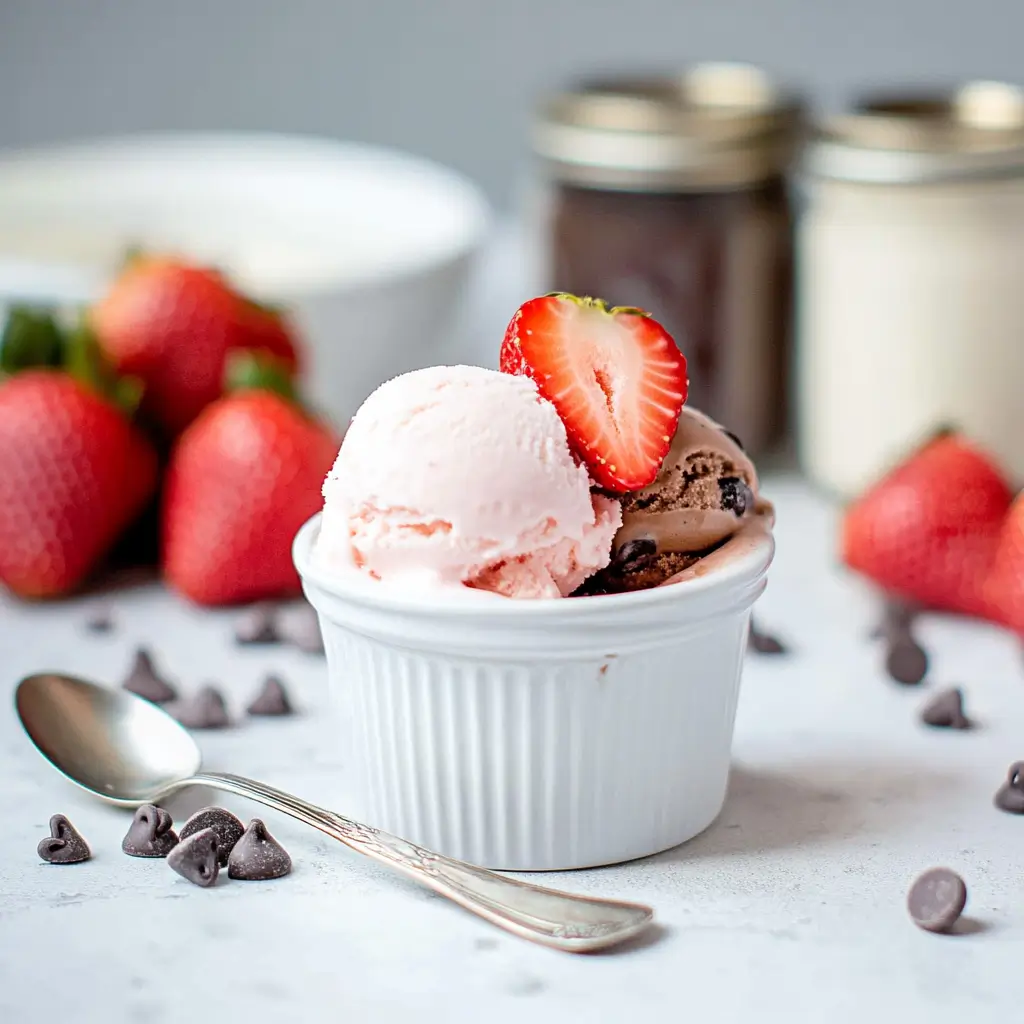
What makes it even better? We’re not just sticking to one flavor. Nope, we’re going all in with three delicious options: classic Vanilla, rich Chocolate, and bright Strawberry. All made using ingredients you probably already have at home. Plus, there’s no churning, no ice cream maker, and no hard-to-find add-ins. Just shake, freeze, and enjoy.
I first tried this recipe during a particularly hot summer weekend when my nieces came to visit. We were all craving something sweet and cold, but I didn’t want to make another grocery store run or pull out my bulky ice cream machine. So we grabbed some mason jars, got a little messy in the best way, and ended up creating one of our favorite kitchen memories. The girls loved customizing their own jars, and I loved how stress-free it all was.
Whether you’re making this as a fun weekend activity with the kids or just want a quick sweet treat after dinner, this mason jar ice cream will deliver every time. It’s creamy, rich, and totally customizable—basically, everything ice cream should be.
Why You’ll Love This Recipe
This recipe checks all the boxes for what a great homemade treat should be. It’s easy, fun, and tastes absolutely amazing. Here’s why you’re going to want to make it over and over again:
- No-Churn Simplicity: Forget the ice cream maker. All you need is a mason jar, your ingredients, and a little shaking. That’s it.
- Kid-Friendly Fun: Kids love making this! It’s interactive, a bit of a workout, and the payoff is a delicious frozen treat. Plus, each child can customize their jar however they want.
- Minimal Ingredients: You don’t need a trip to a specialty store. Everything required is likely already in your pantry and fridge.
- Three Flavors in One Recipe: With just a few tweaks to the base, you can make classic Vanilla, Chocolate, and Strawberry. It’s like a mini ice cream parlor right in your kitchen.
- Creamy and Rich Texture: Thanks to the heavy whipping cream, the texture turns out surprisingly creamy and indulgent—even without churning.
- No Special Equipment: No stand mixer, no ice cream machine, and definitely no fancy tools. Just a jar with a lid and your own two hands.
- Portion Control: Each mason jar makes about two servings, which is perfect for controlling portions and avoiding waste.
So, whether you’re planning a playdate, looking for a quick dessert, or just craving ice cream without the hassle, this recipe has got you covered.
Health Benefits
While ice cream isn’t typically associated with health food, this mason jar version does have a few perks worth highlighting—especially compared to store-bought options.
First, you control the ingredients. That means no artificial stabilizers, preservatives, or unnecessary additives. You know exactly what’s going into your dessert.
Second, you can scale down the sugar. If you prefer your ice cream a little less sweet, you can reduce the sugar in the recipe and still get a creamy, flavorful result.
Third, the portion size is naturally smaller. Each jar makes just two servings, helping to satisfy your sweet tooth without leading to overindulgence.
And finally, since you’re not using eggs or other cooked ingredients, this version is naturally safe for those with certain allergies and dietary preferences.
While this isn’t a “light” dessert, it’s definitely a mindful indulgence you can feel better about, especially when you compare it to some of the ultra-processed options in the freezer aisle.
Preparation Time, Servings, and Nutritional Information
Total Time:
- Prep time: 10 minutes
- Freeze time: 4 hours (minimum)
Servings:
- Each mason jar makes 2 servings
- Recipe is easily scalable
Nutritional Information (per serving):
- Calories: 280
- Protein: 2g
- Carbohydrates: 14g
- Fat: 24g
- Sugar: 13g
(Note: Values vary slightly depending on flavor)
Ingredients List
Here’s what you’ll need to make the base ice cream and the three delicious flavors. Each set of ingredients is per mason jar.
The Base (used in all 3 flavors):
- 1 cup heavy whipping cream
- 1 tablespoon granulated sugar
- 1 teaspoon pure vanilla extract
- A pinch of salt
Vanilla Flavor:
- Use base as is
Chocolate Flavor:
- 2 teaspoons unsweetened cocoa powder (sifted for smoothness)
Strawberry Flavor:
- 1 tablespoon strawberry jam (preferably with fruit bits)
- Optional: a drop or two of red food coloring for vibrant pink
These simple ingredients come together beautifully in just a few steps. If you want to get creative, you can also toss in mini chocolate chips, crushed cookies, or even a swirl of caramel.
Step-By-Step Cooking Instructions
Step 1: Gather Your Mason Jars
Use 8-ounce mason jars with tight-fitting lids. Make sure they’re clean and completely dry.
Step 2: Add the Base Ingredients
In each mason jar, pour in:
- 1 cup heavy whipping cream
- 1 tablespoon sugar
- 1 teaspoon vanilla extract
- A pinch of salt
Step 3: Customize the Flavor
Depending on the flavor you’re making, add:
- Vanilla: No extra ingredients needed.
- Chocolate: Add 2 teaspoons cocoa powder. Stir or shake briefly to dissolve.
- Strawberry: Add 1 tablespoon strawberry jam and optional food coloring.
Step 4: Seal and Shake
Screw the lid on tightly. Now shake vigorously for about 4 to 5 minutes, until the mixture thickens slightly and coats the sides of the jar. It should be about the consistency of a loose whipped cream.
Step 5: Freeze
Place the sealed jars in the freezer and freeze for at least 4 hours, or until solid. Overnight works even better for a firmer texture.
Step 6: Enjoy
Remove from the freezer and let sit at room temperature for 5 to 10 minutes before digging in. This softens it just enough to scoop or eat straight from the jar.
How to Serve
Once your mason jar ice cream is frozen and ready to go, there are lots of fun ways to enjoy it:
- Scoop into bowls and top with fresh fruit or sprinkles
- Eat straight from the jar for a cute, portion-controlled dessert
- Add a scoop to a warm brownie or slice of cake
- Sandwich between two cookies for a quick ice cream sandwich
- Drizzle with chocolate or caramel sauce for an extra treat
Pairing Suggestions
This easy ice cream pairs beautifully with a variety of treats and drinks. Here are some favorite combinations:
- With Baked Goods: Serve alongside warm cookies, banana bread, or chocolate chip muffins
- Fresh Fruit: Top with sliced bananas, strawberries, or mango for a refreshing contrast
- Drinks: Pair with a glass of cold milk or iced coffee
- Crunchy Add-Ons: Try crushed pretzels, chopped nuts, or granola on top
These pairings turn your simple jar of ice cream into a full dessert experience with almost no extra effort.
Storage, Freezing & Reheating Instructions
Storage:
Keep your mason jar ice cream sealed and stored in the freezer for up to 2 weeks. After that, the texture may become icy, but it will still be safe to eat.
Freezing Tips:
- Always leave a bit of room at the top of the jar to allow for expansion.
- Make sure the lids are on tightly to prevent freezer burn.
Reheating (Softening):
If your ice cream is too hard to scoop, let it sit on the counter for 5 to 10 minutes. You can also place the jar in the fridge for 15 minutes for gentler softening.
Common Mistakes to Avoid
Even though this recipe is simple, there are a few common missteps that can affect the results:
- Not Shaking Long Enough: If the mixture isn’t thickened before freezing, your ice cream may be icy instead of creamy. Shake until it’s visibly thicker.
- Using Low-Fat Cream: This recipe relies on the fat content in heavy whipping cream. Don’t substitute with milk or half-and-half.
- Overfilling the Jar: Leave space at the top of the jar for the mixture to expand as it freezes.
- Skipping the Flavor Mix-ins: Without proper mixing, your jam or cocoa may clump. Stir briefly before shaking to distribute evenly.
- Not Letting It Soften: Ice cream straight from the freezer is very firm. Let it soften slightly for the best texture.
Pro Tips
- Sift the cocoa powder before adding it to avoid clumps in the chocolate version.
- Use fruit preserves with bits of fruit for a more authentic strawberry flavor.
- Add extracts like almond, mint, or coconut for new flavors.
- Decorate the jars before serving for parties or picnics—tie a ribbon around the lid or add a cute label.
- Make ahead for events: These are perfect for birthdays, BBQs, or summer gatherings. Prep a variety of flavors the day before and let guests choose their favorite.
Frequently Asked Questions (FAQs)
Can I use a plastic container instead of a mason jar?
Yes, as long as it has a tight-fitting lid and can withstand freezing, it should work just fine.
Is there a dairy-free version of this recipe?
You can try using full-fat coconut cream in place of heavy whipping cream, though the texture may be slightly different.
Can I make it less sweet?
Absolutely. Feel free to reduce the sugar to 2 teaspoons if you prefer a milder flavor.
How long do I need to shake the jar?
Typically, 4 to 5 minutes. You’ll know it’s ready when the mixture is thicker and coats the inside of the jar.
Can I add mix-ins like chocolate chips or crushed cookies?
Yes! Just stir them in after shaking but before freezing.
Why is my ice cream icy instead of creamy?
Most likely, the cream wasn’t shaken enough or the fat content was too low. Be sure to use full-fat heavy cream and shake until thickened.
Can I double the recipe in one jar?
No, it’s best to keep each batch to one jar to ensure proper mixing and freezing.
How long does it last in the freezer?
About 2 weeks for best quality, though it’s safe to eat for longer if stored properly.
Do I need to stir after shaking?
If using mix-ins like jam or cocoa, give a quick stir to distribute them evenly before freezing.
Can I add food coloring for fun?
Yes, a drop or two of food coloring can make your strawberry or vanilla ice cream pop with color—especially fun for kids.
Conclusion & Call to Action
Making homemade ice cream doesn’t have to be complicated. With this easy mason jar method, you can whip up creamy, dreamy ice cream in your favorite flavors using just a few ingredients and zero special tools. It’s the perfect blend of fun and flavor, whether you’re making it with kids or just treating yourself on a cozy night in.
Now it’s your turn to give it a try! Grab those jars, choose your favorite flavor—or better yet, make all three—and enjoy a simple yet delicious frozen dessert. Don’t forget to get creative with toppings and mix-ins. And if you end up loving it as much as we do, snap a photo and share it on social media. I’d love to see how your homemade ice cream turns out!
Happy scooping!
Print
Mason Jar Ice Cream
- Total Time: 4 hours 10 minutes (includes freeze time)
- Yield: 2 servings per jar 1x
- Diet: Vegetarian
Description
This fun, no-churn mason jar ice cream is ultra-creamy and easy to make at home using just a few ingredients. Choose from vanilla, chocolate, or strawberry!
Ingredients
-
1 cup heavy whipping cream
-
1 tbsp granulated sugar
-
1 tsp vanilla extract
-
Pinch of salt
-
For Chocolate: 2 tsp unsweetened cocoa powder
-
For Strawberry: 1 tbsp strawberry jam + optional red food coloring
Instructions
-
Add base ingredients (cream, sugar, vanilla, salt) to an 8 oz mason jar.
-
Customize: Add cocoa for chocolate, or jam + coloring for strawberry.
-
Shake jar for 4–5 minutes until thickened.
-
Freeze for at least 4 hours or overnight.
-
Let soften for 5–10 mins before serving.
Notes
- Use full-fat cream for best texture.
- Mix in chips, cookie crumbs, or swirls after shaking.
- Don’t overfill—leave space for expansion during freezing.
- Prep Time: 10 minutes
- Cook Time: 0 minutes
- Category: Dessert
- Method: No-churn, freezing
- Cuisine: American