
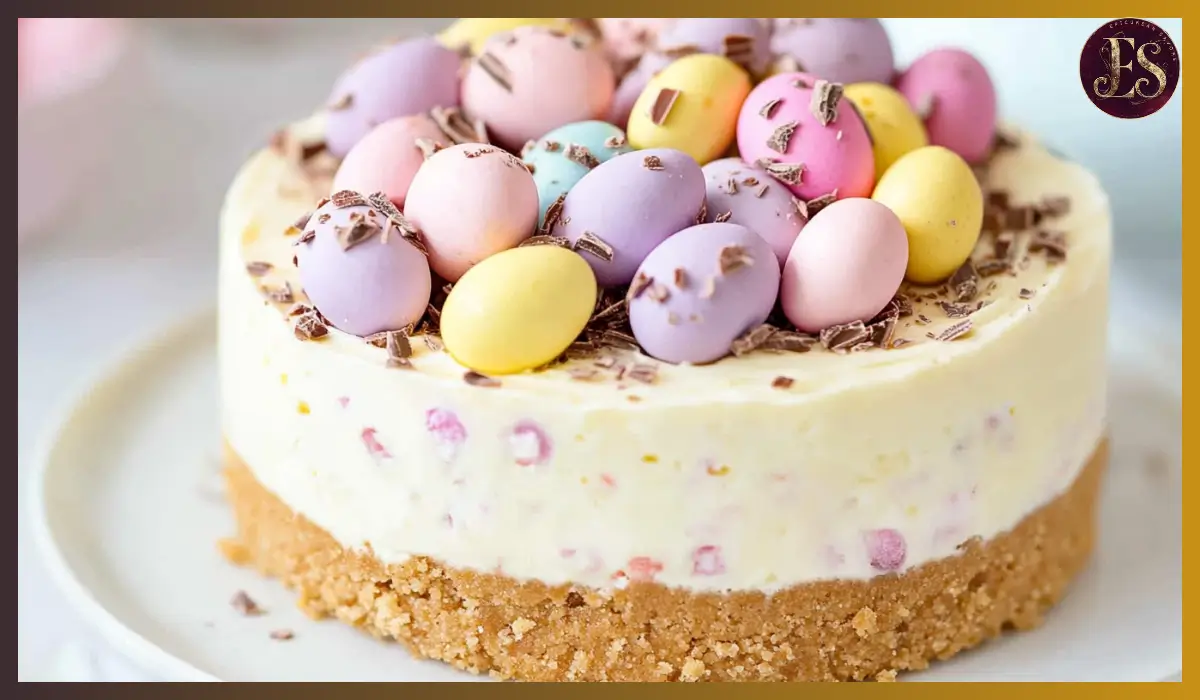
This no-bake Mini Egg Cheesecake is the ultimate Easter dessert, combining a crunchy biscuit base, a smooth and creamy cheesecake filling, and a generous topping of Cadbury Mini Eggs for that perfect holiday touch. It’s incredibly easy to make, requires no oven time, and can be prepared ahead of time, making it ideal for stress-free entertaining. If you love desserts that are both visually stunning and effortless, this recipe is for you.
There’s something so satisfying about a no-bake cheesecake. The combination of textures—the buttery biscuit base, the rich and airy cheesecake layer, and the crisp chocolate eggs—creates a perfect balance in every bite. Plus, with no need to worry about baking times or cracking, this is a foolproof dessert that anyone can master.
This cheesecake has quickly become a family favorite in my home. Every year, as soon as Easter approaches, I find myself stocking up on Mini Eggs because I know my family will be requesting this dessert. The best part? It’s not just for Easter! While Mini Eggs are a seasonal treat, you can substitute them with any chocolate candies throughout the year, making this a versatile and crowd-pleasing dessert. Whether you’re serving it at a family gathering, a spring party, or just as a sweet treat for yourself, this Mini Egg Cheesecake is guaranteed to be a hit.
Why You’ll Love This Recipe
This cheesecake is more than just a pretty Easter dessert; it’s an absolute must-try for so many reasons.
- No-Bake and Easy: No oven, no water bath, and no complicated steps—just mix, chill, and enjoy.
- Perfect for Easter: The colorful Mini Eggs make this cheesecake festive and fun, ideal for holiday celebrations.
- Make-Ahead Dessert: This cheesecake needs to chill for a few hours, which means you can prepare it the day before and have a stress-free Easter dessert ready to go.
- Creamy and Crunchy: The velvety cheesecake filling contrasts beautifully with the buttery biscuit base and the crunchy chocolate Mini Eggs.
- Customizable: While Mini Eggs are the star, you can swap them for any chocolate or even add caramel, nuts, or different biscuit bases to suit your taste.
- Kid-Friendly and Fun: With its vibrant colors and sweet flavors, kids will love helping to decorate and eat this delicious treat.
Health Benefits
While this is a decadent dessert, there are still some positive aspects to enjoy.
- Calcium-Rich: Thanks to the cream cheese and double cream, this cheesecake provides a good amount of calcium, which is essential for strong bones and teeth.
- Energy-Boosting Carbohydrates: The biscuit base and chocolate eggs offer quick energy, making this a great treat to enjoy after a long day or a fun Easter egg hunt.
- Mood-Boosting Chocolate: Chocolate, especially milk chocolate, contains small amounts of serotonin and endorphin boosters, which can help improve your mood and create a sense of happiness.
- Protein from Dairy: Cream cheese and double cream add a small protein boost, which helps keep you feeling satisfied.
- No Artificial Preservatives: Since this cheesecake is homemade, you can control the quality of ingredients, avoiding unnecessary additives that are often found in store-bought desserts.
Of course, this dessert should be enjoyed in moderation as part of a balanced diet. If you want a slightly lighter version, you can use reduced-fat cream cheese or swap some of the Mini Eggs for fresh berries.
Preparation Time, Servings, and Nutritional Information
- Preparation Time: 20 minutes
- Chilling Time: Minimum 3 hours (preferably overnight)
- Servings: 12 slices
- Calories per Serving: Approximately 450 kcal
- Key Nutrients: 32g fat, 40g carbohydrates, 6g protein
Ingredients List
The Biscuit Base:
- 280g Digestive biscuits (crushed)
- 140g Unsalted butter (melted)
The Cheesecake Filling:
- 600g Full-fat cream cheese (such as Philadelphia)
- 140g Icing sugar (sifted)
- 600ml Double cream (whipped to soft peaks)
- 360g Cadbury Mini Eggs (chopped)
- Juice of half a lemon
Decoration:
- 270g Cadbury Mini Eggs (whole or slightly crushed)
- Extra whipped cream (optional, for piping)
Step-By-Step Cooking Instructions
Prepare the Biscuit Base
- Start by crushing the digestive biscuits into fine crumbs. You can do this by placing them in a food processor or by sealing them in a ziplock bag and crushing them with a rolling pin.
- Melt the butter in a saucepan or microwave and mix it with the crushed biscuits until they resemble wet sand.
- Press the mixture into the bottom of a 7-inch springform tin, ensuring an even layer. Use the back of a spoon or the bottom of a glass to pack it tightly.
- Place the tin in the fridge while you prepare the filling.
Make the Cheesecake Filling
- Chop the Mini Eggs in half or into small chunks using a sharp knife. Set aside.
- In a large bowl, beat the cream cheese, icing sugar, and lemon juice until smooth and creamy.
- In a separate bowl, whip the double cream until soft peaks form. Be careful not to over-whip, as this can make the texture too stiff.
- Gently fold the whipped cream into the cream cheese mixture, making sure to keep it light and airy.
- Stir in the chopped Mini Eggs, distributing them evenly throughout the mixture.
- Pour the filling over the biscuit base and smooth the top with a spatula.
- Place the cheesecake in the fridge for at least 3 hours, preferably overnight, to allow it to set properly.
Decorate and Serve
- Once the cheesecake has fully set, carefully remove it from the tin. Run a warm knife around the edges before releasing the springform tin for a clean finish.
- Decorate with extra whipped cream if desired, then scatter the remaining Mini Eggs on top.
- Slice and serve chilled.

How to Serve
This Mini Egg Cheesecake is best served chilled. For clean slices, dip a sharp knife into hot water, wipe it dry, and then cut through the cheesecake. Repeat for each slice to maintain neat edges. You can serve it as is or with additional toppings for extra indulgence:
- A drizzle of melted chocolate or caramel sauce for a richer flavor.
- A handful of fresh berries like raspberries or strawberries for a tart contrast.
- A dusting of cocoa powder or powdered sugar for an elegant finish.
- A dollop of whipped cream on each slice for added creaminess.
Pairing Suggestions
- Coffee or Tea: A cup of hot coffee or a mild black tea balances the richness of the cheesecake beautifully.
- Fruit Juices: Freshly squeezed orange juice or a berry smoothie makes a refreshing contrast.
- Milkshakes: A vanilla or chocolate milkshake pairs perfectly with the creamy cheesecake texture.
Storage, Freezing & Reheating Instructions
- Fridge: Store the cheesecake in an airtight container for up to 3 days.
- Freezer: You can freeze the cheesecake (undecorated) for up to a month. Wrap it tightly in cling film and foil before freezing. Thaw in the fridge for 24 hours before serving.
- Reheating: Since this is a no-bake cheesecake, there’s no need to reheat it. Simply serve it straight from the fridge.
Common Mistakes to Avoid
Even though this no-bake Mini Egg Cheesecake is simple to make, there are a few common mistakes that can affect the final result. Avoid these pitfalls to ensure a creamy, perfectly set cheesecake with the right texture and flavor.
One of the biggest mistakes is overwhipping the double cream. If you whip it too much, it can become too thick and grainy, making the cheesecake dense rather than light and creamy. On the other hand, if you underwhip the cream, the filling might not hold its shape, leading to a soft cheesecake that doesn’t set properly. Aim for soft peaks, where the cream holds its shape but still looks smooth and fluffy.
Another mistake is using low-fat cream cheese. While it might seem like a healthier alternative, reduced-fat cream cheese contains more moisture, which prevents the cheesecake from setting properly. Always use full-fat cream cheese for the best texture and stability.
Not chilling the cheesecake long enough is another common error. No-bake cheesecakes need at least three hours in the fridge, but overnight chilling is ideal. This allows the filling to firm up properly, giving you clean slices and the best texture. If you try to slice it too soon, it may be too soft and messy.
Lastly, cutting the cheesecake incorrectly can ruin the presentation. For clean slices, use a sharp knife dipped in hot water, wipe it dry, and slice in one smooth motion. Repeat for each slice to maintain neat edges.
Pro Tips
To make sure your Mini Egg Cheesecake turns out perfect every time, follow these expert tips. These small details can make a big difference in achieving the best texture, flavor, and presentation.
Always use room temperature cream cheese before mixing. Cold cream cheese can be lumpy and difficult to combine, leading to an uneven filling. Let it sit at room temperature for about 30 minutes before beating it with the icing sugar.
For the best texture, whip the double cream separately before folding it into the cream cheese mixture. This helps to create a light and airy cheesecake rather than a dense and heavy one. Gently fold the whipped cream in rather than stirring vigorously to maintain the fluffiness.
If you want to add more depth of flavor, consider toasting the biscuit crumbs for a couple of minutes before mixing them with the melted butter. This enhances the flavor of the crust, adding a subtle nuttiness that pairs beautifully with the creamy filling.
For extra crunch, reserve some chopped Mini Eggs to sprinkle on top just before serving. This ensures that some of the eggs remain crisp, as they can soften slightly if mixed into the filling too early.
For a fun twist, mix different types of chocolate eggs into the filling, such as white chocolate or caramel-filled eggs, to add variety in flavor and texture.
Frequently Asked Questions (FAQs)
Can I make this cheesecake ahead of time?
Yes! This is the perfect make-ahead dessert since it needs time to chill. You can prepare it a day in advance and keep it in the fridge until ready to serve. Just add the final decorations right before serving for the freshest look.
What if I don’t have a springform tin?
A springform tin is ideal because it makes removing the cheesecake easier, but if you don’t have one, you can use a deep pie dish or a regular cake tin lined with parchment paper. Just be careful when removing the cheesecake, as it won’t have a removable base.
Can I freeze this cheesecake?
Yes, you can freeze it, but it’s best to do so without the Mini Egg topping. Wrap it tightly in cling film and foil, then freeze for up to one month. Thaw in the fridge for 24 hours before serving, then add fresh Mini Eggs on top.
Why didn’t my cheesecake set properly?
This usually happens if the cream wasn’t whipped enough or if low-fat cream cheese was used. Make sure to use full-fat cream cheese and whip the double cream to soft peaks before folding it in. Also, ensure the cheesecake chills for at least three hours, preferably overnight.
Can I use a different type of chocolate instead of Mini Eggs?
Absolutely! You can substitute Mini Eggs with crushed chocolate bars, chocolate chips, or any other small chocolate candies you like. Maltesers, caramel-filled chocolates, or white chocolate chunks would work well.
Conclusion & Call to Action
This no-bake Mini Egg Cheesecake is the perfect Easter dessert—simple, delicious, and absolutely stunning. The combination of a buttery biscuit base, a rich and creamy cheesecake filling, and the festive crunch of Cadbury Mini Eggs makes this a crowd-pleasing treat for all ages. It’s easy to prepare, requires no baking, and can be made ahead of time, making it the ideal dessert for holiday gatherings.
Whether you’re making this for an Easter feast, a spring celebration, or just as a fun weekend treat, this cheesecake is guaranteed to impress. The best part is that it’s completely customizable! You can switch up the toppings, experiment with different chocolates, or even add a flavored swirl to the filling for an extra twist.
Now it’s your turn to give this Mini Egg Cheesecake a try! I’d love to hear how it turns out for you. If you make it, let me know in the comments below or share a photo on social media and tag me. Seeing your beautiful cheesecakes makes my day!
If you loved this recipe, don’t forget to save it for later, share it with your friends, or pin it to your favorite dessert board. And if you’re looking for more no-bake desserts, be sure to check out my other easy recipes. Happy baking, and enjoy your cheesecake!
Print
Mini Egg Cheesecake
- Total Time: 3 hours 20 minutes
- Yield: 12 servings
- Diet: Vegetarian
Description
This no-bake Mini Egg Cheesecake features a buttery biscuit base, a rich and creamy cheesecake filling, and a crunchy topping of Cadbury Mini Eggs. It’s the perfect Easter dessert, easy to make ahead, and requires no baking!
Ingredients
- For the biscuit base: 280g Digestive biscuits, 140g Unsalted butter (melted)
- For the cheesecake filling: 600g Full-fat cream cheese, 140g Icing sugar (sifted), 600ml Double cream (whipped), 360g Cadbury Mini Eggs (chopped), Juice of ½ lemon
- For decoration: 270g Cadbury Mini Eggs, Extra whipped cream (optional)
Instructions
- Prepare the base: Crush biscuits, mix with melted butter, and press into a 7-inch tin. Chill.
- Make the filling: Beat cream cheese, icing sugar, and lemon juice. Whip cream separately and fold in. Stir in chopped Mini Eggs.
- Assemble & chill: Spread filling over the base, smooth the top, and refrigerate for at least 3 hours (preferably overnight).
- Decorate & serve: Remove from the tin, top with Mini Eggs and whipped cream, slice, and enjoy!
Notes
- For a firmer base, chill for an extra hour before adding the filling.
- Use full-fat cream cheese to ensure a thick and creamy texture.
- Chill overnight for the best results.
- Prep Time: 20 minutes
- Cook Time: 3+ hours
- Category: Dessert
- Method: No-Bake
- Cuisine: British, Easter