
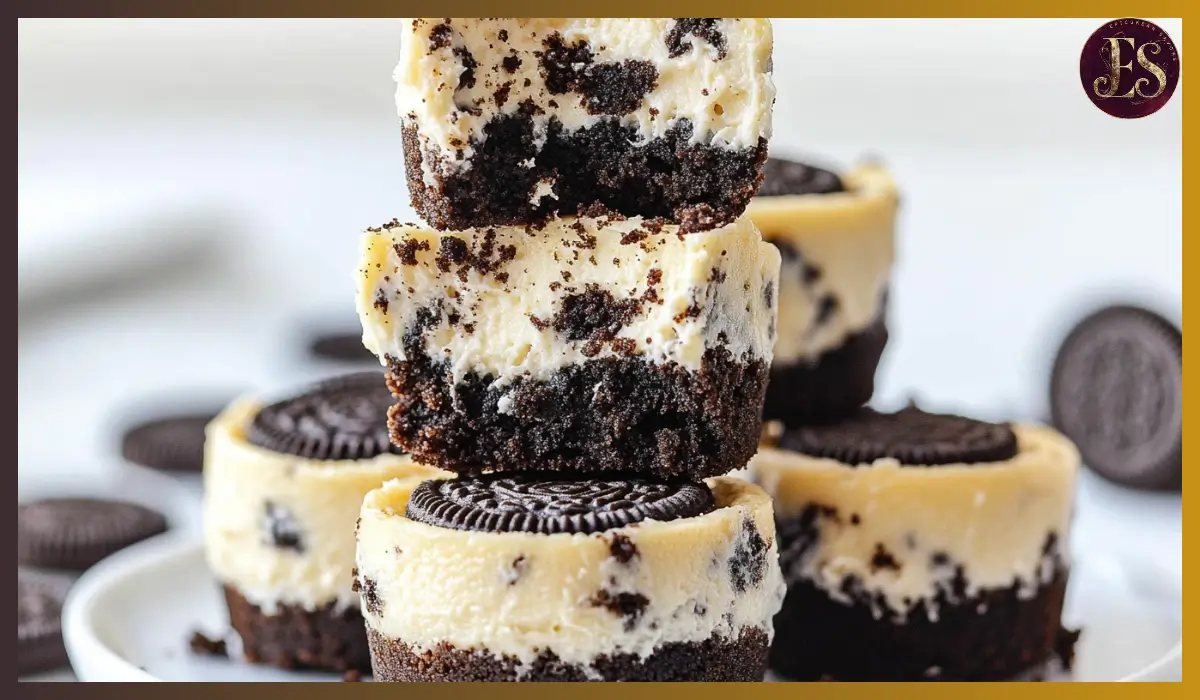
There’s something about cheesecake that feels instantly indulgent—creamy, smooth, rich, and downright comforting. And when you take all that goodness and miniaturize it into a handheld treat, you’ve got something truly special on your hands. These Mini Oreo Cheesecakes are just that: a sweet, velvety dream swirled with chunks of Oreo, sitting pretty on a crisp Oreo cookie base.
Whether you’re planning a birthday party, a family gathering, or just need something quick and satisfying to curb your dessert cravings, this recipe is about to become your go-to. It’s made with just five ingredients, comes together in a single bowl, and bakes up in under 20 minutes.
I first made these on a whim before a casual game night with friends. I needed something easy, with ingredients I already had in the pantry—and let me tell you, these were the first to disappear. Since then, they’ve been a regular in my dessert rotation. Even my little niece calls them “cookie cupcakes,” and she insists we make them together every time she visits. They’ve become a family favorite not just for their flavor, but for how incredibly simple and fun they are to make.
So, if you’re looking for a no-fuss dessert that looks cute, tastes amazing, and always gets rave reviews, you’re going to fall in love with these Mini Oreo Cheesecakes.
Why You’ll Love This Recipe
There are so many reasons these Mini Oreo Cheesecakes deserve a spot in your dessert lineup. Let’s break down why they’re total crowd-pleasers.
Quick and simple – The entire process, from mixing to baking, takes less than 30 minutes. No springform pans, no water baths, and definitely no complicated techniques.
Minimal ingredients – You only need five ingredients, most of which you probably already have in your kitchen. It’s the kind of recipe you can whip up on a whim.
Perfectly portioned – Because they’re baked in a muffin tin, each cheesecake is a single-serving bite. That means easy serving, zero slicing, and way less mess.
Creamy and crunchy combo – The smooth, tangy cheesecake filling pairs beautifully with the crunchy Oreo crust, making every bite a perfect balance of textures and flavors.
Great for any occasion – From birthday parties and school events to holidays and potlucks, these mini cheesecakes are always a hit. They travel well, store easily, and you can even make them ahead of time.
Customizable – Want to mix things up? Swap the regular Oreos for Golden Oreos, Mint Oreos, or even seasonal varieties like Pumpkin Spice or Peppermint Bark for a fun twist.
Health Benefits
While these Mini Oreo Cheesecakes are definitely a treat, there are still a few redeeming qualities worth noting if you’re thinking about balance.
Portion control – Because these are pre-portioned, it’s easier to enjoy one or two without overindulging. That’s a big win for anyone practicing mindful eating.
No artificial fillers – You’re making these from scratch, which means you skip the preservatives and additives often found in store-bought desserts.
Protein from cream cheese and eggs – Each bite-sized cheesecake contains a small amount of protein, thanks to the eggs and full-fat cream cheese, helping you feel a bit more satisfied.
Lower sugar per serving – Compared to a full slice of cheesecake, these mini versions have significantly less sugar per serving, especially if you opt for reduced-sugar Oreos or use a sugar substitute.
Preparation Time, Servings, and Nutritional Information
Total Time:
- Prep: 10 minutes
- Bake: 14–16 minutes
- Chill: 2 hours minimum
Servings: Makes 16 mini cheesecakes
Calories per serving: 180
Protein: 3g
Carbohydrates: 14g
Fat: 13g
Ingredients List
Here’s everything you need to make these delightful mini cheesecakes:
- 16 ounces cream cheese, softened (full-fat recommended for best texture)
- ½ cup granulated sugar – balances the tang of the cream cheese and sweetens the filling
- 2 large eggs – helps set the filling and gives it that creamy yet firm texture
- 1 teaspoon vanilla extract – adds warm, sweet depth to the flavor
- 24 Oreo cookies – you’ll need 16 whole Oreos for the crust and about 8 chopped for the filling and topping
Ingredient Notes
- Cream Cheese: Make sure it’s softened to room temperature for smooth blending. Cold cream cheese can leave lumps in your filling.
- Oreos: Regular or double-stuffed both work. You can even try flavored ones for a twist.
- Sugar: You can reduce the sugar slightly if you prefer a less sweet dessert.
Step-By-Step Cooking Instructions
Let’s walk through the process together. This Mini Oreo Cheesecakes recipe is beginner-friendly, and each step brings you closer to creamy, crunchy perfection.
Prep the Pan and Oven
- Preheat your oven to 350°F (175°C).
- Line a standard 12-cup muffin tin (plus 4 more if you have a second tin or bake in batches) with paper cupcake liners.
- Place one whole Oreo cookie flat at the bottom of each liner. This will be your cheesecake’s crust.
Make the Cheesecake Filling
- In a large mixing bowl, use an electric mixer to beat softened cream cheese until smooth and fluffy, about 2–3 minutes.
- Add sugar, eggs, and vanilla extract. Beat on medium speed until everything is well combined and the batter looks smooth and creamy.
- Fold in about ⅔ of the chopped Oreo pieces gently using a spatula. Save the rest for sprinkling on top.
Fill and Assemble
- Using a spoon or cookie scoop, divide the filling evenly among the 16 liners. You’ll use roughly 2 tablespoons of filling per cup.
- Smooth the tops gently and sprinkle each one with the remaining chopped Oreo crumbs for a little extra cookie crunch.
Bake
- Bake in the preheated oven for 14 to 16 minutes or until the centers are just set.
- The tops should look slightly puffed but not cracked. Give the pan a gentle shake—if the centers jiggle just a bit but the edges are set, they’re ready.
Cool and Chill
- Let the cheesecakes cool in the pan for 30 minutes at room temperature.
- Transfer them to the refrigerator and chill for at least 2 hours, or until fully set.
Optional Garnish: Right before serving, top with a dollop of whipped cream and a sprinkle of extra crushed Oreos if desired.

How to Serve
These mini cheesecakes are adorable on their own, but you can dress them up for any event with a few easy touches:
- Serve on a decorative platter with mini forks for parties and potlucks
- Top with whipped cream and a halved mini Oreo for extra flair
- Drizzle with chocolate or caramel sauce for added richness
- Add a fresh strawberry or raspberry on top for a pop of color and brightness
Pairing Suggestions
Here are some fun and flavorful pairings to elevate your dessert spread:
- With coffee or tea: These cheesecakes pair beautifully with a hot cup of coffee or chai latte.
- With fresh fruit: Serve alongside a bowl of fresh berries or a fruit salad for contrast.
- With milk: Classic and kid-approved—nothing beats cookies and milk!
- As part of a dessert board: Combine with brownie bites, chocolate-covered pretzels, and fruit skewers for an impressive sweet table.
Storage, Freezing & Reheating Instructions
Storing in the Fridge
Place the cheesecakes in an airtight container and refrigerate for up to 7 days. Keep them covered to prevent them from absorbing any fridge odors.
Freezing
- Wrap each cooled cheesecake individually in plastic wrap, then in foil.
- Store them in a freezer-safe container or bag for up to 3 months.
- When ready to eat, thaw at room temperature for 2–4 hours or overnight in the fridge.
Reheating
Since these are meant to be enjoyed cold, there’s no need to reheat. However, if you like a slightly softer texture, you can leave them at room temp for 10–15 minutes before serving.
Common Mistakes to Avoid
Even though this recipe is super simple, here are a few pitfalls to watch for:
- Using cold cream cheese: This results in a lumpy batter. Let it soften at room temperature first.
- Overbaking: The centers should still jiggle slightly. Overbaking can lead to cracks and a dry texture.
- Skipping the chill time: The cheesecakes need at least 2 hours in the fridge to firm up. Don’t rush it.
- Not lining the muffin tin: Paper liners make removal a breeze. Without them, the cheesecakes may stick.
- Filling the cups too full: Stick to 2 tablespoons of batter per cup to avoid overflow.
Pro Tips
To get perfect results every time, keep these helpful tips in mind:
- Room temperature ingredients are key for a smooth, lump-free batter.
- Use a cookie scoop or ice cream scoop for evenly sized portions.
- Let the cheesecakes cool completely before chilling to avoid condensation and sogginess.
- Experiment with Oreo flavors like peanut butter, mint, or even red velvet for a fun twist.
- Double the batch and freeze extras so you always have a sweet treat on hand.
Frequently Asked Questions (FAQs)
Can I use low-fat cream cheese?
Yes, but the texture will be slightly less rich and creamy. For the best results, stick with full-fat cream cheese.
Can I make these without a mixer?
You can mix by hand using a sturdy whisk, but an electric mixer makes the process much easier and ensures a smoother filling.
How do I know when they’re done baking?
The centers should look set but still jiggle slightly when you gently shake the pan. They will firm up as they cool.
Can I use mini muffin tins?
Absolutely. Just use mini Oreos as the base and reduce the baking time to 8–10 minutes.
What if I don’t have cupcake liners?
You can grease the muffin tin well, but liners make it much easier to remove the cheesecakes cleanly.
Can I use flavored Oreos?
Yes! This is a great way to add variety. Try using Golden Oreos, Mint, or even seasonal flavors.
How far in advance can I make these?
They’re perfect to make 1–2 days ahead. Just keep them refrigerated until ready to serve.
Are these safe for kids?
Definitely. These are kid-approved and make great party treats for little ones.
Can I add toppings before chilling?
Wait until just before serving to add whipped cream or soft toppings to avoid them getting soggy.
Can I reduce the sugar?
You can try using ⅓ cup of sugar instead of ½ cup for a less sweet version. They’ll still be delicious.
Conclusion & Call to Action
These Mini Oreo Cheesecakes are everything you want in a dessert—simple to make, wildly delicious, and guaranteed to impress. Whether you’re baking with your kids, prepping for a party, or just need a quick dessert fix, this recipe delivers every time.
So grab your muffin tin, stock up on Oreos, and give these creamy, dreamy bites a try. I’d love to hear how they turn out for you—feel free to drop a comment, share your photos, or tag me if you post them online. Happy baking!
Print
Mini Oreo Cheesecakes
- Total Time: 26 minutes + chill
- Yield: 16 mini cheesecakes 1x
- Diet: Vegetarian
Description
Creamy, cookies-and-cream flavored mini cheesecakes made with just 5 ingredients. Baked in a muffin tin, they’re easy, crowd-pleasing, and perfect for any occasion.
Ingredients
-
16 oz cream cheese, softened
-
½ cup sugar
-
2 large eggs
-
1 tsp vanilla extract
-
24 Oreo cookies (16 whole, 8 chopped)
Instructions
-
Preheat oven to 350°F and line a muffin tin with 16 liners. Place one whole Oreo at the bottom of each liner.
-
Beat cream cheese until smooth. Add sugar, eggs, and vanilla. Mix until creamy.
-
Fold in chopped Oreos.
-
Spoon batter over Oreos in liners.
-
Bake for 14–16 minutes or until centers are set.
-
Cool for 30 minutes, then chill in fridge for at least 2 hours.
Notes
- Soften cream cheese for a smoother texture.
- Use different Oreo flavors for variety.
- Store in the fridge for up to 7 days or freeze for up to 3 months.
- Prep Time: 10 minutes
- Cook Time: 16 minutes
- Category: Dessert
- Method: Baking
- Cuisine: American