
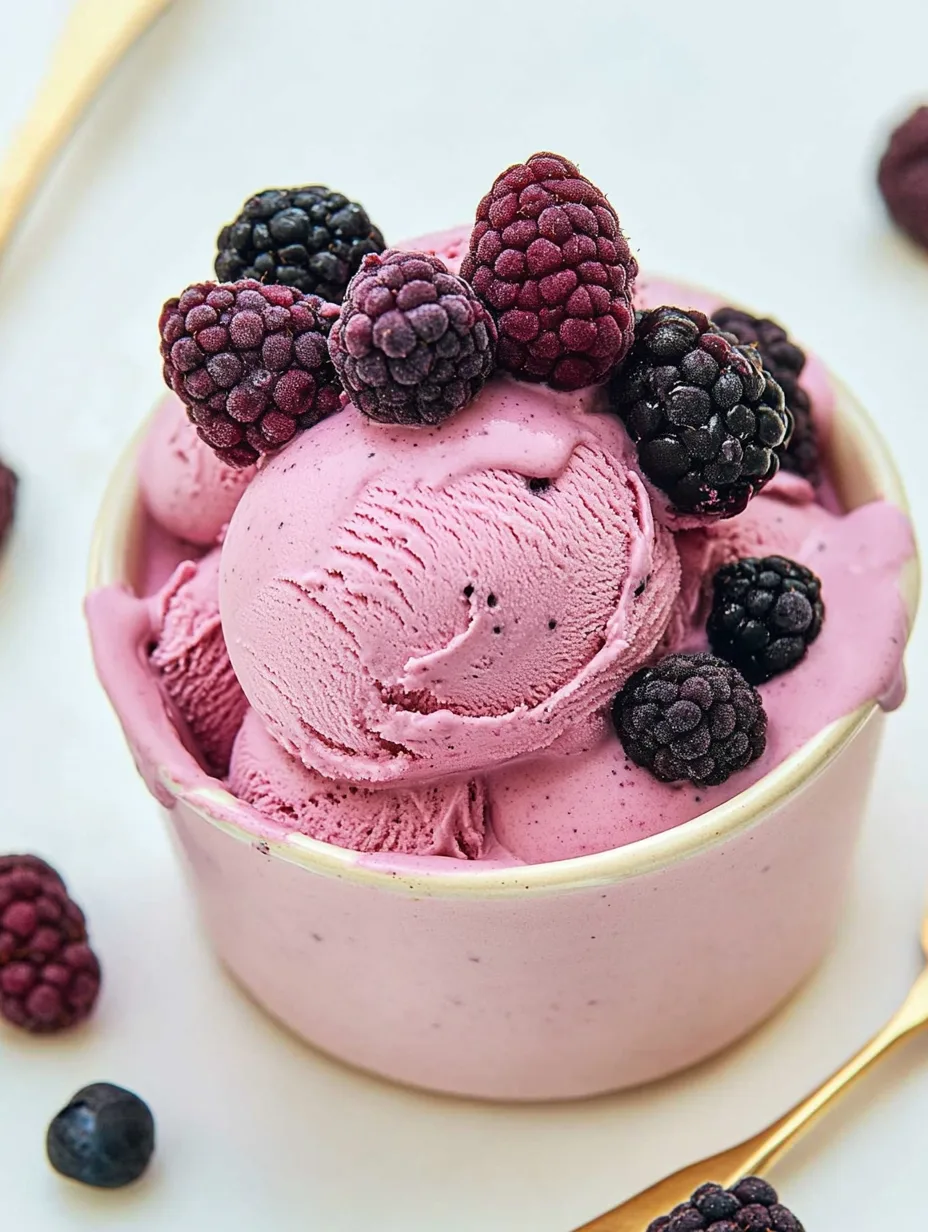
Ninja Creami Blackberry Ice Cream is a delightful treat that captures the essence of summer in every scoop. The smooth, creamy texture combined with the sweet and tangy flavor of blackberries creates an unforgettable dessert experience. If you have ever wished to create something truly special at home, this recipe is a game changer. There’s something undeniably amazing about enjoying homemade ice cream, especially when it’s made with fresh fruit.
In this article, we will explore why this Ninja Creami Blackberry Ice Cream recipe stands out among others. From the ingredient list to the step-by-step instructions, you’ll be set for a fun and flavorful adventure. Whether you’re hosting a summer barbecue, celebrating a special occasion, or simply indulging yourself, this treat is guaranteed to impress everyone around you. Join me as we delve into the world of blackberry delights and discover how easy it is to make this exceptional dessert at home.
Why You’ll Love This Recipe
There are countless reasons to adore the Ninja Creami Blackberry Ice Cream, and here are just a few that will leave you excited to try it:
1. Fresh Ingredients: This recipe uses simple, fresh ingredients that are often found in your kitchen or local market. The health benefits of blackberries add a nutritious twist to your dessert.
2. Easily Customizable: Feel free to modify the recipe! You can substitute blackberries with other fruits for different flavors, such as strawberries or raspberries.
3. Kid-Friendly: Kids love ice cream, and this is a fun recipe to engage them. They can help with mixing and even enjoy creating their flavors.
4. No Ice Cream Maker Required: The Ninja Creami does all the hard work for you, making it the ideal gadget for ice cream lovers who seek convenience without sacrificing quality.
5. Intense Flavor: The sweetness of blackberries shines through, making each spoonful bursting with flavor and freshness.
6. Guilt-Free Indulgence: With lower added sugars and all-natural ingredients, every bite of this ice cream is both satisfying and wholesome.
With these enticing elements in mind, it’s easy to see why many enjoy making and sharing this delightful treat.
Preparation and Cooking Time
Creating your own Ninja Creami Blackberry Ice Cream is quite straightforward. Here’s a detailed look at the preparation and total cooking time you can expect:
– Preparation Time: 15 minutes
– Freezing Time: 24 hours (for best results)
– Churning Time: 5-10 minutes with the Ninja Creami
Although the waiting time for freezing might seem long, the effort will be worth it when you taste the final product!
Ingredients
– 2 cups fresh blackberries
– 1 cup full-fat coconut milk (or heavy cream)
– 1/2 cup sweetened condensed milk
– 2 tablespoons honey or sugar (adjust to taste)
– 1 teaspoon vanilla extract
– Pinch of salt
– Optional: Additional blackberries for garnish
Step-by-Step Instructions
Creating your Ninja Creami Blackberry Ice Cream can be broken down into simple steps for an effortless experience:
1. Prepare Blackberries: Wash and dry the blackberries thoroughly. Set aside a few for later garnish if desired.
2. Mix Ingredients: In a blender or food processor, add the blackberries, coconut milk, sweetened condensed milk, honey or sugar, vanilla extract, and a pinch of salt. Blend until smooth.
3. Taste and Adjust: Take a moment to taste the mixture and adjust sweetness if necessary by adding more honey or sugar.
4. Pour Mixture: Pour the blended mixture into a shallow container. Cover and freeze for at least 24 hours to ensure it is completely solid.
5. Churn: Once the mixture is thoroughly frozen, remove it from the container and break it into chunks. Place the chunks into the Ninja Creami.
6. Select Your Setting: Start by using the “Ice Cream” setting on the Ninja Creami. Once processed, check the texture; if it’s too crumbly, re-blend briefly until you achieve your desired creaminess.
7. Serve Immediately: After churning, you can serve immediately or transfer to an airtight container and re-freeze for a firmer texture.
8. Garnish: If desired, scoop the ice cream into bowls and garnish with fresh blackberries or a drizzle of honey.
9. Enjoy: Enjoy your delightful homemade Ninja Creami Blackberry Ice Cream!
How to Serve
When serving the Ninja Creami Blackberry Ice Cream, consider the following tips to elevate the experience:
1. Presentation: Use elegant bowls or cones for serving. The vibrant color of the blackberries will make a stunning visual impact.
2. Toppings: Enhance your creation with various toppings such as crushed nuts, granola, or a light sprinkle of sea salt.
3. Pairing: Serve alongside a slice of chocolate cake or fresh fruit for a delightful dessert spread.
4. Scoop Size: Keep the scoop sizes modest. Smaller servings encourage guests to return for seconds without feeling overwhelmed.
5. Garnish: Use a few whole blackberries or mint leaves as a garnish to bring an additional pop of color and freshness to your presentation.
By focusing on these presentation elements, you can create a memorable dining experience that will leave everyone impressed.
In conclusion, the Ninja Creami Blackberry Ice Cream is not just an extraordinary recipe; it is an enjoyable culinary experience. With its straightforward ingredients and simple preparation steps, anyone can indulge in this amazing dessert. Whether it’s a family gathering or simply a treat for yourself, the delightful flavor of blackberry ice cream is perfect for any occasion. Enjoy every creamy bite!
Additional Tips
– Experiment with Sweetness: Depending on your palate, the sweetness level can be adjusted by varying the amount of honey or sugar. This personalization adds a unique touch to your Ninja Creami Blackberry Ice Cream.
– Enhance with Flavor: Consider adding a splash of lemon juice or zest for that extra zing. It complements the blackberries wonderfully and brightens the overall flavor.
– Mix-Ins: Incorporate your favorite mix-ins such as chocolate chips, crushed cookies, or nuts to amplify the textural contrast in each serving. It adds an exciting element to the creamy goodness.
– Chill the Container: Before pouring your ice cream mixture, chill your serving bowls or cones in the freezer. This helps keep the ice cream colder longer.
Recipe Variation
Try these fun variations to keep things interesting with your Ninja Creami Blackberry Ice Cream:
1. Mixed Berry Delight: Combine blackberries with blueberries and raspberries for a berry medley that is bursting with flavor.
2. Creamy Almond Version: Substitute coconut milk with almond milk and blend in some almond extract. This gives a nutty flavor profile that complements the blackberries.
3. Chocolate Swirl: Add a rich chocolate swirl by melting dark chocolate and folding it in after churning. This creates a delightful chocolate-blackberry combination.
Freezing and Storage
– Storage: Your Ninja Creami Blackberry Ice Cream can be stored in an airtight container in the freezer for up to a week. Make sure it is well-covered to prevent freezer burn.
– Refreezing: If you’ve churned and served some but want to save the remainder, also ensure it is sealed tightly and stored at the back of the freezer for optimal texture.
Special Equipment
To make your Ninja Creami Blackberry Ice Cream, you will need:
– Ninja Creami: This is essential for creating the creamy texture of your ice cream without the need for an ice cream maker.
– Blender or Food Processor: For blending the ingredients together smoothly before freezing.
– Shallow Container: To hold the mixture during the freezing process.
– Airtight Container: For storing the finished ice cream in the freezer.
Frequently Asked Questions
Can I use frozen blackberries instead of fresh?
Yes, frozen blackberries can be used, but remember to thaw them slightly before blending for optimal results.
What if my ice cream is too hard after freezing?
If your ice cream is hard, let it sit at room temperature for a few minutes before scooping. This will make it easier to serve.
Is there a dairy-free option?
Absolutely! Using full-fat coconut milk and sweetened condensed coconut milk keeps the recipe entirely dairy-free.
Can I make this without the Ninja Creami?
While the Ninja Creami simplifies the process, you can still make this using traditional ice cream methods. Just churn it in a bowl every 30 minutes until the desired consistency is achieved.
Conclusion
The Ninja Creami Blackberry Ice Cream is a delightful and versatile dessert that brightens up any occasion. Its easy preparation and fresh ingredients make it a must-try for anyone craving a sweet, flavorful treat. With room for creativity, whether through variations or toppings, this ice cream continually brings joy and satisfaction. Each scoop embodies the essence of summer while inviting everyone to indulge and enjoy every bite!
Ninja Creami Blackberry Ice Cream: An Incredible Ultimate Recipe
- Total Time: 15 minutes
Ingredients
– 2 cups fresh blackberries
– 1 cup full-fat coconut milk (or heavy cream)
– 1/2 cup sweetened condensed milk
– 2 tablespoons honey or sugar (adjust to taste)
– 1 teaspoon vanilla extract
– Pinch of salt
– Optional: Additional blackberries for garnish
Instructions
Creating your Ninja Creami Blackberry Ice Cream can be broken down into simple steps for an effortless experience:
1. Prepare Blackberries: Wash and dry the blackberries thoroughly. Set aside a few for later garnish if desired.
2. Mix Ingredients: In a blender or food processor, add the blackberries, coconut milk, sweetened condensed milk, honey or sugar, vanilla extract, and a pinch of salt. Blend until smooth.
3. Taste and Adjust: Take a moment to taste the mixture and adjust sweetness if necessary by adding more honey or sugar.
4. Pour Mixture: Pour the blended mixture into a shallow container. Cover and freeze for at least 24 hours to ensure it is completely solid.
5. Churn: Once the mixture is thoroughly frozen, remove it from the container and break it into chunks. Place the chunks into the Ninja Creami.
6. Select Your Setting: Start by using the “Ice Cream” setting on the Ninja Creami. Once processed, check the texture; if it’s too crumbly, re-blend briefly until you achieve your desired creaminess.
7. Serve Immediately: After churning, you can serve immediately or transfer to an airtight container and re-freeze for a firmer texture.
8. Garnish: If desired, scoop the ice cream into bowls and garnish with fresh blackberries or a drizzle of honey.
9. Enjoy: Enjoy your delightful homemade Ninja Creami Blackberry Ice Cream!
- Prep Time: 15 minutes
- Cook Time: 0 minutes
Nutrition
- Serving Size: 6-8 servings
- Calories: 230 kcal
- Fat: 12g
- Protein: 3g