
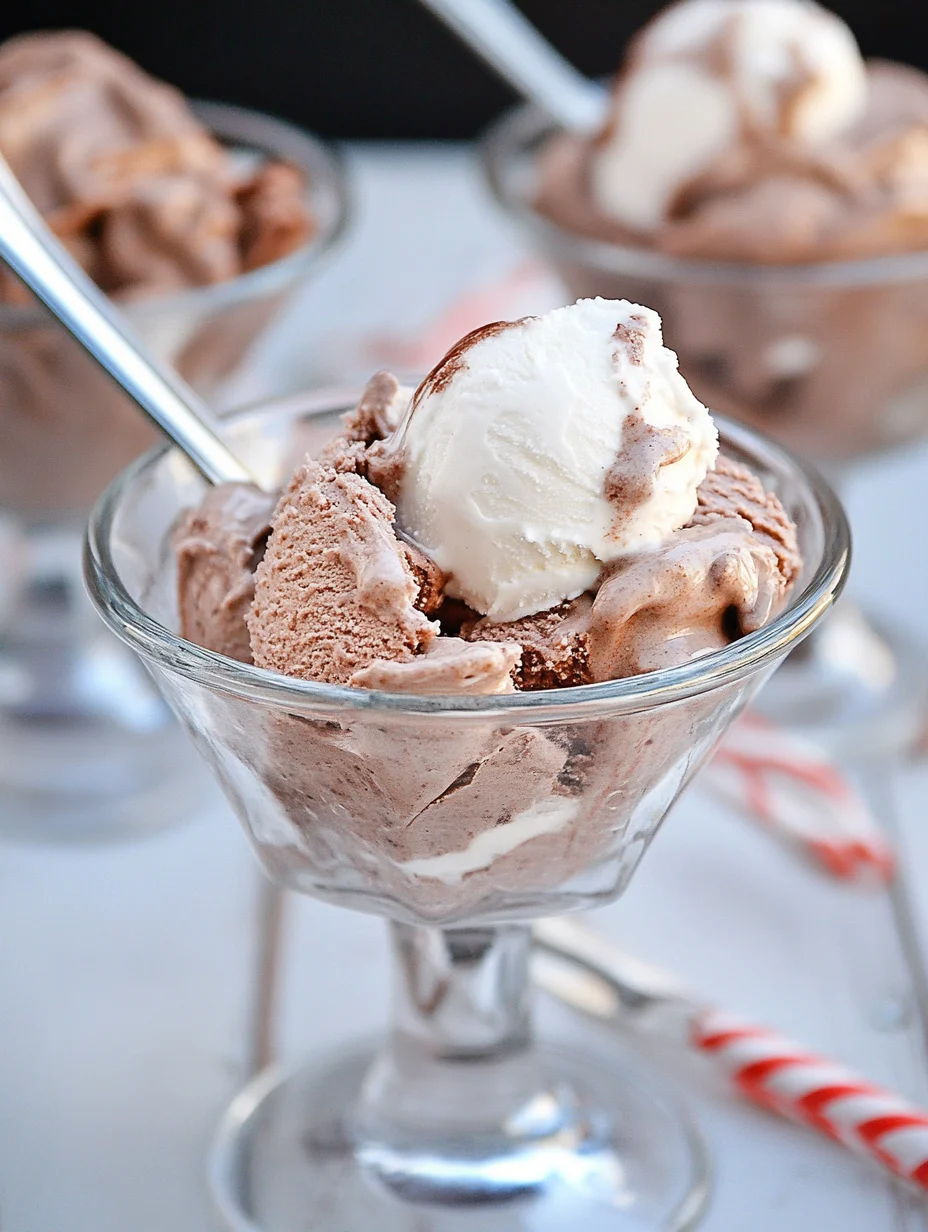
No Churn Hot Chocolate Ice Cream is an incredible treat perfect for cocoa enthusiasts and ice cream lovers alike. This rich, creamy dessert is not only easy to make, but it also captures the essence of warm, comforting hot chocolate in every delightful bite. Imagine a scoop of this frozen delight on a hot summer day or as the perfect nightcap after a chilly winter evening. With its luscious texture and intense flavor, this ice cream promises to impress everyone at the table.
If you love both hot chocolate and ice cream, you’re in for a real treat. This recipe eliminates the need for an ice cream maker, allowing anyone, regardless of their kitchen skills, to whip up this delightful dessert. The blend of chocolate flavors combined with a velvety texture makes this an unforgettable dessert experience. You’ll learn how straightforward it is to make No Churn Hot Chocolate Ice Cream, ensuring that even the most novice cooks can succeed.
With its rich ingredients like cocoa powder, sweetened condensed milk, and heavy cream, your taste buds are bound to rejoice. That’s not all—this delightful ice cream can easily be customized with mix-ins such as chocolate chips or marshmallows. Now, let’s explore what makes No Churn Hot Chocolate Ice Cream a must-try recipe for everyone!
Why You’ll Love This Recipe
There are countless reasons why No Churn Hot Chocolate Ice Cream will become a beloved recipe in your household. Here are several compelling points that make this dessert stand out:
1. No Special Equipment Required – You won’t need an ice cream maker, simplifying the process immensely.
2. Quick and Simple – This recipe takes minimal time to prepare, making it ideal for spontaneous dessert cravings.
3. Rich Flavor – The combination of cocoa and sweetened condensed milk results in a deep, satisfying chocolate flavor.
4. Customizable – Feel free to add your favorite toppings or mix-ins to personalize your ice cream.
5. Perfect for Any Season – Whether it’s summer or winter, there’s never a bad time for ice cream.
6. Makes a Great Gift – Present this homemade ice cream in a decorative container, and you have a thoughtful gift for friends or family.
With all these reasons and more, it becomes clear why this recipe is a favorite among chocolate lovers. You’ll not only be able to enjoy a creamy scoop, but you can share the joy by making it for others.
Preparation and Cooking Time
Creating your batch of No Churn Hot Chocolate Ice Cream takes about 6 hours total, which includes freezing time. Here’s a detailed breakdown:
– Preparation Time: 15 minutes
– Freezing Time: 6 hours
These times can vary slightly based on your kitchen equipment and how quickly you work, but this estimate provides a solid guideline.
Ingredients
– 2 cups heavy cream
– 1 cup sweetened condensed milk
– ½ cup unsweetened cocoa powder
– 1 teaspoon vanilla extract
– 1 cup mini marshmallows (optional)
– ½ cup chocolate chips (optional)
Step-by-Step Instructions
Making No Churn Hot Chocolate Ice Cream is an enjoyable experience, especially if you follow these straightforward steps:
1. Whip Cream: In a large bowl, use an electric mixer to whip the heavy cream until stiff peaks form.
2. Mix Cocoa: In another bowl, combine the sweetened condensed milk, unsweetened cocoa powder, and vanilla extract.
3. Combine Mixtures: Gently fold the whipped cream into the cocoa mixture until fully incorporated. Be careful not to deflate the whipped cream.
4. Add Extras: If desired, fold in mini marshmallows and chocolate chips to enhance the flavor and texture.
5. Transfer to Container: Pour the mixture into a loaf pan or other suitable airtight container.
6. Cover and Freeze: Cover the container with a lid or plastic wrap and freeze for at least 6 hours, or until solid.
7. Scoop and Serve: Once frozen, remove from the freezer and let it sit for a few minutes to soften before scooping.
These simple steps will guide you in creating this incredible ice cream with ease.
How to Serve
When it comes to serving No Churn Hot Chocolate Ice Cream, consider the following tips to create an unforgettable experience:
1. Presentation: Use a decorative ice cream scoop or scoop into bowls filled with chocolate sauce for added flair.
2. Toppings: Top with whipped cream, extra mini marshmallows, or chocolate shavings for additional texture and flavor.
3. Pair with Desserts: Serve alongside brownies or chocolate cake for a decadent dessert experience.
4. Serving Size: Present generous scoops to allow guests to savor the delightful taste of chocolate ice cream.
By thoughtfully considering how to serve this delicious No Churn Hot Chocolate Ice Cream, you’ll elevate the entire dessert experience, making it memorable for everyone who tries it. Enjoy the delightful process of making and sharing this amazing treat!
Additional Tips
– Use Fresh Ingredients: For the most flavorful No Churn Hot Chocolate Ice Cream, use fresh heavy cream and high-quality cocoa powder.
– Experiment with Flavors: Feel free to try different cocoa brands or even specialty chocolate powders for unique taste profiles.
– Allow Proper Freezing: Ensure your ice cream is fully frozen before serving to enhance its creamy texture.
– Serve at the Right Temperature: Let your ice cream sit out for a few minutes to soften for easier scooping.
Recipe Variation
Don’t hesitate to get creative with your No Churn Hot Chocolate Ice Cream! Here are a few delicious variations to try:
1. Mint Chocolate Version: Mix in some peppermint extract for a refreshing twist reminiscent of mint hot chocolate.
2. White Chocolate Swirl: Incorporate melted white chocolate for a delightful contrast against the cocoa.
3. S’mores Flavors: Add crushed graham crackers and chocolate-covered marshmallows for a fun s’mores-inspired ice cream.
Freezing and Storage
– Storage: Keep your No Churn Hot Chocolate Ice Cream in an airtight container to maintain freshness. It can last for up to 2 weeks in the freezer.
– Freezing: For best results, allow the ice cream to freeze completely (about 6 hours) before serving. Make sure to tightly seal any leftover portions to prevent freezer burn.
Special Equipment
You don’t need much to create No Churn Hot Chocolate Ice Cream, but having these tools handy can make the process easier:
– Mixing Bowl: A large bowl for whipping cream and mixing ingredients.
– Electric Mixer: This will help achieve stiff peaks in your whipped cream.
– Spatula: For folding ingredients delicately and ensuring everything is well combined.
– Airtight Container: A loaf pan or other freezer-safe container for storing your ice cream.
Frequently Asked Questions
Can I substitute ingredients?
Yes! You can replace heavy cream with coconut cream for a dairy-free version, though the texture may differ slightly.
How long can I store this ice cream?
No Churn Hot Chocolate Ice Cream can be stored in the freezer for up to 2 weeks if sealed properly.
Can I use a different kind of milk?
While heavy cream yields the creamiest results, you can try using whole milk for a lighter version, but it may compromise texture.
What if my ice cream is hard to scoop?
If your ice cream is too hard, let it sit at room temperature for a few minutes before attempting to scoop.
Is it possible to make this recipe vegan?
You could use coconut cream and vegan sweetened condensed milk as substitutes for a vegan-friendly version.
Conclusion
The No Churn Hot Chocolate Ice Cream is a delightful dessert that captures the essence of everyone’s favorite winter beverage while offering a cool, refreshing treat for any day. Its simple preparation and rich flavor make it accessible for anyone to enjoy at home. With endless possibilities for customization, it is sure to become a staple in your dessert repertoire. Enjoy making and sharing this incredible treat with your friends and family!

No Churn Hot Chocolate Ice Cream: An Amazing Ultimate Recipe
- Total Time: 42 minute
Ingredients
– 2 cups heavy cream
– 1 cup sweetened condensed milk
– ½ cup unsweetened cocoa powder
– 1 teaspoon vanilla extract
– 1 cup mini marshmallows (optional)
– ½ cup chocolate chips (optional)
Instructions
Making No Churn Hot Chocolate Ice Cream is an enjoyable experience, especially if you follow these straightforward steps:
1. Whip Cream: In a large bowl, use an electric mixer to whip the heavy cream until stiff peaks form.
2. Mix Cocoa: In another bowl, combine the sweetened condensed milk, unsweetened cocoa powder, and vanilla extract.
3. Combine Mixtures: Gently fold the whipped cream into the cocoa mixture until fully incorporated. Be careful not to deflate the whipped cream.
4. Add Extras: If desired, fold in mini marshmallows and chocolate chips to enhance the flavor and texture.
5. Transfer to Container: Pour the mixture into a loaf pan or other suitable airtight container.
6. Cover and Freeze: Cover the container with a lid or plastic wrap and freeze for at least 6 hours, or until solid.
7. Scoop and Serve: Once frozen, remove from the freezer and let it sit for a few minutes to soften before scooping.
These simple steps will guide you in creating this incredible ice cream with ease.
- Prep Time: 15 minutes
- Cook Time: N/A
Nutrition
- Serving Size: Present generous scoops to allow guests to savor the delightful taste of chocolate ice cream.
- Calories: 220 kcal
- Fat: 11g
- Protein: 3g