
There is something irresistibly fun about making themed treats, especially when they are as cute and easy as Oreo Chickens. These adorable no-bake treats are the perfect addition to Easter celebrations, farm-themed parties, or any occasion where you want to add a bit of whimsy to your dessert table. With just a few simple ingredients and minimal effort, you can create these charming little chicks that will delight both kids and adults.
The beauty of this recipe is its simplicity. Using store-bought Oreos as the base, a bit of melted candy coating, and some strategically placed sprinkles and candies, you can transform ordinary cookies into festive, eye-catching treats. Whether you’re making these with your kids as a fun holiday activity or preparing them for a themed gathering, these Oreo Chickens are guaranteed to bring smiles.
I still remember the first time I made these Oreo Chickens. I had planned a fun baking afternoon with my niece, and we were looking for something festive but foolproof. As soon as we dipped the first Oreo into the bright yellow candy coating and added the tiny candy beaks, she couldn’t stop giggling. The end result was a batch of adorable little chicks that became the highlight of our Easter table. Since then, this recipe has become a family tradition, and every spring, we make a new batch of Oreo Chickens to celebrate the season.
If you’re looking for a simple, delightful, and highly customizable Easter treat, this recipe is for you. These Oreo Chickens are not only fun to make, but they also taste delicious, with a perfect balance of crunchy cookie and smooth, sweet candy coating. Get ready to create a batch of these little cuties and watch them disappear in no time!
Why You’ll Love This Recipe
There are so many reasons to love these Oreo Chickens, and once you try them, they might just become one of your go-to holiday treats.
First, they are incredibly easy to make. Unlike many decorative desserts that require intricate piping or special molds, these Oreo Chickens come together with just a few basic ingredients. You don’t need any baking experience—just melt, dip, and decorate!
Another great reason to love this recipe is that it’s a perfect activity for kids. If you’ve ever tried baking with little ones, you know that complicated steps can quickly lead to frustration. With this recipe, kids can get creative, adding sprinkles, drawing tiny eyes, and placing candy decorations to bring their chick creations to life.
Another major plus is that these treats are great for parties and gifting. Whether you’re hosting an Easter brunch, a spring baby shower, or a farm-themed birthday party, these Oreo Chickens will fit right in. You can even package them up in small treat bags for party favors or as a fun addition to Easter baskets.
Finally, they taste amazing. With the combination of the crunchy Oreo and the smooth, creamy candy coating, each bite delivers a delicious mix of texture and flavor. The touch of sweetness from the candy decorations complements the chocolate cookie perfectly, making them just as tasty as they are cute.
Health Benefits
While Oreo Chickens are undeniably a fun and festive treat, they also offer some unexpected benefits when compared to other traditional Easter desserts.
One of the biggest advantages is that they are portion-controlled. Unlike large cakes or frosted cupcakes, these treats come in single-cookie portions, making it easier to enjoy a sweet indulgence without overdoing it.
Additionally, because this recipe doesn’t involve heavy creams, butter, or excessive amounts of sugar, it’s lighter than many baked goods. The candy coating provides the main source of sweetness, and since it’s thinly layered, each bite is satisfying without being overly rich.
Another great thing about these treats is that they are egg-free, making them a good choice for those with egg allergies. Many traditional Easter desserts, such as cakes and cookies, require eggs for structure and texture. Since Oreo Chickens are completely no-bake, you can enjoy them without worrying about common allergens.
Lastly, this recipe is an excellent way to encourage creativity in the kitchen. Cooking and baking together fosters a love for homemade treats, allows kids to develop fine motor skills, and promotes mindfulness through the process of decorating. While this might not be a “health” benefit in the traditional sense, the joy and bonding experience that comes with making these treats can have a positive impact on mental well-being.
Preparation Time, Servings, and Nutritional Information
Preparation Time:
- Total Time: 30 minutes
- Active Time: 20 minutes
Servings:
- Makes approximately 12 Oreo Chickens
Nutritional Information (Per Serving):
- Calories: 180
- Fat: 9g
- Carbohydrates: 24g
- Sugar: 18g
- Protein: 1.5g
Ingredients List
To make these adorable Oreo Chickens, you’ll need just a handful of ingredients, most of which you can find at any grocery store.
- 12 Oreo cookies (original or golden, depending on preference)
- 1 cup yellow candy melts (for the chick’s body)
- ¼ cup white candy melts (for white variations)
- ¼ cup orange plain M&Ms (for the beak)
- ¼ cup yellow jimmies sprinkles (for texture)
- 12 red jumbo heart sprinkles (for the chicken’s comb)
- Black food marker (for the eyes)
Optional: You can also use tiny candy eyes instead of drawing them on with a marker.
Step-By-Step Cooking Instructions
Prepare Your Workstation
Before you begin, set up your workspace with parchment paper, a tray for the dipped Oreos, and all your decorations within reach. This will make the process smoother and help prevent messes.
Melt the Candy Coating
In a microwave-safe bowl, melt the yellow candy coating in 30-second intervals, stirring between each round, until smooth. If the candy melts are too thick, add a teaspoon of coconut oil or vegetable shortening to thin them out.
Dip the Oreos
Using a fork or dipping tool, carefully lower each Oreo into the melted candy coating. Coat it completely, then lift it out and gently tap off the excess. Place the coated Oreo on the parchment paper to set.
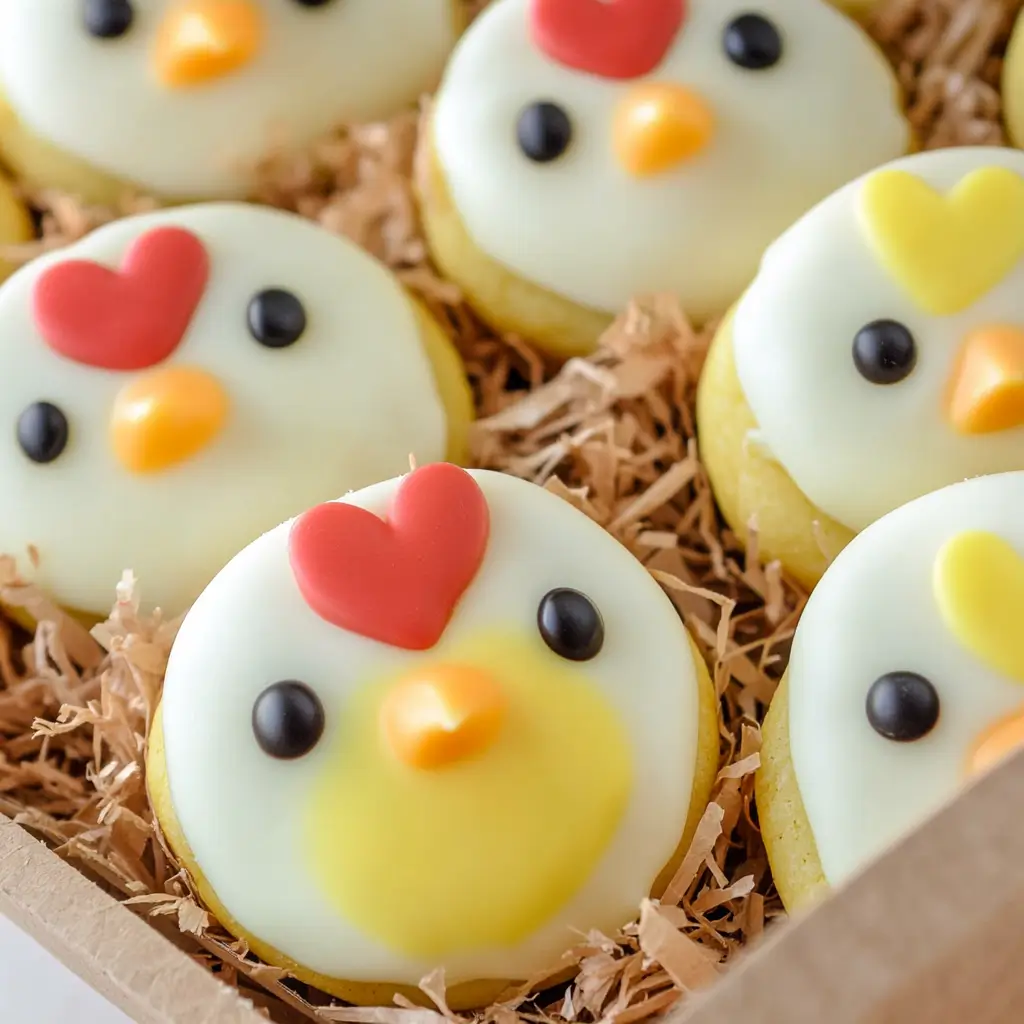
Add Sprinkles for Texture
While the candy coating is still wet, sprinkle yellow jimmies over the top to create a textured, feathery appearance.
Add the Beak
Cut an orange M&M in half and place it in the center of the Oreo, cut side down, to form the beak.
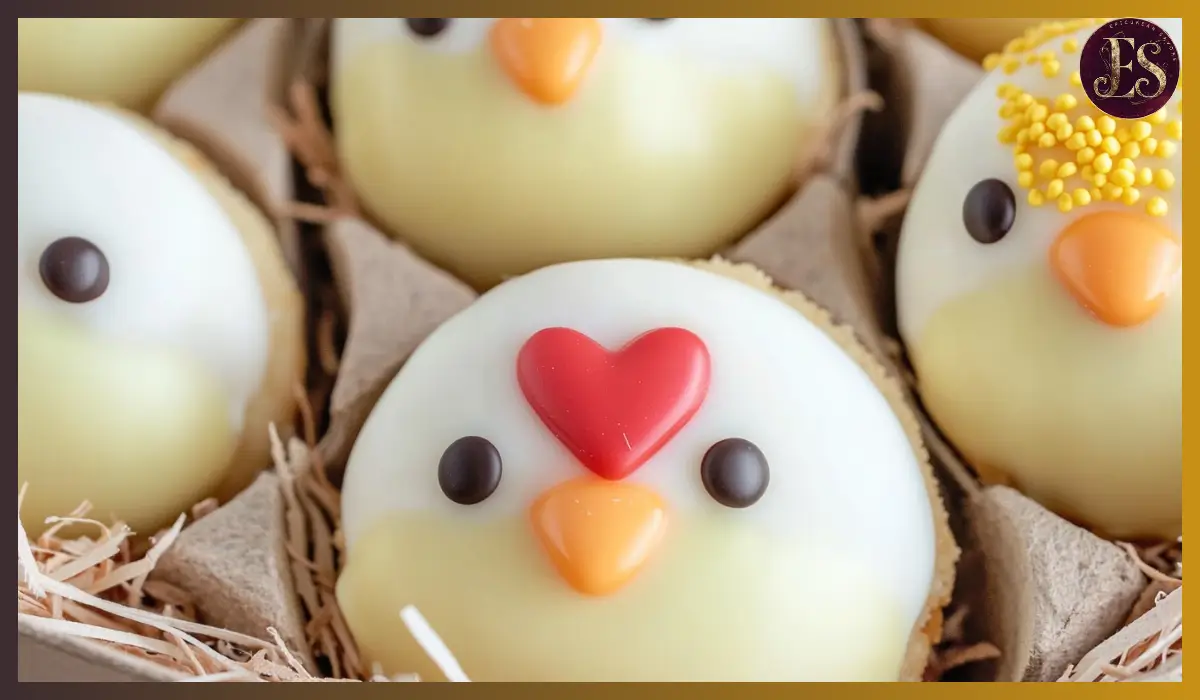
Create the Chicken’s Comb
Take a red jumbo heart sprinkle and position it at the top of the Oreo while the candy coating is still soft. This will serve as the chicken’s comb.
Draw the Eyes
Once the coating has set, use a black food marker to carefully draw two small dots for the eyes. If using candy eyes, apply a tiny dot of melted candy coating as glue and press them in place.
Allow to Set and Serve
Let the decorated Oreos sit for 15-20 minutes until fully set. Once hardened, they are ready to serve!
How to Serve
Once your Oreo Chickens are fully set, it’s time to serve them in the most delightful way possible. These adorable treats are visually appealing, so presenting them in a creative manner can enhance their charm.
One of the simplest ways to serve these is by arranging them on a platter with colorful Easter grass underneath. This mimics the look of a cozy nest, making the Oreo Chickens look even more festive. If you’re hosting an Easter brunch, consider placing a few of these treats in small cupcake liners or decorative paper cups to make them easy to grab.
For a fun twist, use decorative baskets filled with shredded coconut dyed green to resemble grass. Arrange the Oreo Chickens on top and serve them as a centerpiece dessert. This works particularly well if you’re hosting an Easter egg hunt or a spring-themed party.
No matter how you choose to present them, these Oreo Chickens will be the highlight of any spring celebration. They’re cute, they’re fun, and they’re absolutely delicious!
Pairing Suggestions
Oreo Chickens are a sweet and playful treat, and they pair well with a variety of complementary desserts and beverages. If you’re serving these at a party or gathering, consider pairing them with other Easter-themed goodies to create a well-rounded dessert spread.
For a delicious flavor contrast, serve these alongside fresh fruit such as strawberries, blueberries, and pineapple. The natural sweetness and slight tartness of fresh fruit help balance the sugary candy coating of the Oreo Chickens.
If you’re hosting a brunch, these treats pair wonderfully with a warm cup of hot chocolate or vanilla milk. The creamy, rich flavors of these drinks enhance the smooth texture of the candy coating, making for an irresistible combination.
For a lighter option, serve Oreo Chickens with herbal teas such as chamomile or mint. The refreshing flavors of these teas cleanse the palate and prevent the treats from feeling too rich.
No matter what you choose to pair them with, these Oreo Chickens are a delightful treat that will fit into any springtime gathering or Easter celebration.
Storage, Freezing & Reheating Instructions
Since these Oreo Chickens are covered in candy coating, they store well at room temperature and maintain their freshness for several days. However, there are a few tips to ensure they stay as delicious as the day you made them.
Storing at Room Temperature
- Place the Oreo Chickens in an airtight container to prevent them from becoming stale.
- Store them in a cool, dry place away from direct sunlight to prevent the candy coating from melting.
- These treats will stay fresh for up to 5 days when stored properly.
Refrigerating
- If you live in a warm climate or your kitchen is particularly warm, you may want to refrigerate them to prevent the candy coating from becoming too soft.
- Place them in an airtight container and store them in the fridge for up to a week.
- Before serving, let them sit at room temperature for about 10 minutes so the candy coating softens slightly.
Freezing Instructions
- These Oreo Chickens can be frozen, but it’s important to wrap them well to prevent moisture from affecting the candy coating.
- Place the decorated Oreo Chickens on a baking sheet in a single layer and freeze them for about an hour until solid.
- Transfer them to a zip-top freezer bag or airtight container, separating layers with parchment paper to prevent them from sticking together.
- They will stay fresh in the freezer for up to 2 months.
Reheating or Thawing
- When you’re ready to serve them, remove them from the freezer and let them sit at room temperature for 15-20 minutes before eating.
- Do not microwave or heat them, as this will melt the candy coating.
Common Mistakes to Avoid
Even though this recipe is simple, there are a few common mistakes that can affect the final result. Avoiding these pitfalls will ensure that your Oreo Chickens turn out picture-perfect every time.
1. Overheating the Candy Melts
Candy melts can burn if overheated. Always melt them in short 30-second intervals, stirring in between, to ensure a smooth consistency. If the candy coating is too thick, add a teaspoon of vegetable shortening or coconut oil to thin it out.
2. Not Tapping Off Excess Coating
After dipping the Oreos, it’s important to gently tap off excess coating to prevent a thick, uneven layer. Too much coating can make the cookies look messy and cause the decorations to slide off.
3. Adding Decorations Too Late
Candy coating hardens quickly, so be sure to add the sprinkles, beak, and comb while the coating is still wet. If it hardens before you add the decorations, they won’t stick properly.
Pro Tips
For the best results, follow these expert tips to make your Oreo Chickens look and taste amazing.
- Use Golden Oreos for a lighter flavor: If you prefer a vanilla base instead of chocolate, Golden Oreos work just as well.
- Chill the Oreos before dipping: Placing the cookies in the fridge for 10 minutes before dipping helps the candy coating set faster.
- Work in batches: Dip and decorate only a few Oreos at a time to ensure the coating stays wet long enough for decorations to stick.
Frequently Asked Questions (FAQs)
1. Can I use white chocolate instead of candy melts?
Yes! You can melt white chocolate and add yellow food coloring for the same effect. However, candy melts set faster and are easier to work with.
2. How can I make these gluten-free?
Use gluten-free sandwich cookies in place of Oreos. Many brands offer gluten-free options that taste just as good.
3. Can I use mini Oreos for bite-sized versions?
Absolutely! Mini Oreos make adorable bite-sized chickens that are perfect for kids. Just adjust the decorations accordingly.
4. What can I use instead of a black food marker?
You can use melted dark chocolate and a toothpick to dot on the eyes if you don’t have a food marker.
Conclusion & Call to Action
These Oreo Chickens are the ultimate no-bake Easter treat—fun to make, adorable to look at, and absolutely delicious. Whether you’re making them with your kids, preparing a festive dessert for a party, or simply looking for a creative way to celebrate the season, this recipe is a guaranteed success.
I’d love to see how your Oreo Chickens turn out! If you try this recipe, snap a picture and share it on social media. Happy Easter and happy baking!
Print
Oreo Chickens
- Total Time: 30 minutes
- Yield: 12 Oreo Chickens 1x
- Diet: Vegetarian
Description
These cute and easy Oreo Chickens are the perfect no-bake Easter treat! Made with Oreos, candy melts, and sprinkles, they’re fun to make and delicious to eat. Great for kids and festive celebrations!
Ingredients
- 12 Oreo cookies
- 1 cup yellow candy melts
- ¼ cup white candy melts (optional for variety)
- ¼ cup orange plain M&Ms (for the beak)
- ¼ cup yellow jimmies sprinkles
- 12 red jumbo heart sprinkles (for the comb)
- Black food marker (or candy eyes)
Instructions
- Melt the yellow candy melts in a microwave-safe bowl in 30-second intervals, stirring until smooth.
- Dip each Oreo into the melted candy, coating evenly, and place it on parchment paper.
- While wet, sprinkle yellow jimmies on top for texture.
- Cut an orange M&M in half and place one piece in the center for the beak.
- Attach a red heart sprinkle to the top for the comb.
- Once the coating is set, use a black food marker to draw two small eyes or attach candy eyes with melted chocolate.
- Let the treats harden completely before serving.
Notes
- If the candy melts are too thick, add 1 teaspoon of coconut oil to thin them out.
- Store in an airtight container at room temperature for up to 5 days.
- Use white candy melts for a variation or add different colors for fun themes!
- Prep Time: 10 minutes
- Cook Time: 0 minutes
- Category: Dessert, Holiday Treats
- Method: No-Bake
- Cuisine: American