
Polar Bear Cookies are a delightful treat that brings a touch of whimsy to your baking. These adorable cookies are not only visually appealing but also incredibly delicious. The combination of sweet vanilla flavor and soft, chewy texture makes them a favorite among kids and adults alike. Whether you’re baking for a holiday gathering, a birthday party, or just to brighten up a regular day, these cookies are sure to impress everyone.
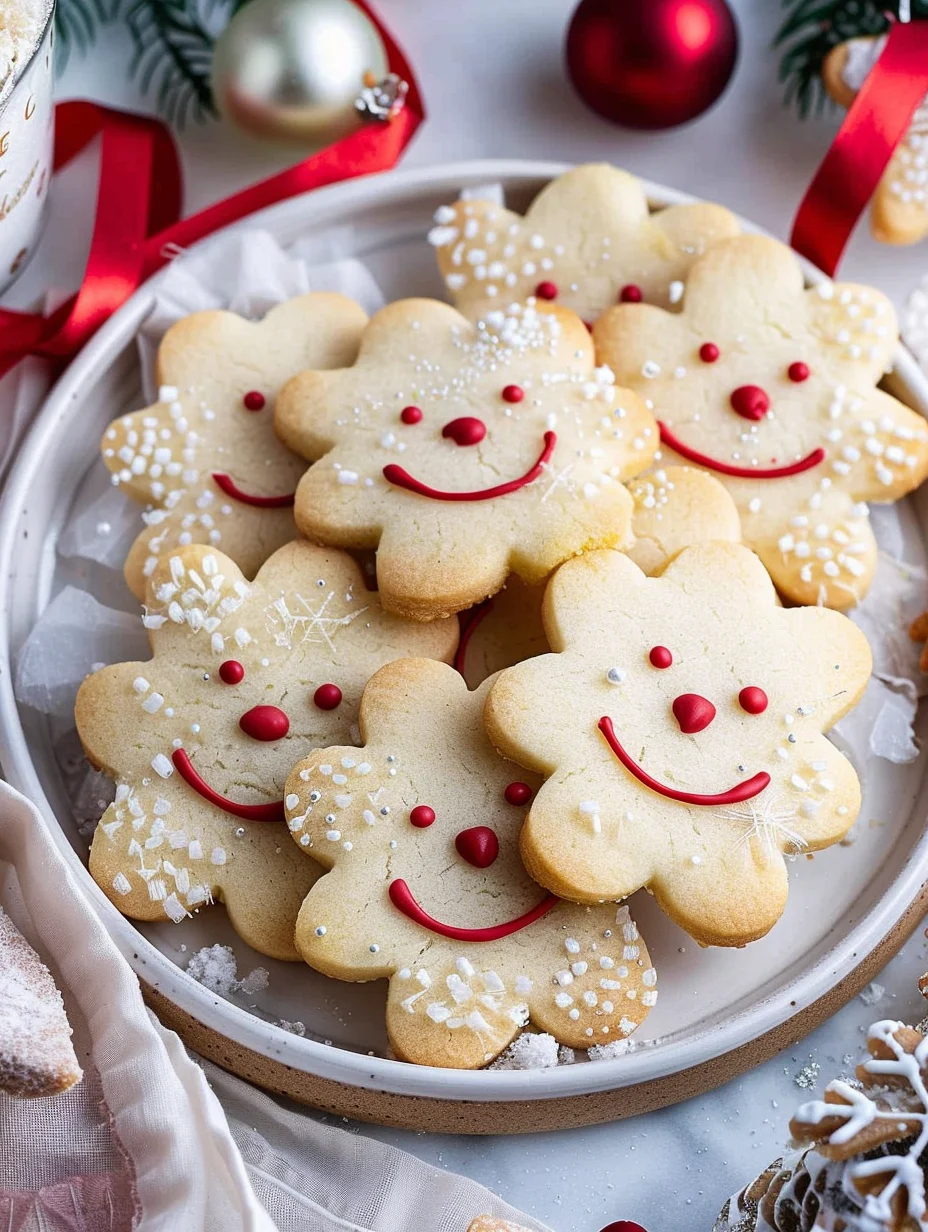
From the moment you pop them in the oven, the aroma of freshly baked cookies fills your kitchen, creating an atmosphere of warmth and joy. The endearing design of these cookies, often decorated to resemble polar bears with fluffy white frosting and chocolate accents, adds an element of fun to any occasion. Imagine serving these delightful cookies at a winter-themed party or as a creative surprise during the holidays. They will undoubtedly be the highlight of the dessert table!
In this guide, you will discover why Polar Bear Cookies are such a beloved recipe, the simple steps to make them, and tips on how to serve them effectively. Even if you’re a novice baker, the amazing flavors and charming presentation of these cookies will make you feel like a pro in the kitchen. Let’s dive into what makes Polar Bear Cookies a must-try recipe for everyone!
Why You’ll Love This Recipe
Polar Bear Cookies are more than just a sweet treat; they offer a delightful experience that brings joy to any gathering. Here are some reasons why you’ll fall in love with this recipe:
1. Fun and Creative Design: The cute polar bear shape adds a playful touch that kids will adore.
2. Simple Ingredients: Most of the ingredients are common pantry staples, making it easy to whip up a batch anytime.
3. Versatile Recipe: You can customize the cookie design based on themes or personal preferences, making them perfect for various occasions.
4. Perfect for All Ages: These cookies appeal to both children and adults, making them a great choice for family gatherings.
5. Easy to Follow Instructions: The clear steps ensure that even beginner bakers can successfully create these delightful cookies.
6. Great for Gifting: Packaged nicely, these cookies make for a charming gift during the holiday season or for special occasions.
With all these factors in mind, it’s no wonder that Polar Bear Cookies are a favorite in many households. Each cookie brings a smile and a taste of sweetness that makes any day feel special!
Preparation and Cooking Time
Making Polar Bear Cookies is a fun and rewarding experience. Here’s a breakdown of the time you’ll need:
– Preparation Time: 30 minutes
– Cooking Time: 10-12 minutes
– Cooling Time: 15 minutes
These times may vary depending on your kitchen equipment and experience, but this framework should provide a good estimate.
Ingredients
– 2 ½ cups all-purpose flour
– 1 teaspoon baking soda
– ½ teaspoon baking powder
– ¼ teaspoon salt
– 1 cup unsalted butter, softened
– 1 cup granulated sugar
– 1 cup brown sugar, packed
– 2 large eggs
– 2 teaspoons vanilla extract
– 1 teaspoon almond extract (optional)
– 2 cups powdered sugar (for decoration)
– 2-3 tablespoons milk (for decoration)
– Mini chocolate chips (for eyes and nose)
– White frosting or royal icing (for decoration)
Step-by-Step Instructions
Creating Polar Bear Cookies is straightforward if you follow these simple steps:
1. Preheat the Oven: Preheat your oven to 350°F (175°C). Line baking sheets with parchment paper.
2. Mix Dry Ingredients: In a bowl, whisk together the flour, baking soda, baking powder, and salt. Set aside.
3. Cream Butter and Sugars: In a large mixing bowl, cream the softened butter with granulated sugar and brown sugar until light and fluffy.
4. Add Eggs and Extracts: Beat in the eggs, vanilla extract, and almond extract until well combined.
5. Combine Mixtures: Gradually add the dry mixture to the wet ingredients, mixing until just combined.
6. Shape the Cookies: Using your hands, roll the dough into small balls and then flatten them slightly. Shape them into a polar bear head by making a larger ball for the head and two smaller balls for the ears.
7. Bake: Place the shaped cookies on the prepared baking sheets and bake for 10-12 minutes, or until the edges are lightly golden.
8. Cool the Cookies: Remove from the oven and let the cookies cool on the baking sheets for 5 minutes before transferring them to wire racks to cool completely.
9. Decorate: Once cooled, mix the powdered sugar with milk to create a frosting. Use it to cover the cookies, creating a fluffy white coat for the polar bears.
10. Add Details: Use mini chocolate chips to create eyes and noses on the cookies. You can also add any additional decorations you desire.
These steps will guide you in creating these incredible cookies effortlessly.
How to Serve
To make the most of your Polar Bear Cookies, consider the following when serving:
1. Presentation: Arrange the cookies on a decorative platter or in a themed container to enhance their appeal.
2. Pair with Beverages: Serve with hot cocoa, milk, or coffee for a delightful treat that complements the sweetness of the cookies.
3. Add Fun Labels: If serving at a party, add fun labels with names or fun facts about polar bears to engage your guests.
4. Gift Packages: Wrap a few cookies in clear cellophane bags tied with ribbons for a charming homemade gift.
5. Themed Parties: Incorporate the cookies into a winter-themed party, using them as part of a dessert table alongside other festive treats.
By putting thought into how you serve the cookies, you create a memorable experience for both yourself and your guests. Enjoy the smiles and delight that these Polar Bear Cookies bring!
Additional Tips
– Use Fresh Ingredients: Ensure your butter and eggs are at room temperature for the best texture and flavor.
– Experiment with Flavors: Consider adding a hint of peppermint extract for a festive twist during the holidays.
– Customize Decorations: Get creative with your decorating; use different colored frosting or edible glitter to make your cookies stand out.
– Involve Kids: Let children help with the decorating process. It’s a fun activity that can create lasting memories.
– Test a Small Batch: If you’re uncertain about the flavors, bake a small batch first to adjust the sweetness or texture to your preference.
Recipe Variation
Feel free to try these variations to make your Polar Bear Cookies even more exciting:
1. Chocolate Polar Bears: Incorporate cocoa powder into the dough for a chocolate version of the cookies.
2. Gluten-Free Option: Substitute all-purpose flour with a gluten-free flour blend for a gluten-free treat that everyone can enjoy.
3. Nutty Flavor: Add finely chopped nuts, such as almonds or walnuts, to the dough for added crunch and flavor.
4. Holiday Themed: Change the decoration to fit other holidays, such as using red and green icing for Christmas trees or hearts for Valentine’s Day.
Freezing and Storage
– Storage: Keep your Polar Bear Cookies in an airtight container at room temperature for up to one week.
– Freezing: These cookies can be frozen for up to three months. Place them in a single layer on a baking sheet to freeze, then transfer to a freezer-safe bag. Thaw at room temperature before serving.
Special Equipment
To make your Polar Bear Cookies, you will need the following tools:
– Mixing bowls
– Electric mixer or whisk
– Baking sheets
– Parchment paper
– Cookie cutters (optional, if not shaping by hand)
– Decorating tools such as piping bags for frosting
Frequently Asked Questions
Can I use margarine instead of butter?
Yes, margarine can be used, but cookies may have a slightly different texture and flavor.
What can I do if my cookie dough is too sticky?
If the dough is too sticky to handle, chill it in the refrigerator for about 30 minutes. This will make it easier to shape.
Can I make the dough ahead of time?
Absolutely! You can prepare the dough a day in advance and store it in the refrigerator. Just bring it back to room temperature before shaping.
Is it necessary to decorate the cookies?
While decoration adds a fun touch, you can enjoy the cookies plain. They are delicious even without frosting.
How do I store decorated cookies?
Store decorated cookies in a single layer in an airtight container to avoid smudging the frosting.
Conclusion
Polar Bear Cookies are a delightful blend of creativity and taste. Their whimsical design makes them perfect for any occasion, while their delicious flavor satisfies sweet cravings. Whether you’re baking with family or surprising friends, these cookies will surely bring joy and smiles. With simple steps and easily accessible ingredients, anyone can whip up a batch. Embrace the fun of baking and enjoy the delightful Polar Bear Cookies that will warm hearts and add sweetness to your celebrations!
Polar Bear Cookies: An Amazing Ultimate Recipe You Must Try
- Total Time: 11 minute
Ingredients
– 2 ½ cups all-purpose flour
– 1 teaspoon baking soda
– ½ teaspoon baking powder
– ¼ teaspoon salt
– 1 cup unsalted butter, softened
– 1 cup granulated sugar
– 1 cup brown sugar, packed
– 2 large eggs
– 2 teaspoons vanilla extract
– 1 teaspoon almond extract (optional)
– 2 cups powdered sugar (for decoration)
– 2-3 tablespoons milk (for decoration)
– Mini chocolate chips (for eyes and nose)
– White frosting or royal icing (for decoration)
Instructions
Creating Polar Bear Cookies is straightforward if you follow these simple steps:
1. Preheat the Oven: Preheat your oven to 350°F (175°C). Line baking sheets with parchment paper.
2. Mix Dry Ingredients: In a bowl, whisk together the flour, baking soda, baking powder, and salt. Set aside.
3. Cream Butter and Sugars: In a large mixing bowl, cream the softened butter with granulated sugar and brown sugar until light and fluffy.
4. Add Eggs and Extracts: Beat in the eggs, vanilla extract, and almond extract until well combined.
5. Combine Mixtures: Gradually add the dry mixture to the wet ingredients, mixing until just combined.
6. Shape the Cookies: Using your hands, roll the dough into small balls and then flatten them slightly. Shape them into a polar bear head by making a larger ball for the head and two smaller balls for the ears.
7. Bake: Place the shaped cookies on the prepared baking sheets and bake for 10-12 minutes, or until the edges are lightly golden.
8. Cool the Cookies: Remove from the oven and let the cookies cool on the baking sheets for 5 minutes before transferring them to wire racks to cool completely.
9. Decorate: Once cooled, mix the powdered sugar with milk to create a frosting. Use it to cover the cookies, creating a fluffy white coat for the polar bears.
10. Add Details: Use mini chocolate chips to create eyes and noses on the cookies. You can also add any additional decorations you desire.
These steps will guide you in creating these incredible cookies effortlessly.
- Prep Time: 30 minutes
- Cook Time: 10-12 minutes
Nutrition
- Serving Size: 24 cookies
- Calories: 150 kcal
- Fat: 7g
- Protein: 2g