
Springtime always feels like the perfect season for playful, colorful, and whimsical treats. And when it comes to Easter, it’s hard to resist making something adorable and festive that brings smiles to everyone’s faces. Enter Rice Krispie Easter Chicks—a charming and super easy recipe that’s just as delightful to make as it is to eat. Whether you’re looking for a fun Easter dessert to share with family or a creative baking project to do with kids, this recipe checks all the boxes.
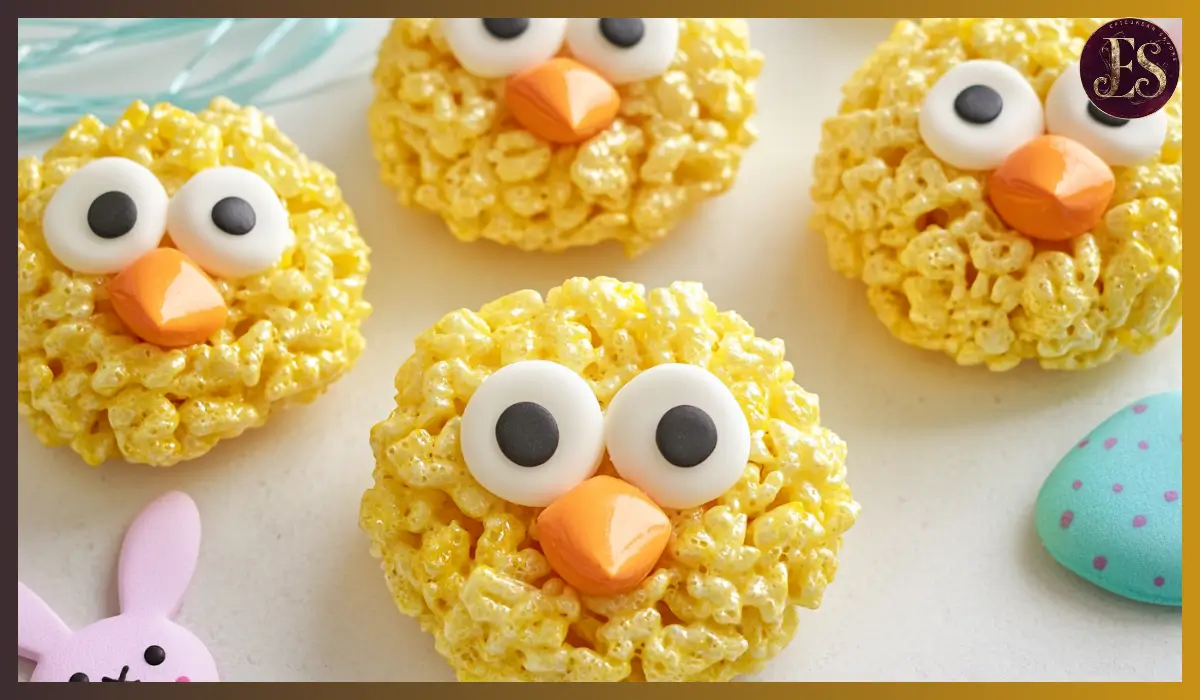
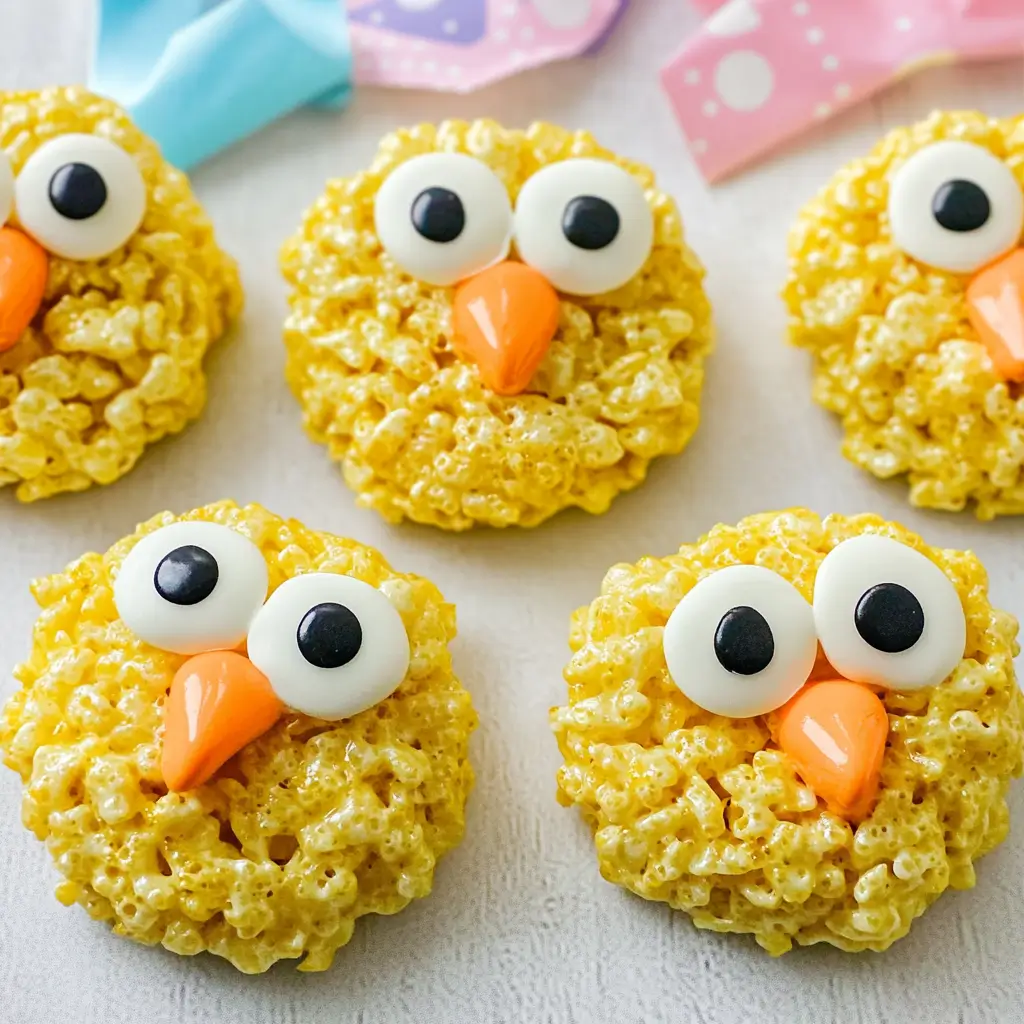
These cheerful little chicks are made from the classic, crowd-pleasing combination of Rice Krispies cereal, marshmallows, and butter, with the addition of a little yellow food coloring to make them perfectly chick-like. But the fun doesn’t stop there! Decorating these chicks with candy eyes and orange candy melts to create beaks and feet adds a whole new level of cuteness that’s guaranteed to impress.
I first stumbled upon the idea of Rice Krispie Easter Chicks during a family Easter gathering, and it’s been a staple ever since. The kids absolutely adore helping out with decorating, and the adults? Well, let’s just say these little treats disappear faster than you’d think. Plus, they’re a breeze to make, so you can easily whip up a batch whenever you want something sweet and charming for the dessert table.
Why You’ll Love This Recipe
There are so many reasons why these Rice Krispie Easter Chicks will become your go-to Easter treat. Here are just a few:
- Super Easy to Make: You don’t need any fancy baking skills or tools to make these cute little chicks. The recipe is straightforward and perfect for beginners or anyone looking for a fuss-free dessert.
- Family-Friendly Fun: Kids will absolutely love helping out with this recipe. From mixing the marshmallow and Rice Krispie mixture to decorating the little chicks, it’s a fun, hands-on activity that keeps everyone entertained.
- Adorable and Festive: The bright yellow chicks with their adorable candy eyes, beaks, and feet are the perfect addition to any Easter celebration. They make a cheerful centerpiece for dessert tables or a delightful treat to bring to school parties.
- Customizable: You can easily get creative with this recipe. Try making different shapes, adding sprinkles, or even using colored candy melts to give each chick a unique look.
- Deliciously Chewy and Sweet: The texture of these treats is a wonderful mix of chewy, gooey goodness from the marshmallow and crispy crunch from the cereal. The candy decorations add a fun, sweet touch that everyone will love.
Health Benefits
Alright, so these Rice Krispie Easter Chicks might not be the healthiest treat on the planet, but there are a few positive aspects to consider. After all, enjoying something sweet and fun now and then is part of a balanced approach to life.
- Low in Calories and Fat (Relatively Speaking): Rice Krispies cereal itself is low in calories and fat. When combined with marshmallows and butter, the overall treat is still relatively light compared to richer desserts like cakes, brownies, or heavy chocolate treats.
- Portion Control: Making these chicks as individual treats allows you to control portion sizes easily. You can make them smaller if you’re aiming for a lighter dessert.
- Customizable Ingredients: If you’re looking to make them a bit healthier, you can use low-fat butter or a plant-based butter substitute to reduce the amount of saturated fat.
- Sugar-Free Options: Reduced-sugar or sugar-free marshmallows are available and can be used to decrease the sugar content without sacrificing too much of the classic texture.
- Dairy-Free Possibility: With the right butter substitute, these treats can be made dairy-free, which is great for those with dietary restrictions or preferences.
Remember, these chicks are meant to be a fun treat rather than a health food. Enjoying them in moderation as part of a well-rounded diet is completely fine!
Preparation Time, Servings, and Nutritional Information
Total Time: 30 minutes (15 minutes prep, 15 minutes cooling)
Servings: About 12-15 Rice Krispie Easter Chicks (depending on size)
Nutritional Information (Per Chick):
- Calories: 150
- Carbohydrates: 28g
- Protein: 1g
- Fat: 4g
- Sugar: 18g
- Fiber: 0g
The nutritional information will vary based on the size of your chicks and the specific ingredients you use. But generally speaking, these little treats are a fairly light, sweet snack.
Ingredients List
To make these adorable Rice Krispie Easter Chicks, you will need:
- 6 cups Rice Krispies cereal (The foundation of your deliciously crispy chicks)
- 15 oz marshmallows (Mini marshmallows work best for easier melting)
- 3 tablespoons softened butter (Adds richness and helps bind everything together)
- Yellow food coloring (To give your chicks their cheerful, bright yellow appearance)
- 2 cups orange candy melts (Used for decorating the beaks and feet)
- Large candy eyes (For creating the cutest little chick faces)
- 4-inch circle cookie cutter (To shape the chicks)
- 9×13-inch pan (For setting the Rice Krispie mixture)
- Non-stick cooking spray or butter (For greasing the pan)
- Decorating bag (For precise decorating with melted candy melts)
- Potato masher (For pressing the mixture firmly into the pan)
Optional Additions:
- Sprinkles or edible glitter (If you want to give your chicks a little extra sparkle)
- Different colored candy melts (To make creative variations of your chicks)
Step-By-Step Cooking Instructions
Prepare the Pan
- Grease a 9×13-inch pan with butter or non-stick cooking spray to ensure easy removal of your treats once they’re set.
Melt the Marshmallows
- In a large microwave-safe bowl, combine the marshmallows and softened butter.
- Microwave on high for 1-2 minutes until the marshmallows are puffy and melted.
- Stir the mixture until smooth and well-combined.
Add Color & Mix
- Add yellow food coloring to the melted marshmallow mixture.
- Stir until the color is evenly distributed and vibrant.
- Pour in the 6 cups of Rice Krispies cereal and gently fold everything together until the cereal is fully coated.
Set & Cool
- Press the Rice Krispie mixture firmly into the prepared pan using a potato masher or your hands (lightly buttered to prevent sticking).
- Place the pan in the freezer for 15 minutes to cool and firm up.
Cut Out Chicks
- Once the mixture has cooled, use a 4-inch circle cookie cutter to cut out chick shapes.
- Gently remove the shapes from the pan and place them on parchment paper.
Melt the Candy Melts
- Place the orange candy melts in a microwave-safe bowl.
- Microwave on 50% power for 2-3 minutes, stirring every 30 seconds until smooth.
Decorate the Chicks
- Transfer the melted candy to a decorating bag.
- Attach large candy eyes to the top of each chick by adding a small dot of melted candy as glue.
- Pipe small triangles for the beaks and draw little feet at the bottom of each chick.
- Let the decorations set for 5-10 minutes before handling.
Serve or Store
- Once decorated, your Rice Krispie Easter Chicks are ready to be served!
- If not serving immediately, store them in an airtight container to keep them fresh.
How to Serve
These Rice Krispie Easter Chicks are as versatile as they are adorable. Here are some fun serving ideas:
- Easter Dessert Table: Arrange them on a colorful platter surrounded by chocolate eggs and festive candies.
- Party Favors: Wrap each chick individually in cellophane bags tied with pastel ribbons for a charming takeaway treat.
- Kids’ Activities: Let children decorate their own chicks for a creative Easter party activity.
- Themed Lunchboxes: Add a cheerful chick to your child’s lunchbox for a fun, sweet surprise.
They’re perfect for family gatherings, school parties, or simply as a festive snack to enjoy at home.
Pairing Suggestions
While these treats are delightful on their own, pairing them with complementary items can make them even more enjoyable:
- Beverages: Serve with a cold glass of milk, hot cocoa, or fruity lemonade for a refreshing balance.
- Fruits: Arrange them alongside fresh fruit platters featuring strawberries, grapes, and melon for a colorful, sweet display.
- Cookies and Cupcakes: Make a full Easter-themed dessert spread by including bunny-shaped cookies or pastel-frosted cupcakes.
- Ice Cream: Serve the chicks over a scoop of vanilla or strawberry ice cream for an extra indulgent treat.
The playful nature of these chicks makes them a versatile dessert that pairs well with all kinds of fun, family-friendly goodies.
Storage, Freezing & Reheating Instructions
Storage:
- Store your Rice Krispie Easter Chicks in an airtight container at room temperature for up to 3 days.
- If you prefer them to stay fresher for longer, refrigerate them for up to a week.
Freezing:
- Place the decorated chicks on a baking sheet and freeze until solid.
- Transfer them to a freezer-safe container or bag.
- Freeze for up to 3 months.
Reheating:
- To restore their gooey texture, let frozen chicks thaw at room temperature for about 30 minutes before serving.
- Avoid microwaving as it may cause the candy decorations to melt.
Common Mistakes to Avoid
Making sure your Rice Krispie Easter Chicks turn out perfect is easy if you avoid these common pitfalls:
- Overheating Marshmallows: Melting marshmallows too long can make them hard and tough. Stick to short intervals and stir often.
- Skipping the Cooling Step: Not allowing the mixture to cool properly will result in misshapen chicks when cutting them out.
- Using Too Much Butter: Adding too much butter can make the mixture greasy and prevent it from setting correctly.
- Handling Decorations Too Soon: Letting the candy melts set properly before storing or serving will help them hold their shape.
- Not Greasing the Pan: Always grease your pan or the mixture will stick and make it difficult to cut out shapes.
Pro Tips
Want to make your Rice Krispie Easter Chicks extra special? Try these pro tips:
- Add Extra Flavor: Mix in a teaspoon of vanilla extract or almond extract for a subtle boost of flavor.
- Create Textured Feathers: Use a fork to gently press lines into the Rice Krispie mixture before cooling to give your chicks a feathered appearance.
- Use Gel Coloring: Gel food coloring gives a more vibrant color with less moisture, keeping your treats firm.
- Prevent Sticking: Grease your hands lightly when pressing the mixture into the pan for easy handling.
- Make-ahead Option: Prepare the chicks a day before decorating to make the process even smoother.
Frequently Asked Questions (FAQs)
Can I use margarine instead of butter?
Yes, you can use margarine or even plant-based butter to make this recipe dairy-free.
How can I make this recipe gluten-free?
Use certified gluten-free Rice Krispies cereal to keep this recipe gluten-free.
What if I don’t have orange candy melts?
You can use colored frosting, melted white chocolate with orange coloring, or even mini candies shaped like beaks and feet.
Can I make these chicks without food coloring?
Absolutely! They’ll just be classic Rice Krispie color but still taste amazing.
How far in advance can I make these?
They can be made up to a week ahead if stored properly in the fridge.
Can I use homemade marshmallows for this recipe?
Yes, but keep in mind that the texture may be slightly different, and you may need to adjust the melting process.
Can I decorate them with chocolate instead of candy melts?
Yes, melted chocolate works well for decorating and adds a rich flavor.
Why did my chicks fall apart?
If your mixture is too dry or not pressed firmly enough, the chicks may crumble. Make sure to press down evenly before cooling.
How can I add more details to the decorations?
Use edible markers, additional candy pieces, or colored frosting to create wings, hats, or even little bows.
Are these treats safe for young children?
Yes, but supervision is recommended if the chicks are decorated with small candy pieces like candy eyes.
Conclusion & Call to Action
These Rice Krispie Easter Chicks are more than just a sweet treat; they’re a delightful, creative experience that brings joy to everyone involved. Whether you’re whipping them up for a school party, a festive Easter brunch, or simply for a fun afternoon at home, they’re bound to be a hit.
Their cheerful appearance, easy preparation, and playful decorating process make them a fantastic addition to any Easter celebration. Plus, you can make them your own by experimenting with different colors, sizes, and decorations.
Ready to try this adorable recipe? Gather your ingredients, call the kids to the kitchen, and start crafting some of the cutest treats you’ve ever made. And if you give them a try, don’t forget to share your adorable creations! I’d love to see how your Rice Krispie Easter Chicks turn out.
Print
Rice Krispie Easter Chicks
- Total Time: 30 minutes
- Yield: 12-15 Chicks 1x
- Diet: Vegetarian
Description
These Rice Krispie Easter Chicks are a fun, festive, and easy-to-make Easter treat. Made with Rice Krispies cereal, marshmallows, and colorful candy decorations, these adorable chicks are perfect for Easter parties, family gatherings, or creative kitchen fun with kids.
Ingredients
- 6 cups Rice Krispies cereal
- 15 oz marshmallows (mini marshmallows preferred)
- 3 tablespoons softened butter
- Yellow food coloring
- 2 cups orange candy melts (for beak and feet decoration)
- Large candy eyes
- 4-inch circle cookie cutter
- 9x13-inch pan (for setting the mixture)
- Non-stick cooking spray or butter (for greasing the pan)
- Decorating bag (for candy melts)
- Potato masher (for pressing the mixture)
Instructions
- Prepare the Pan: Grease a 9×13-inch pan with butter or non-stick cooking spray.
- Melt Marshmallows: In a microwave-safe bowl, melt marshmallows and butter for 1-2 minutes. Stir until smooth.
- Add Color & Mix: Add yellow food coloring and stir until evenly mixed. Add Rice Krispies cereal and mix until well-coated.
- Set & Cool: Press mixture firmly into the prepared pan. Freeze for 15 minutes.
- Cut Out Chicks: Use a 4-inch circle cookie cutter to cut out chick shapes.
- Melt Candy Melts: Melt orange candy melts on 50% power for 2-3 minutes, stirring every 30 seconds.
- Decorate: Attach candy eyes and pipe beaks and feet using the melted candy. Let set for 5-10 minutes.
- Serve or Store: Store in an airtight container at room temperature for up to 3 days.
Notes
- To make these treats dairy-free, use plant-based butter.
- Store in the fridge for up to a week or freeze for up to 3 months.
- Avoid overheating the marshmallows for the best texture.
- Prep Time: 15 minutes
- Cook Time: 15 minutes (cooling time)
- Category: Dessert, Snack
- Method: No-Bake
- Cuisine: American