
Easter is a time for joy, family gatherings, and, of course, delicious treats. These Rice Krispies Treat Easter Eggs are the perfect way to celebrate the holiday. They’re fun to make, incredibly easy, and can be customized with different colors and toppings. If you’re looking for a creative and kid-friendly dessert that will bring smiles to everyone’s faces, this recipe is for you.
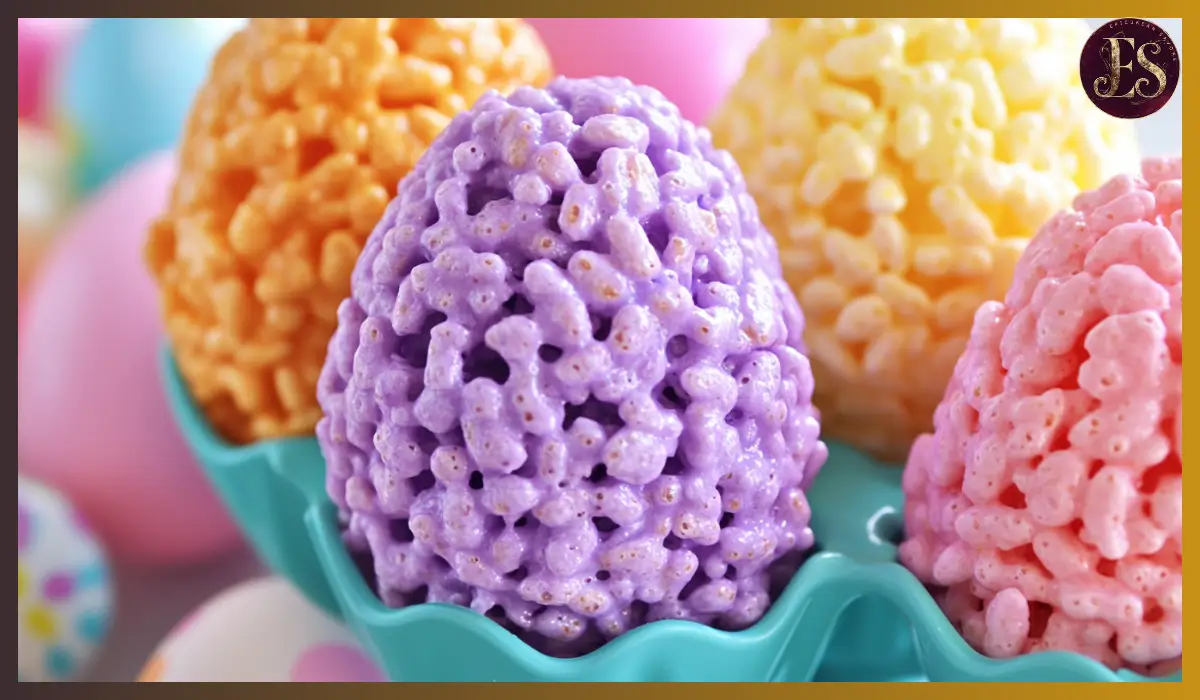
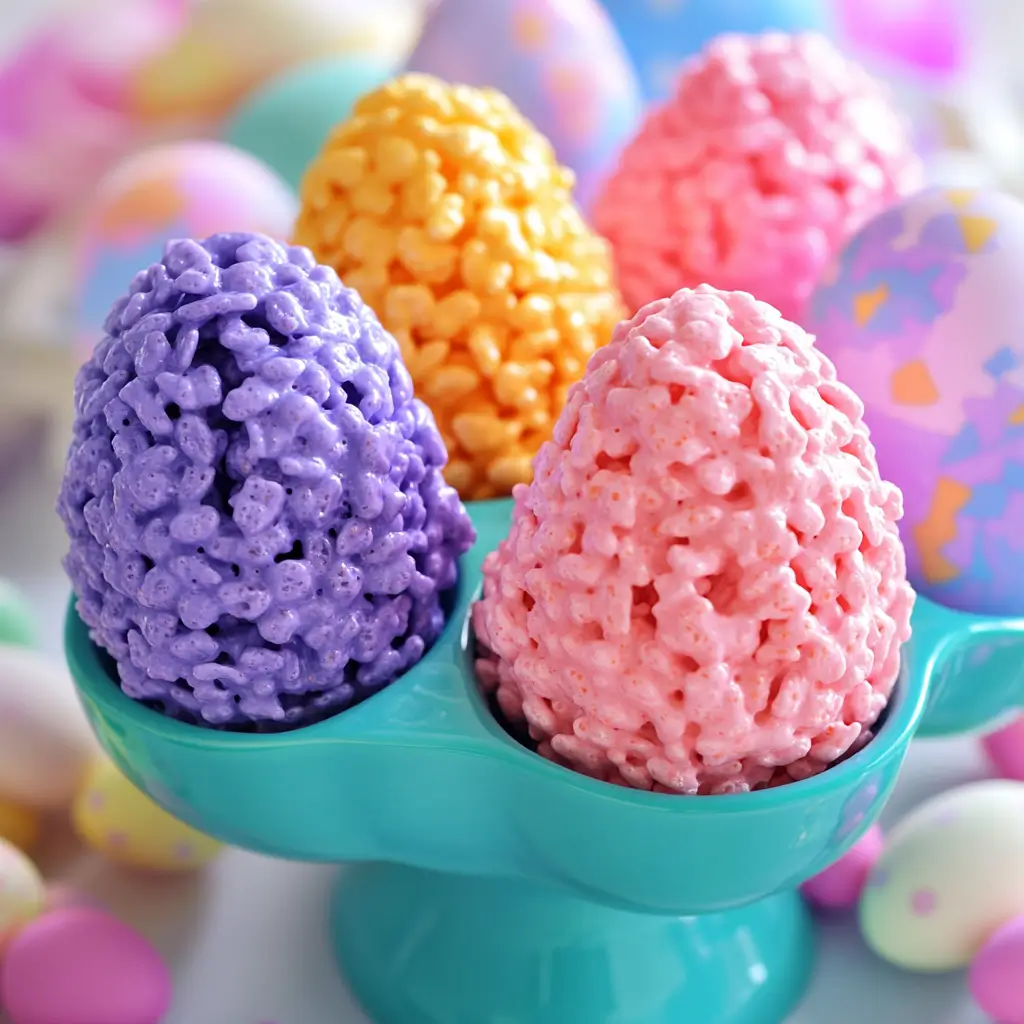
What makes these treats extra special is their festive egg shape, which is achieved by using plastic Easter eggs as molds. They’re soft, chewy, and slightly crispy, making them an irresistible addition to your Easter table. The best part? You don’t need any fancy equipment—just a few simple ingredients and some creativity.
I remember the first time I made these with my kids. We had so much fun mixing in different food colors and pressing the warm, gooey mixture into the plastic eggs. The excitement on their faces when they popped out their perfectly shaped Rice Krispies eggs was priceless. Since then, this has become a yearly tradition in our home.
These treats are perfect for filling Easter baskets, serving at family brunches, or even gifting to friends and neighbors. You can also make a big batch in advance and store them for later, making them an ideal make-ahead Easter dessert. Whether you’re an experienced home baker or just looking for a simple, no-bake treat, these Rice Krispies Easter eggs are a guaranteed hit.
Why You’ll Love This Recipe
There are so many reasons to fall in love with these Rice Krispies Treat Easter Eggs. They are festive, fun, and absolutely delicious. Here’s why they deserve a spot on your Easter dessert table:
- Easy and Quick to Make – This recipe requires only a handful of ingredients and comes together in less than 30 minutes. No baking is required, making it perfect for beginners.
- Perfect for Kids – Kids love to help with this recipe. From stirring the melted marshmallows to shaping the eggs, it’s a hands-on activity that keeps them entertained.
- Customizable – You can add food coloring to create pastel-colored eggs, mix in sprinkles for extra fun, or drizzle them with chocolate for a gourmet touch.
- Great for Easter Celebrations – These treats make a beautiful addition to Easter baskets, dessert platters, or even as party favors.
- Make-Ahead Friendly – You can prepare these treats a few days in advance and store them in an airtight container until you’re ready to serve.
- Minimal Cleanup – Unlike traditional baked goods, this recipe doesn’t require multiple bowls, baking sheets, or long prep times. You’ll only need a microwave-safe bowl and a spoon.
If you’re looking for a stress-free, crowd-pleasing treat this Easter, these Rice Krispies eggs are the answer.
Health Benefits
While these Rice Krispies Treat Easter Eggs are a sweet indulgence, they do have a few benefits that make them a better option than some store-bought candies and desserts.
- Lower in Fat – Unlike many traditional baked goods, these treats are made with a small amount of butter and don’t require any frying or heavy oils.
- Gluten-Free Option – If you use gluten-free Rice Krispies cereal, this recipe can easily be made gluten-free, making it a great option for those with dietary restrictions.
- Controlled Ingredients – When you make treats at home, you have full control over the ingredients. You can use high-quality marshmallows, natural food coloring, and organic butter for a cleaner version of this classic snack.
- Portion Control – Since these treats are made in small, individual egg shapes, they’re naturally portioned to help prevent overeating.
- No Artificial Preservatives – Unlike store-bought Easter candies, these homemade treats don’t contain artificial preservatives or additives, making them a fresher and healthier choice.
Enjoying sweet treats in moderation is part of a balanced lifestyle, and these Rice Krispies eggs allow you to satisfy your sweet tooth while still making a more mindful choice.
Preparation Time, Servings, and Nutritional Information
Total Time: 25 minutes
Servings: Makes about 12 Easter egg treats
Calories per serving: 140
Carbohydrates: 28g
Protein: 1g
Fat: 4g
These numbers will vary slightly based on the exact brands of ingredients used, but overall, these Rice Krispies Treat Easter Eggs are a relatively light dessert option compared to many traditional baked goods.
Ingredients List
To make these festive Rice Krispies eggs, you’ll need the following simple ingredients:
- 6 cups Rice Krispies cereal – The classic crisped rice cereal provides the perfect crunchy texture.
- 1 (10 oz) bag mini marshmallows – Melting these down creates the signature gooey consistency that holds everything together.
- 6 tablespoons butter – This adds richness and ensures a smooth, creamy marshmallow mixture.
- Plastic Easter eggs – Used as molds to shape the Rice Krispies mixture into perfect egg shapes.
- Nonstick cooking spray – Prevents sticking when pressing the mixture into the plastic eggs.
- Food coloring (optional) – Adds fun pastel colors for a festive Easter look.
You can also add extras like sprinkles, mini chocolate chips, or even drizzle them with melted chocolate for added texture and flavor.
Step-By-Step Cooking Instructions
- Melt the Butter and Marshmallows
- In a large microwave-safe bowl, add the butter and mini marshmallows.
- Microwave on high for 30 seconds, then stir. Continue microwaving in 15-second intervals, stirring between each, until the mixture is smooth and fully melted.
- Divide the Mixture for Coloring (Optional)
- If you want to make multiple colors, divide the melted marshmallow mixture into separate bowls.
- Add a few drops of food coloring to each bowl and stir until the color is evenly distributed.
- Mix in the Rice Krispies Cereal
- Pour half of the Rice Krispies cereal into each bowl, stirring until the cereal is fully coated with the marshmallow mixture.
- Prepare the Plastic Easter Egg Molds
- Spray the inside of each plastic egg mold with nonstick cooking spray to prevent sticking.
- Shape the Treats
- Using a spoon or your hands, firmly press the mixture into both halves of the plastic egg molds.
- Close the egg molds and press them together tightly to form the egg shape. Let them sit for a few minutes to set.
- Remove the Treats from the Molds
- Carefully open the plastic eggs and remove the formed Rice Krispies treats.
- If any pieces stick, gently loosen them with a butter knife.
- Let Them Cool and Set
- Place the Rice Krispies eggs on a baking sheet or parchment paper and let them cool completely before serving.
- Optional Decorating
- Drizzle with melted chocolate, add sprinkles, or even dust with powdered sugar for extra decoration.
How to Serve
These Rice Krispies Treat Easter Eggs are delicious on their own, but here are some fun serving ideas:
- Arrange them in an Easter basket with colorful grass for a festive display.
- Serve them on a dessert platter alongside other Easter treats like cookies and cupcakes.
- Wrap them individually in plastic wrap and tie with a ribbon for a homemade Easter gift.
- Pair them with a glass of milk or a cup of hot chocolate for a sweet snack.
Pairing Suggestions
These treats go perfectly with:
- Fresh fruit like strawberries and grapes for a balanced Easter dessert spread.
- A warm cup of coffee or tea for an afternoon treat.
- A scoop of vanilla ice cream for an extra indulgent dessert.
Storage, Freezing & Reheating Instructions
- Storage: Store in an airtight container at room temperature for up to 3 days.
- Freezing: Wrap each treat in plastic wrap and place in a freezer-safe bag. Freeze for up to 1 month.
- Reheating: Let frozen treats thaw at room temperature before serving.
Common Mistakes to Avoid
Making Rice Krispies Treat Easter Eggs is a simple and fun process, but a few common mistakes can affect the final result. Here are some pitfalls to watch out for and how to avoid them.
- Overheating the Marshmallow Mixture – If you microwave the butter and marshmallows for too long, the mixture can become too thick and sticky, making it difficult to mix with the cereal. Always heat in short intervals, stirring frequently, to keep the mixture smooth and manageable.
- Not Coating the Plastic Eggs Properly – If you skip spraying the plastic Easter eggs with nonstick cooking spray, the mixture will stick, making it difficult to remove the treats from the mold. A light spray ensures easy release and keeps the shape intact.
- Pressing the Mixture Too Firmly – While you want the mixture to hold together, pressing too hard can make the treats dense and tough instead of light and chewy. Use just enough pressure to mold them into shape without compacting them too much.
- Not Working Quickly Enough – The marshmallow mixture begins to set as it cools, making it harder to shape. Work efficiently and have everything prepped in advance to ensure smooth and easy assembly.
- Using Too Much Food Coloring – Adding too much liquid food coloring can make the mixture too wet and sticky. Use just a few drops and stir well to evenly distribute the color without altering the texture.
- Skipping the Cooling Time – If you try to handle or move the Rice Krispies eggs too soon, they may fall apart. Let them set properly at room temperature to ensure they hold their shape.
- Storing Them Incorrectly – Leaving the treats uncovered can make them dry out quickly. Always store them in an airtight container to maintain their chewy texture for longer.
Pro Tips
Making these Rice Krispies Treat Easter Eggs even more fun and foolproof is easy with these expert tips.
- Use Fresh Marshmallows – Older marshmallows tend to be dry and won’t melt as smoothly, leading to a lumpy mixture. Always use fresh, soft marshmallows for the best results.
- Grease Your Hands for Easy Handling – If the mixture sticks to your hands while shaping, lightly coat them with butter or nonstick spray. This prevents sticking and makes it easier to press the treats into the molds.
- Mix the Food Coloring into the Butter First – To achieve an even color, mix the food coloring into the melted butter before adding the marshmallows. This ensures uniform distribution without streaks.
- Make Them Extra Festive – Roll the finished eggs in pastel-colored sprinkles, drizzle them with white chocolate, or dip them in melted chocolate for a gourmet touch.
- Use Parchment Paper for Storage – If stacking the treats, place a sheet of parchment paper between layers to prevent them from sticking together.
- Try Different Molds – If you don’t have plastic Easter eggs, silicone molds or cupcake liners can work as creative alternatives for shaping the treats.
- Customize the Flavor – Add a drop of vanilla or almond extract to the marshmallow mixture for an extra layer of flavor. You can also mix in crushed cookies, chopped nuts, or mini chocolate chips.
Frequently Asked Questions (FAQs)
1. Can I make these treats ahead of time?
Yes! You can prepare them up to three days in advance. Store them in an airtight container at room temperature to keep them fresh.
2. How do I prevent the treats from sticking to the molds?
Spray the inside of the plastic Easter eggs with nonstick cooking spray before pressing in the mixture. This makes it easy to release the treats without breaking them.
3. Can I use regular marshmallows instead of mini marshmallows?
Yes, but they may take longer to melt. If using large marshmallows, cut them into smaller pieces to speed up the melting process.
4. How can I make a healthier version of this recipe?
You can use brown rice cereal for a slightly healthier option and reduce the butter amount slightly. While this is a treat, making small swaps can lighten it up.
Conclusion & Call to Action
Making Rice Krispies Treat Easter Eggs is a fun, festive, and easy way to celebrate Easter. These delightful no-bake treats are perfect for kids and adults alike, bringing joy to holiday gatherings and adding a playful touch to dessert tables. Whether you customize them with bright colors, drizzle them with chocolate, or sprinkle them with candy toppings, these treats are guaranteed to be a crowd-pleaser.
If you’re looking for a creative Easter recipe that requires minimal effort but delivers maximum fun, this is the one to try. The simple ingredients and easy process make it a stress-free activity, even for beginner cooks. Plus, since these treats can be made ahead of time, they’re perfect for Easter parties, brunches, and homemade gifts.
I’d love to hear how your Rice Krispies Treat Easter Eggs turned out! If you made this recipe, share your experience in the comments below. Did you add any special toppings or flavors? Let me know! If you enjoyed this recipe, be sure to share it with friends and family on social media. Don’t forget to tag me so I can see your festive creations.
Looking for more fun and easy Easter recipes? Stay tuned for more holiday treats that are just as simple and delicious. Happy Easter and happy cooking!
Print
Rice Krispies Treat Easter Eggs
- Total Time: 25 minutes
- Yield: 12 Easter egg treats 1x
- Diet: Vegetarian
Description
These festive Rice Krispies Treat Easter Eggs are a fun and easy Easter dessert! Shaped like eggs and customizable with colors and toppings, they make the perfect no-bake treat for Easter baskets and family gatherings.
Ingredients
- 6 cups Rice Krispies cereal
- 1 (10 oz) bag mini marshmallows
- 6 tablespoons butter
- Plastic Easter eggs (for shaping)
- Nonstick cooking spray
- Food coloring (optional)
Instructions
- Melt butter and marshmallows in a microwave-safe bowl, stirring until smooth.
- Divide the mixture into bowls and add food coloring if desired.
- Mix in Rice Krispies cereal until fully coated.
- Spray plastic Easter eggs with nonstick spray.
- Press the mixture firmly into each mold and close the eggs.
- Let set for a few minutes, then remove from molds.
- Cool completely before serving.
Notes
- Add sprinkles, mini chocolate chips, or drizzle with melted chocolate for extra flavor.
- Store in an airtight container for up to 3 days.
- Use gluten-free Rice Krispies for a gluten-free version.
- Prep Time: 10 minutes
- Cook Time: 0 minutes (no-bake)
- Category: Dessert
- Method: No-Bake
- Cuisine: American