
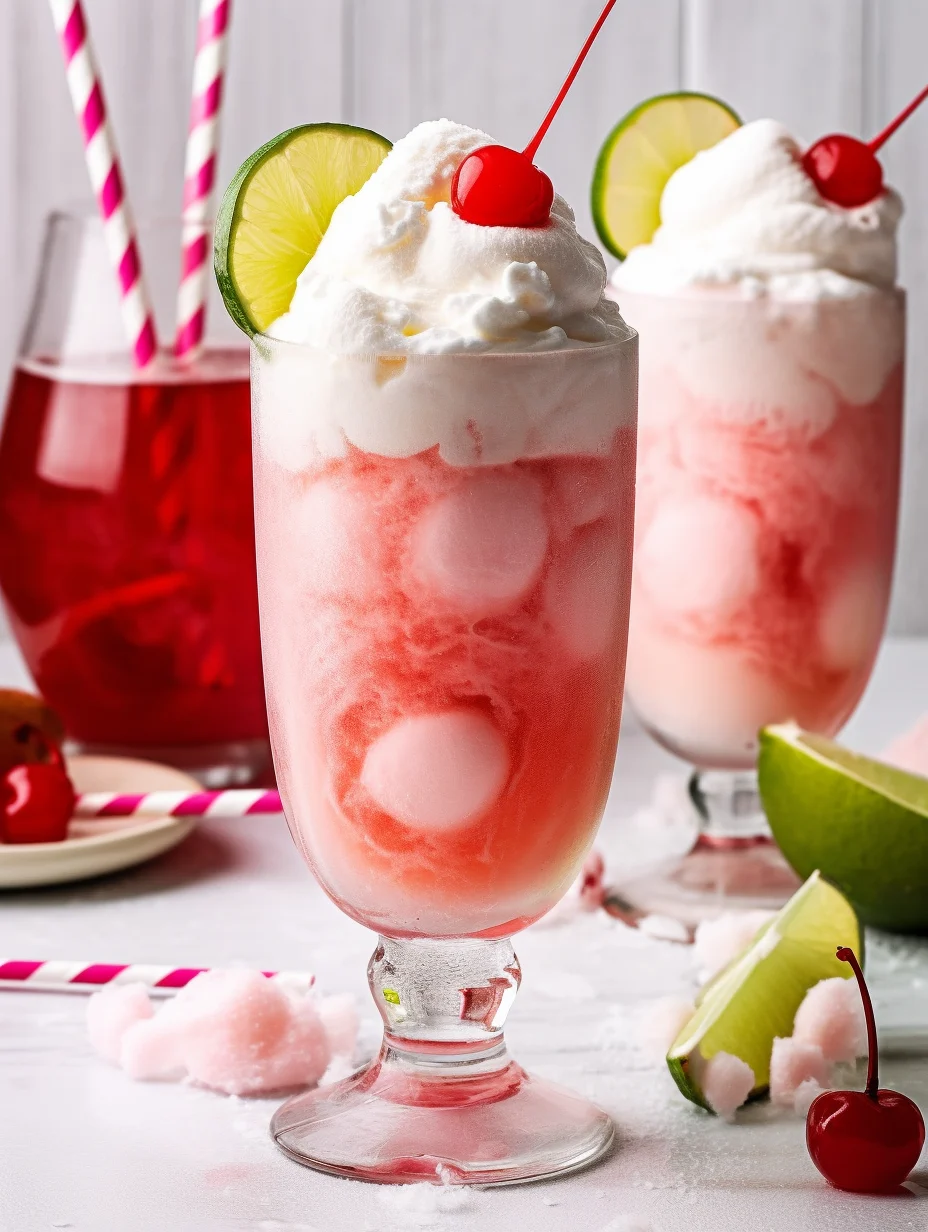
Shirley Temple Ice Cream Float is a delightful blend of nostalgic flavors and refreshing fun. This sip-and-scoop creation is perfect for any occasion, especially during hot summer days. Combining subtle cherry tastes with creamy vanilla ice cream creates an incredible balance that everyone will enjoy. It’s not just a drink or dessert; it’s a cherished memory for many who grew up loving the iconic Shirley Temple mocktail.
If you’ve ever taken a sip of a classic Shirley Temple, you understand the joyful sensation that comes with the fizzy sweetness and cherry flavor. Now, imagine elevating that experience by adding creamy ice cream! Each spoonful of this float is an explosion of taste and texture, making it a truly unique treat. In this guide, you’ll discover why this recipe is a must-try, the simple preparation process, and helpful serving suggestions that will impress your family and friends.
Let’s dive deeper into the amazing world of Shirley Temple Ice Cream Floats and see why they have stood the test of time. This recipe is perfect for parties, birthdays, or simply enjoying at home after a long day. Get ready to serve up smiles with this ultimate frozen delight!
Why You’ll Love This Recipe
Shirley Temple Ice Cream Float brings a taste of childhood joy wrapped in a deliciously simple recipe. Here’s why this treat will capture your heart:
1. Easy to Make: With just a few ingredients, this recipe can be prepared in minutes.
2. Family-Friendly: This float appeals to all ages, making it the ideal treat for everyone.
3. Versatile Flavors: You can customize it with different flavors of soda or ice cream.
4. Eye-Catching Presentation: The vibrant colors of the drink and the creamy white ice cream make it visually stunning.
5. Nostalgic Experience: It evokes fond memories for many who grew up enjoying Shirley Temple drinks.
6. Perfect for Any Occasion: Whether it’s a birthday party, summer picnic, or family gathering, this float is always a hit.
With all these enticing features, it’s easy to see why Shirley Temple Ice Cream Float is a legendary treat that continues to win hearts around the world.
Preparation and Cooking Time
Creating Shirley Temple Ice Cream Floats is quick and enjoyable. Here’s a breakdown of the time required:
– Preparation Time: 10 minutes
– Total Time: 10 minutes
These times are ideal and allow you to whip up a refreshing float in no time, making it perfect for spontaneous treat-making.
Ingredients
– 2 cups cherry soda (such as 7UP or Sprite)
– 1 cup vanilla ice cream
– Maraschino cherries for garnish
– Whipped cream (optional)
– 1 tablespoon grenadine (optional, for added sweetness)
– Ice cubes (optional)
Step-by-Step Instructions
Making a Shirley Temple Ice Cream Float is delightful and straightforward. Just follow these simple steps:
1. Prepare Your Glass: Start by selecting a tall glass to showcase your float beautifully.
2. Add Ice Cubes: If desired, put a few ice cubes at the bottom of the glass for extra chill.
3. Pour Cherry Soda: Slowly pour the cherry soda into the glass, filling it about halfway.
4. Add Ice Cream: Gently add one scoop of vanilla ice cream on top of the soda. Ensure it’s a generous scoop for a perfect float.
5. Add Grenadine: Drizzle a tablespoon of grenadine over the ice cream for an extra flavor boost.
6. Finish with More Soda: Carefully top the float with remaining cherry soda, allowing it to fizz and foam.
7. Garnish with Whipped Cream: For an indulgent touch, add a dollop of whipped cream on top.
8. Top with Maraschino Cherry: Finish the float by placing a maraschino cherry on the whipped cream.
9. Serve Immediately: Serve the float with a straw and a long spoon for easy sipping and scooping.
Following these steps will lead you to creating a delicious and visually enticing Shirley Temple Ice Cream Float!
How to Serve
Serving Shirley Temple Ice Cream Floats can be just as fun as making them. Consider the following tips:
1. Presentation: Use colorful straws and decorative glasses to enhance the visual appeal.
2. Personalize Each Float: Allow guests to customize their floats with varying flavors of soda or ice cream to suit their preferences.
3. Pair with Snacks: Compliment the sweet float with salty snacks like popcorn or pretzels to balance flavors.
4. Ideal for Parties: Set up a float station at your next event where guests can create their own Shirley Temple Ice Cream Floats.
5. Serve Chilled: Make sure your soda and glasses are chilled for the best experience on a hot day.
By following these serving suggestions, you can elevate your Shirley Temple Ice Cream Float experience, making it an unforgettable treat for all!
Additional Tips
– Customize the Ice Cream: While vanilla ice cream is classic, feel free to use chocolate, strawberry, or even cherry-flavored ice cream for a unique twist.
– Garnish Creatively: Beyond maraschino cherries, consider using colorful sprinkles, chocolate shavings, or crushed nuts on top for added texture and fun.
– Experiment with Soda Flavors: Cherry soda is traditional, but lemon-lime soda, ginger ale, or even fruit-flavored sodas can make for exciting new flavors.
– Enjoy Responsibly: The combination of ice cream and soda makes for a rich treat. It’s best to enjoy it in moderation to prevent overwhelming your taste buds.
Recipe Variation
Here are some delightful variations you can try to make your Shirley Temple Ice Cream Float standout further:
1. Tropical Twist: Instead of cherry soda, use pineapple soda and top it with coconut ice cream for a refreshing beach-inspired float.
2. Chocolate Cherry Delight: Add a chocolate fudge swirl in between the ice cream and the soda for a chocolatey upgrade to the classic drink.
3. Adult Version: For a grown-up twist, mix the float with a splash of cherry liqueur or champagne.
4. Fizzy Strawberry Float: Substitute cherry soda with strawberry soda and vanilla ice cream for a fruity variation that is equally delicious.
Freezing and Storage
– Storage: It’s best to prepare these floats fresh as they are best enjoyed immediately. However, if you have leftover components, store any open ice cream in the freezer and cherry soda in a cool place to maintain its fizz.
– Freezing: You can freeze leftover ice cream separately. Just ensure it’s well-covered to avoid freezer burn. Soda should not be frozen as it can lose carbonation.
Special Equipment
You don’t need too many tools to prepare Shirley Temple Ice Cream Floats, but having the right equipment can make it easier:
– Tall glasses (preferably clear to showcase the colorful layers)
– Ice cream scoop for the perfect scoops
– A spoon for layering the ice cream
– Mixing spoon (if using additional flavorings)
Frequently Asked Questions
Can I use diet soda for my float?
Absolutely! Feel free to use any diet or sugar-free options if you prefer a lighter drink.
What if I can’t find cherry soda?
No problem! Any clear soda with a hint of fruit flavor will suffice. Consider using ginger ale or lemon-lime soda for a refreshing float.
How can I make this a vegan treat?
To make a vegan version, use plant-based ice cream and choose a soda that contains no animal products.
Is it possible to prepare this float in advance?
While the individual components can be prepared ahead of time, it’s best to assemble the float just before serving for optimal freshness.
Conclusion
The Shirley Temple Ice Cream Float is more than just a treat; it’s a celebration of flavor and nostalgia. Its vibrant colors, delightful combination of ice cream and soda, and customizable aspects make it a fun activity for families and friends alike. Whether you’re serving it at a gathering, celebrating a special occasion, or simply indulging after a long day, this float promises smiles all around. Dive into the delightful experience it offers, and don’t forget to share it with those you love!
Shirley Temple Ice Cream Float: The Ultimate Amazing Treat You’ll Love
- Total Time: 15 minutes
Ingredients
– 2 cups cherry soda (such as 7UP or Sprite)
– 1 cup vanilla ice cream
– Maraschino cherries for garnish
– Whipped cream (optional)
– 1 tablespoon grenadine (optional, for added sweetness)
– Ice cubes (optional)
Instructions
Making a Shirley Temple Ice Cream Float is delightful and straightforward. Just follow these simple steps:
1. Prepare Your Glass: Start by selecting a tall glass to showcase your float beautifully.
2. Add Ice Cubes: If desired, put a few ice cubes at the bottom of the glass for extra chill.
3. Pour Cherry Soda: Slowly pour the cherry soda into the glass, filling it about halfway.
4. Add Ice Cream: Gently add one scoop of vanilla ice cream on top of the soda. Ensure it’s a generous scoop for a perfect float.
5. Add Grenadine: Drizzle a tablespoon of grenadine over the ice cream for an extra flavor boost.
6. Finish with More Soda: Carefully top the float with remaining cherry soda, allowing it to fizz and foam.
7. Garnish with Whipped Cream: For an indulgent touch, add a dollop of whipped cream on top.
8. Top with Maraschino Cherry: Finish the float by placing a maraschino cherry on the whipped cream.
9. Serve Immediately: Serve the float with a straw and a long spoon for easy sipping and scooping.
Following these steps will lead you to creating a delicious and visually enticing Shirley Temple Ice Cream Float!
- Prep Time: 15 minutes
- Cook Time: 0 minutes
Nutrition
- Serving Size: 2
- Calories: 300 kcal
- Fat: 10g
- Protein: 4g